self portrait
a senior thesis show, March 2 - 6, 2020
Lucas Gallery, 185 Nassau St, Princeton, New Jersey
self portrait is a show about how portraits reveal more about the photographer than the subjects by exposing the work process. It transforms time into a tangible medium that deviates from traditional time-lapses. The show plays with tensions between mathematical precision and human error, between the digital and physical space, and between the corporate aesthetics and appreciation of jank.
This work served in fulfillment of Princeton Visual Arts Department's senior thesis requirement.
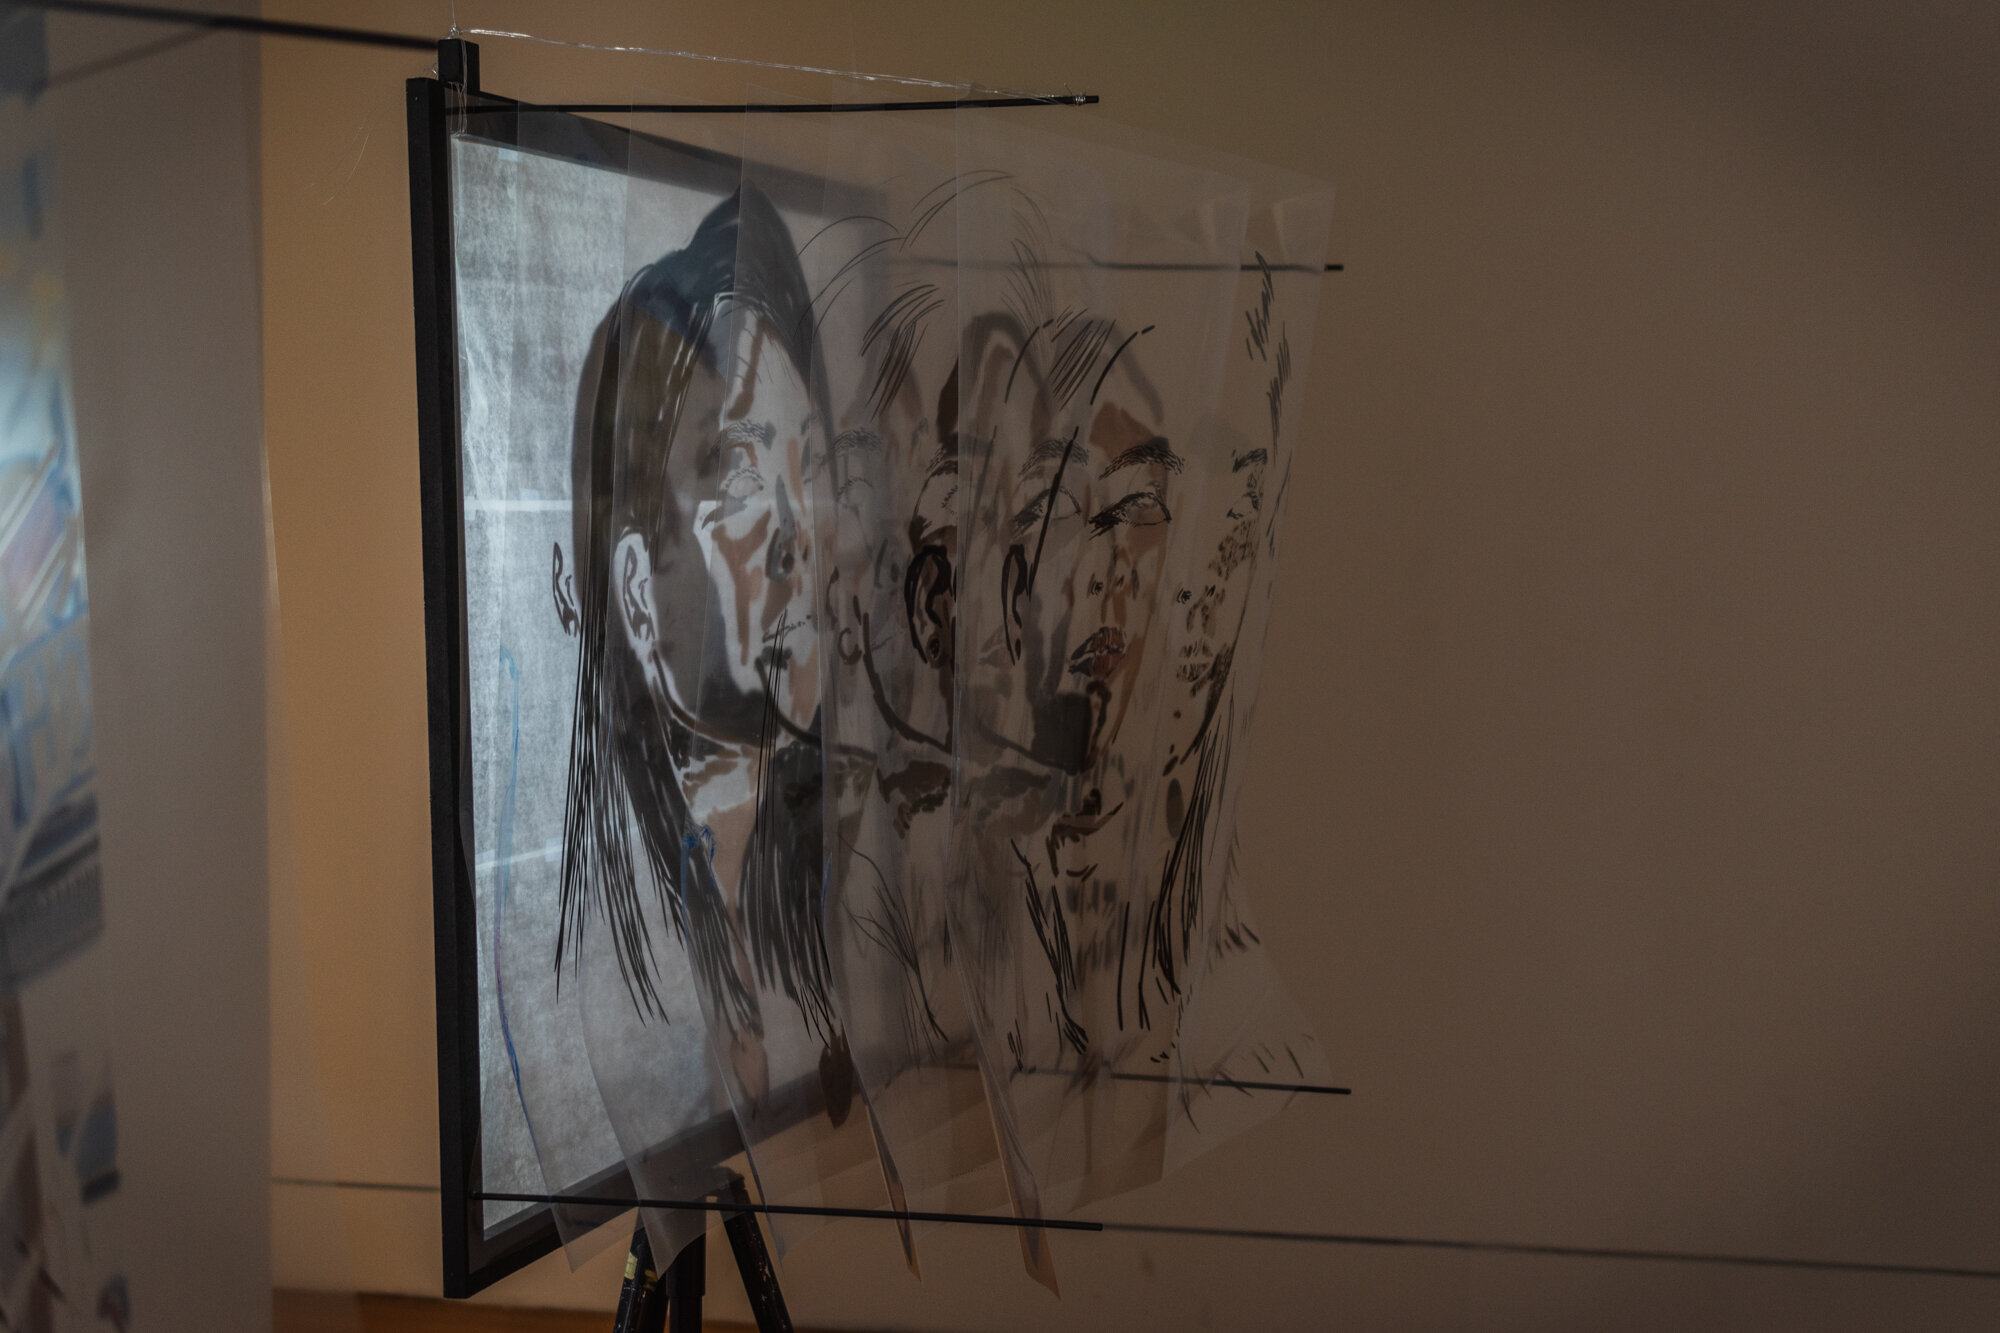
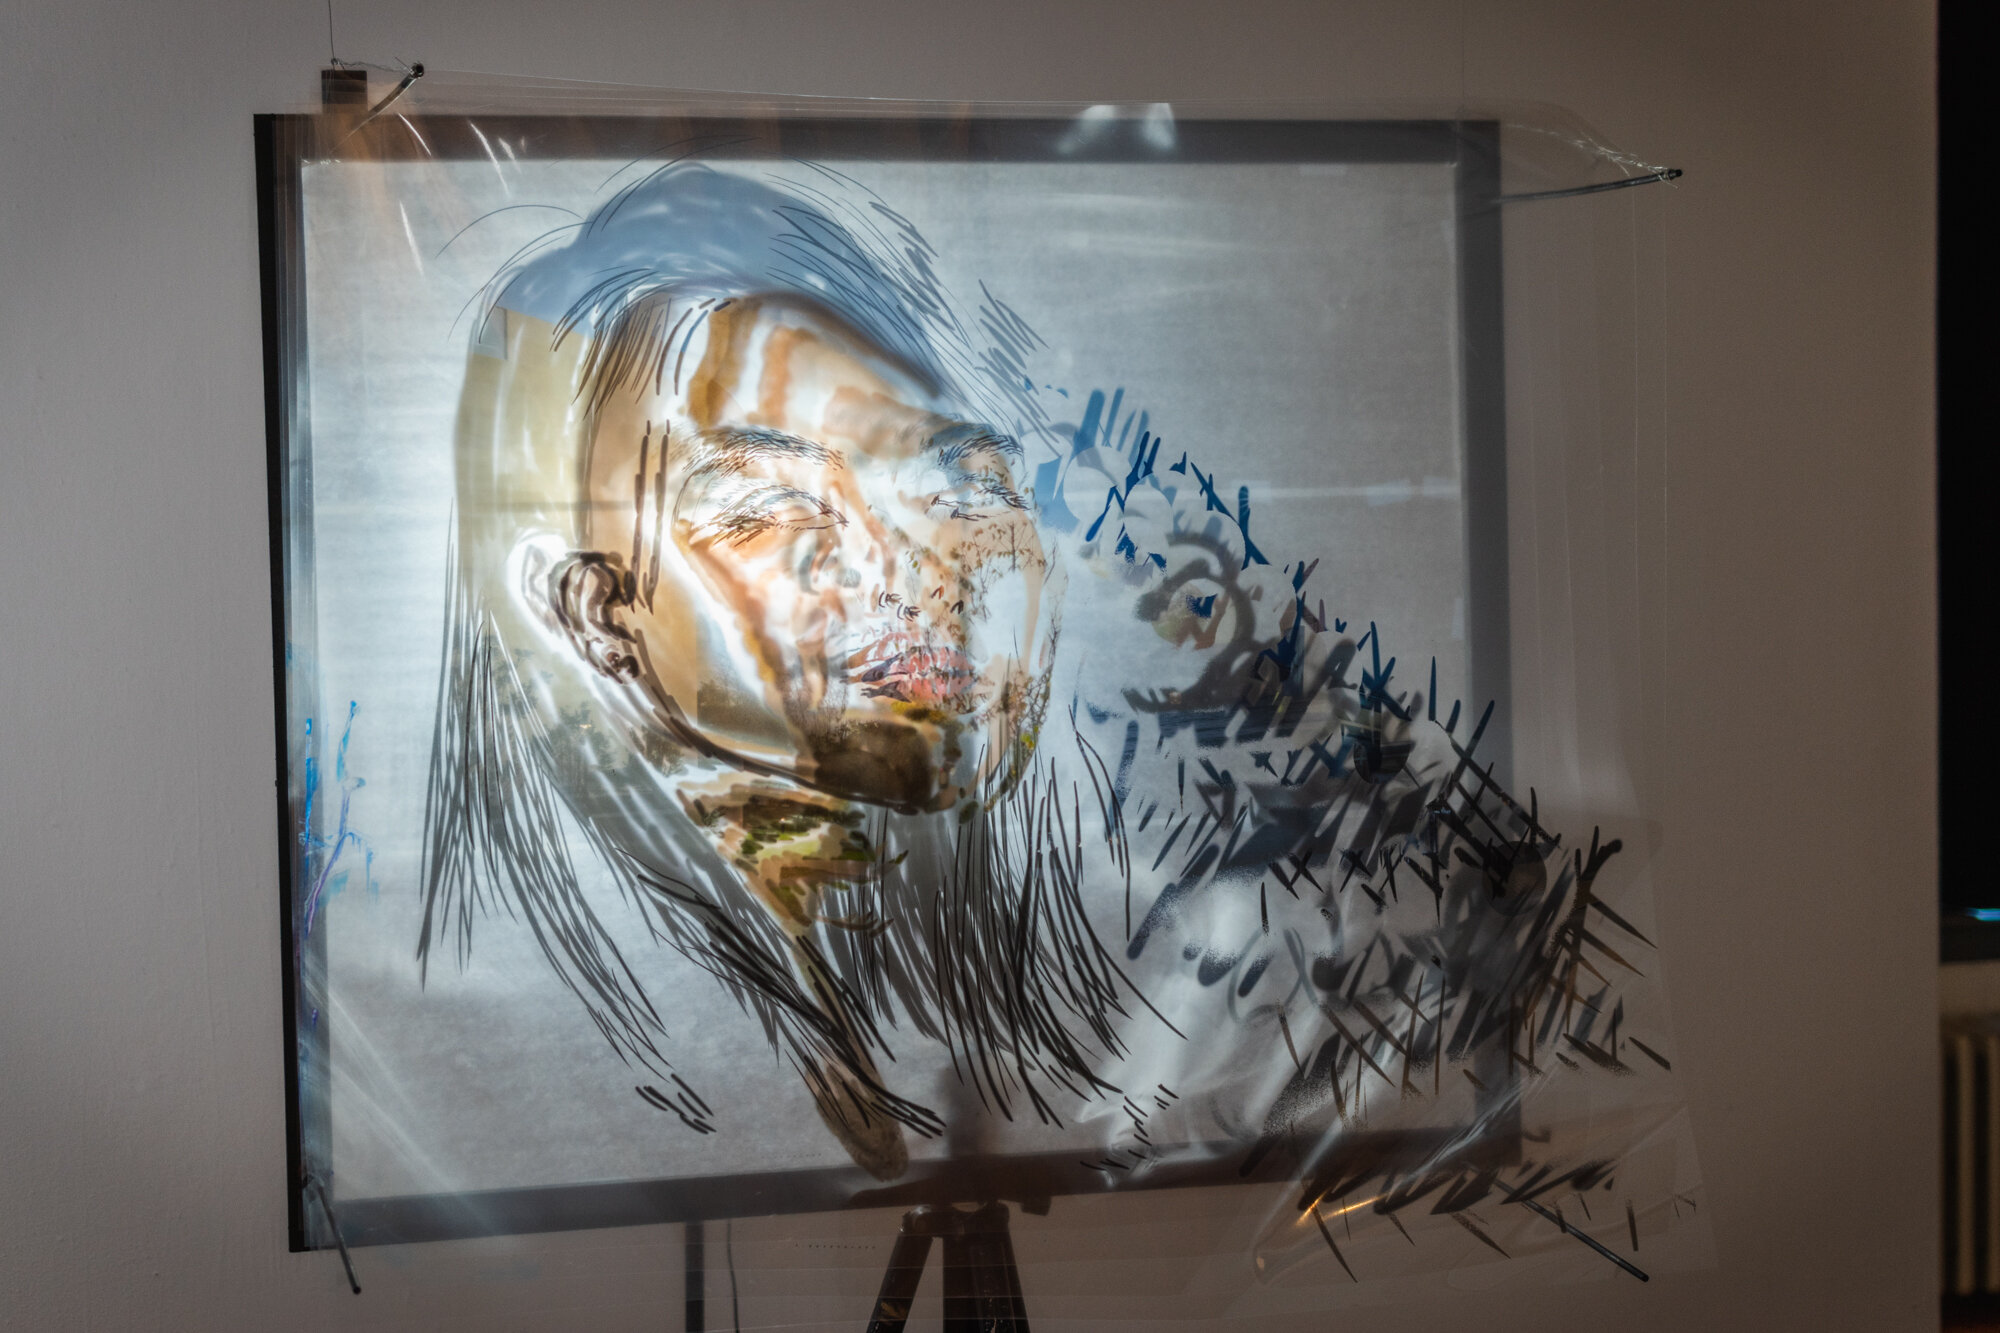
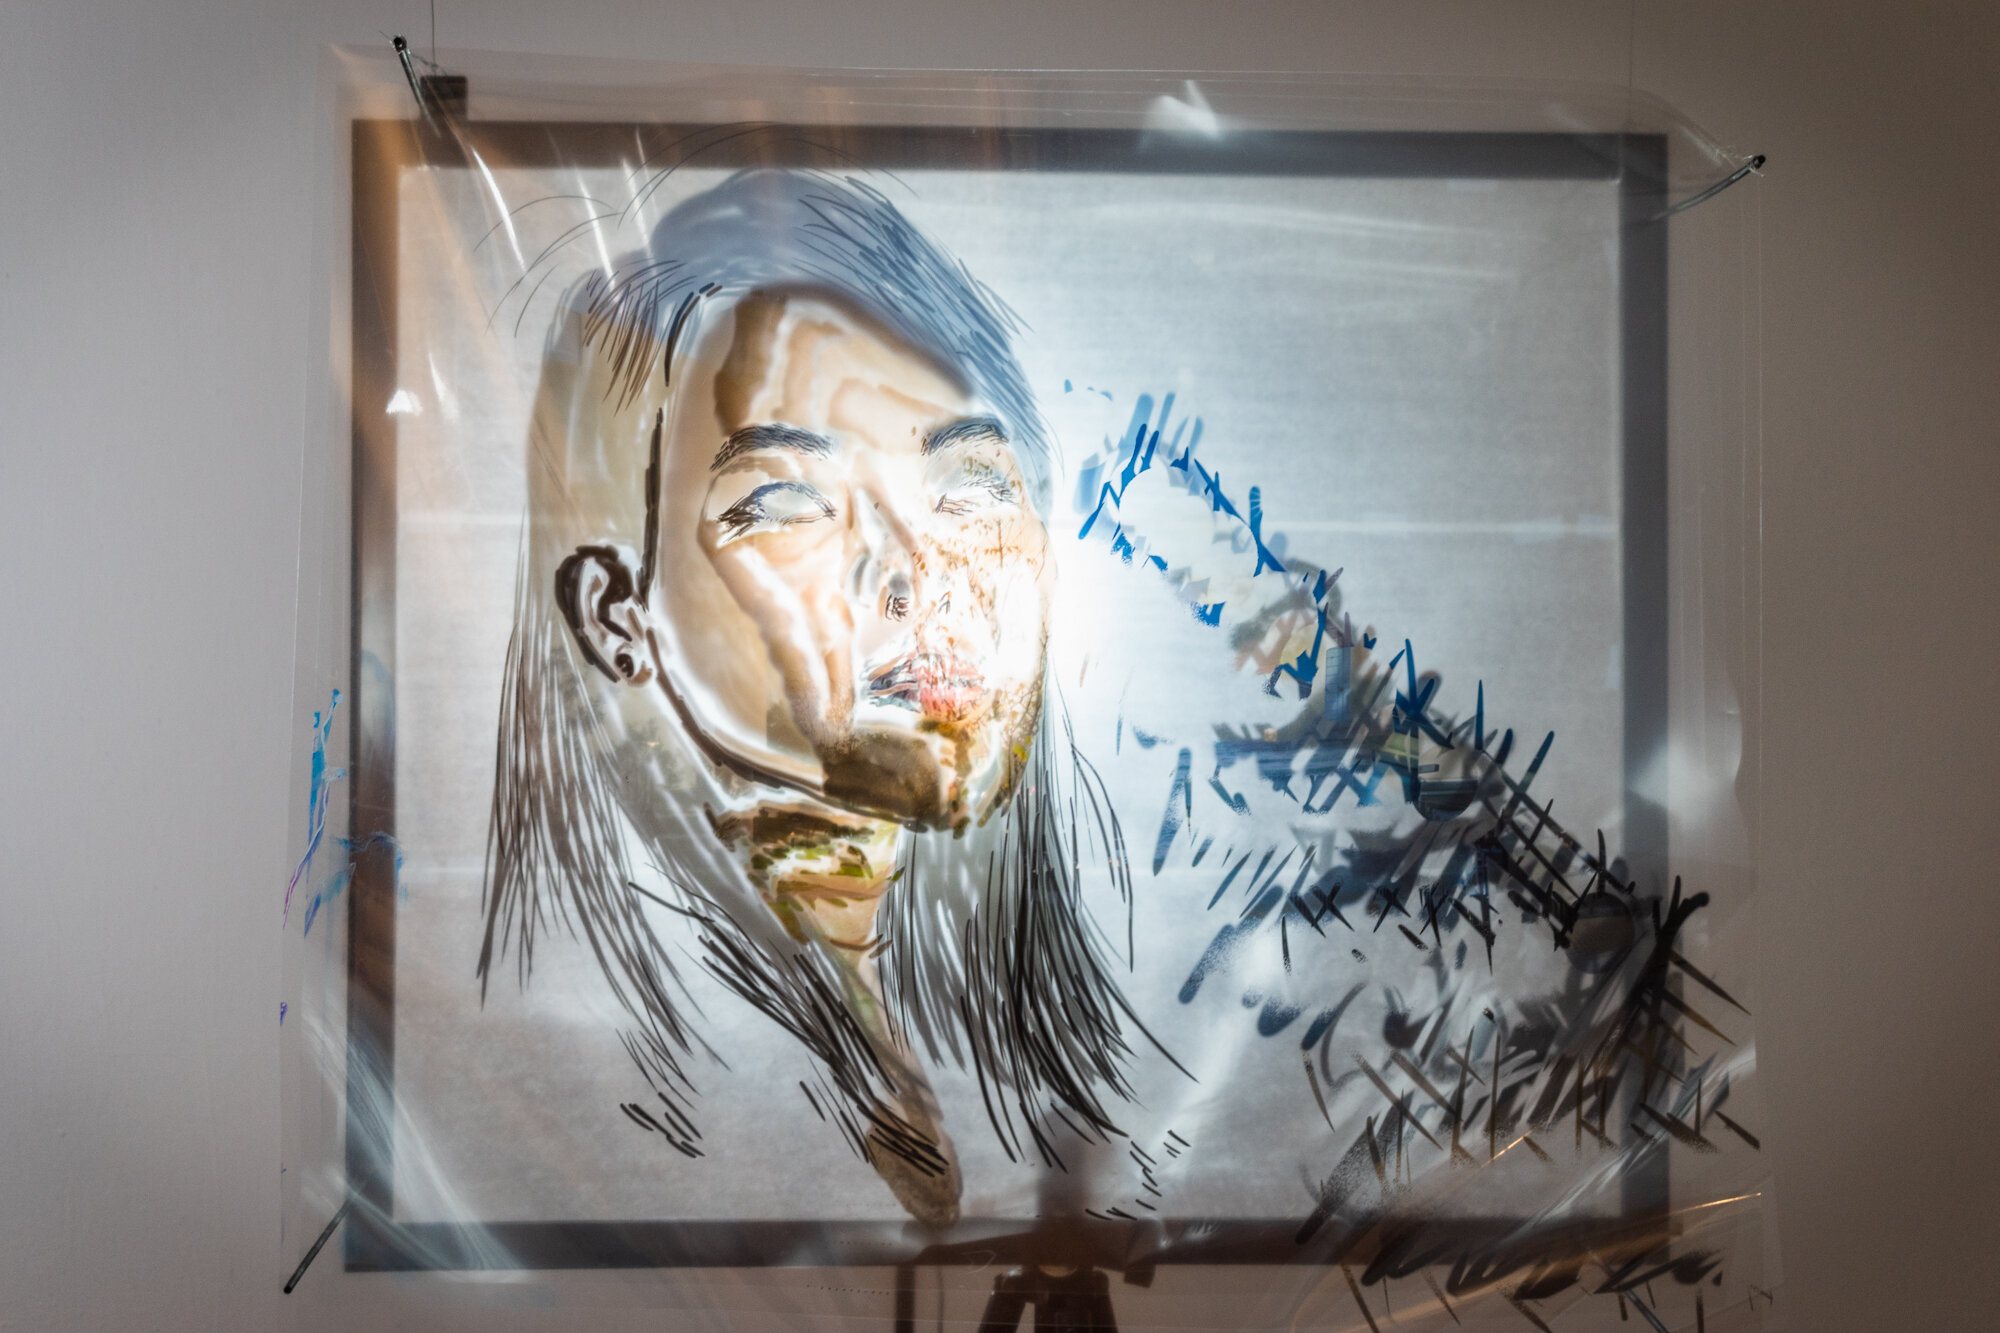
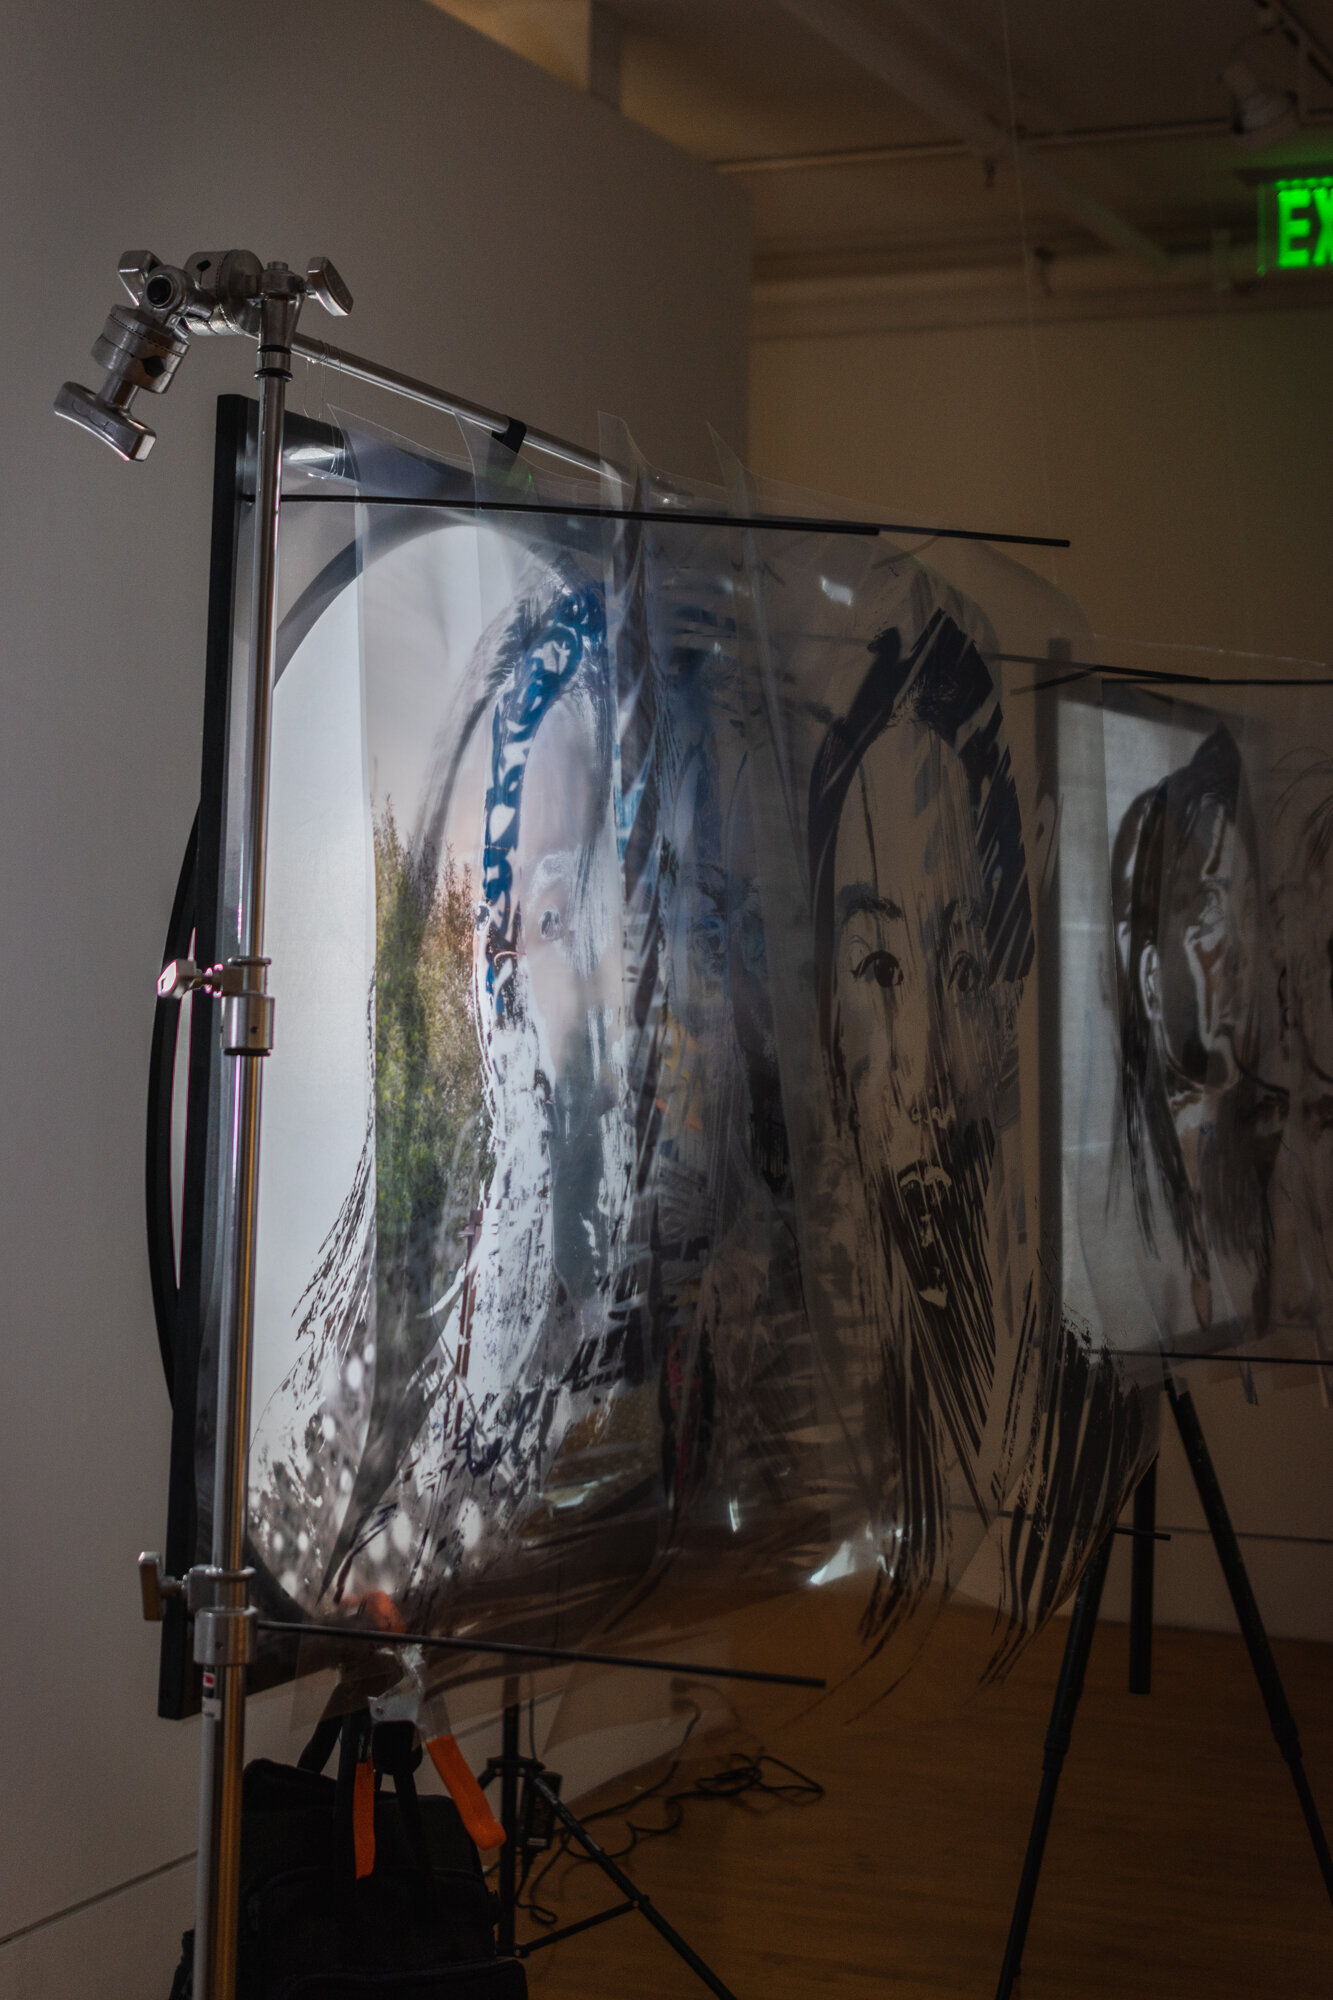
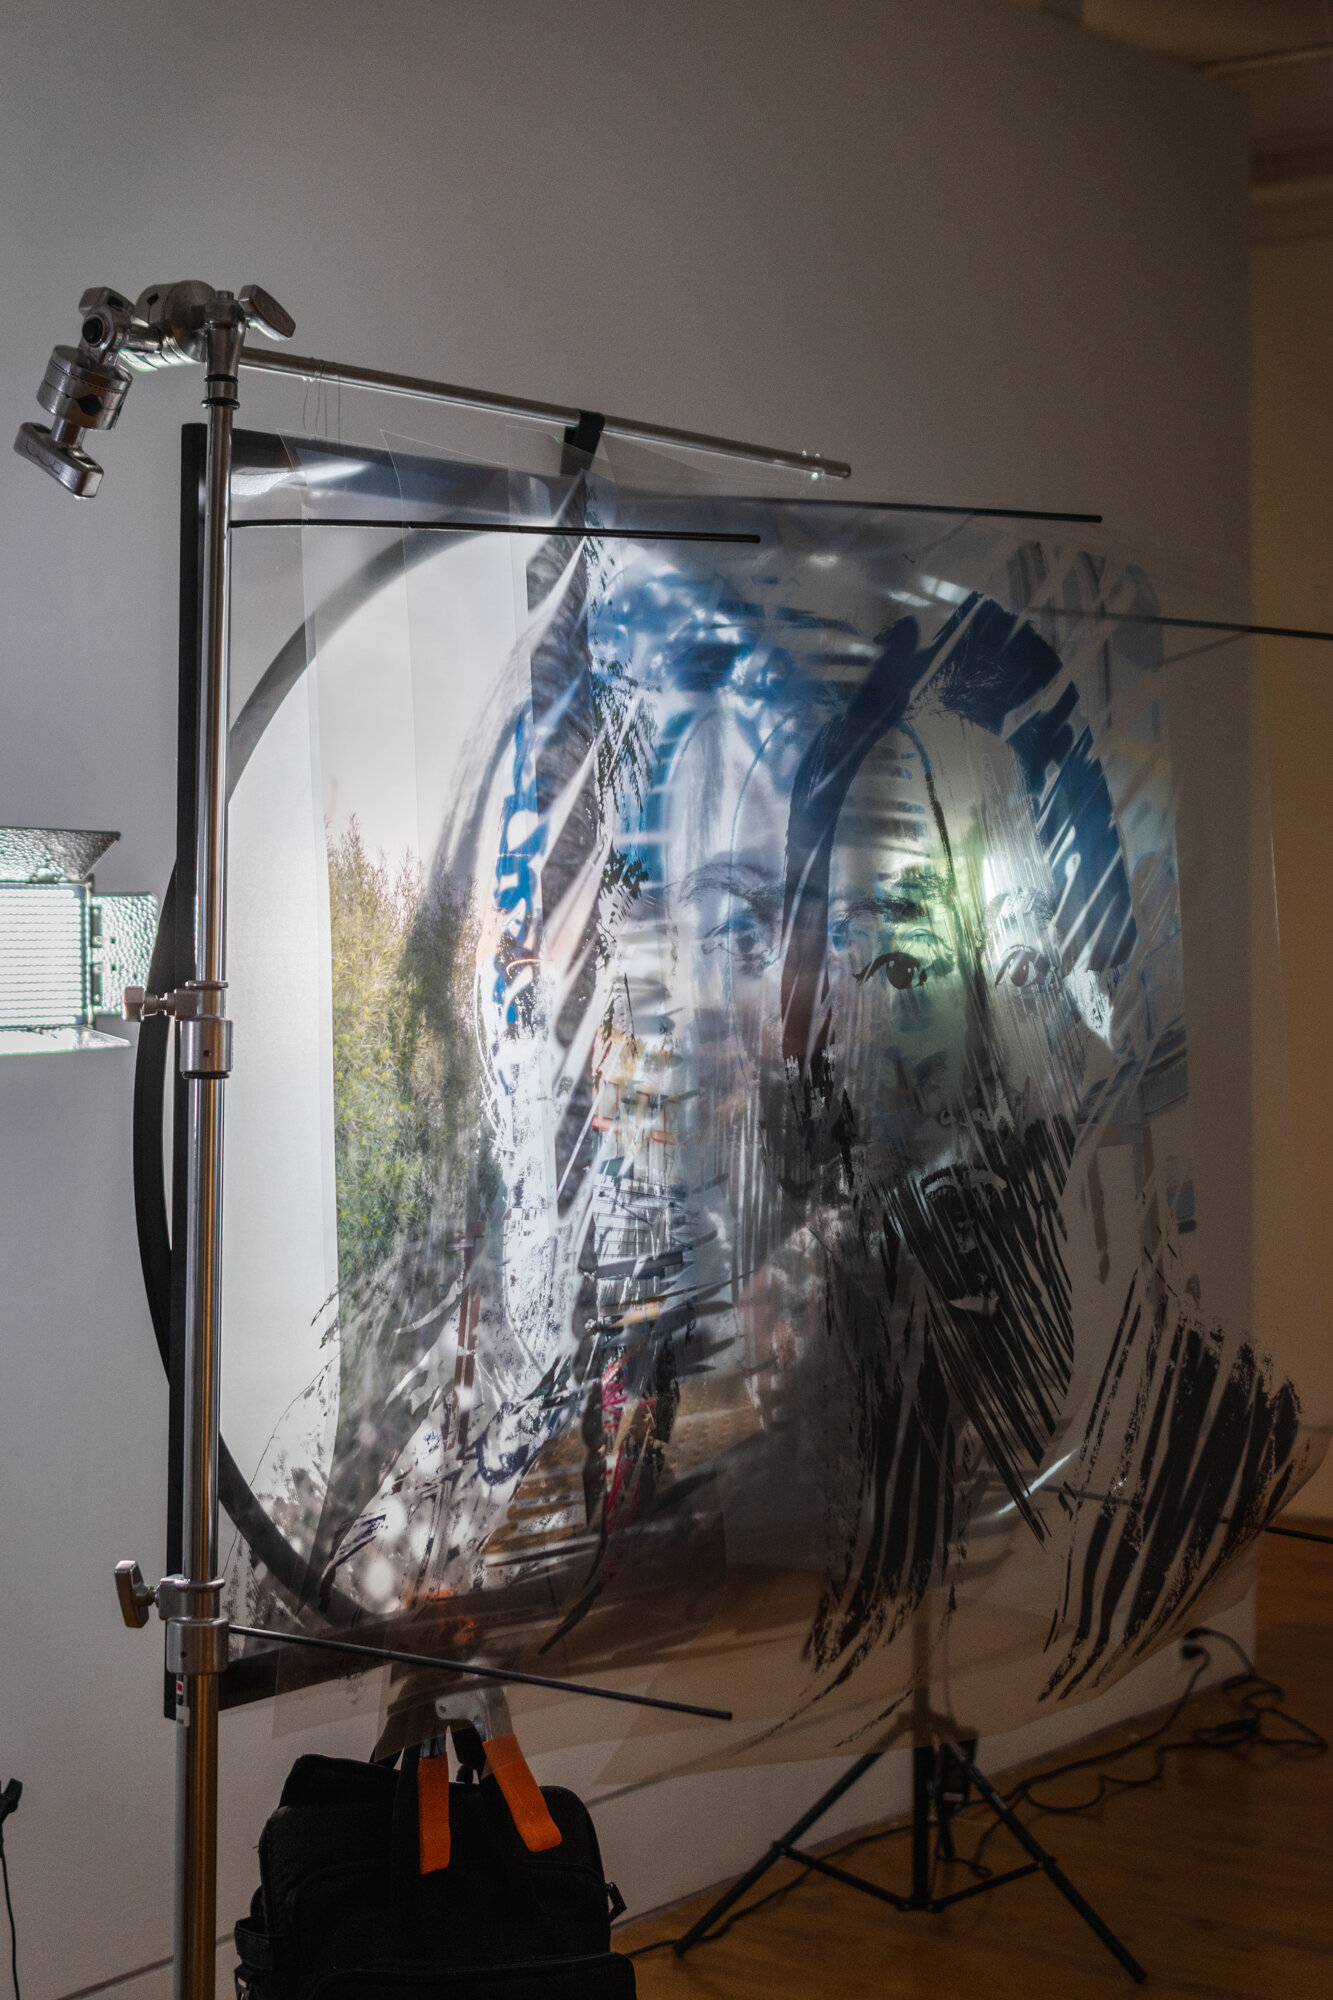
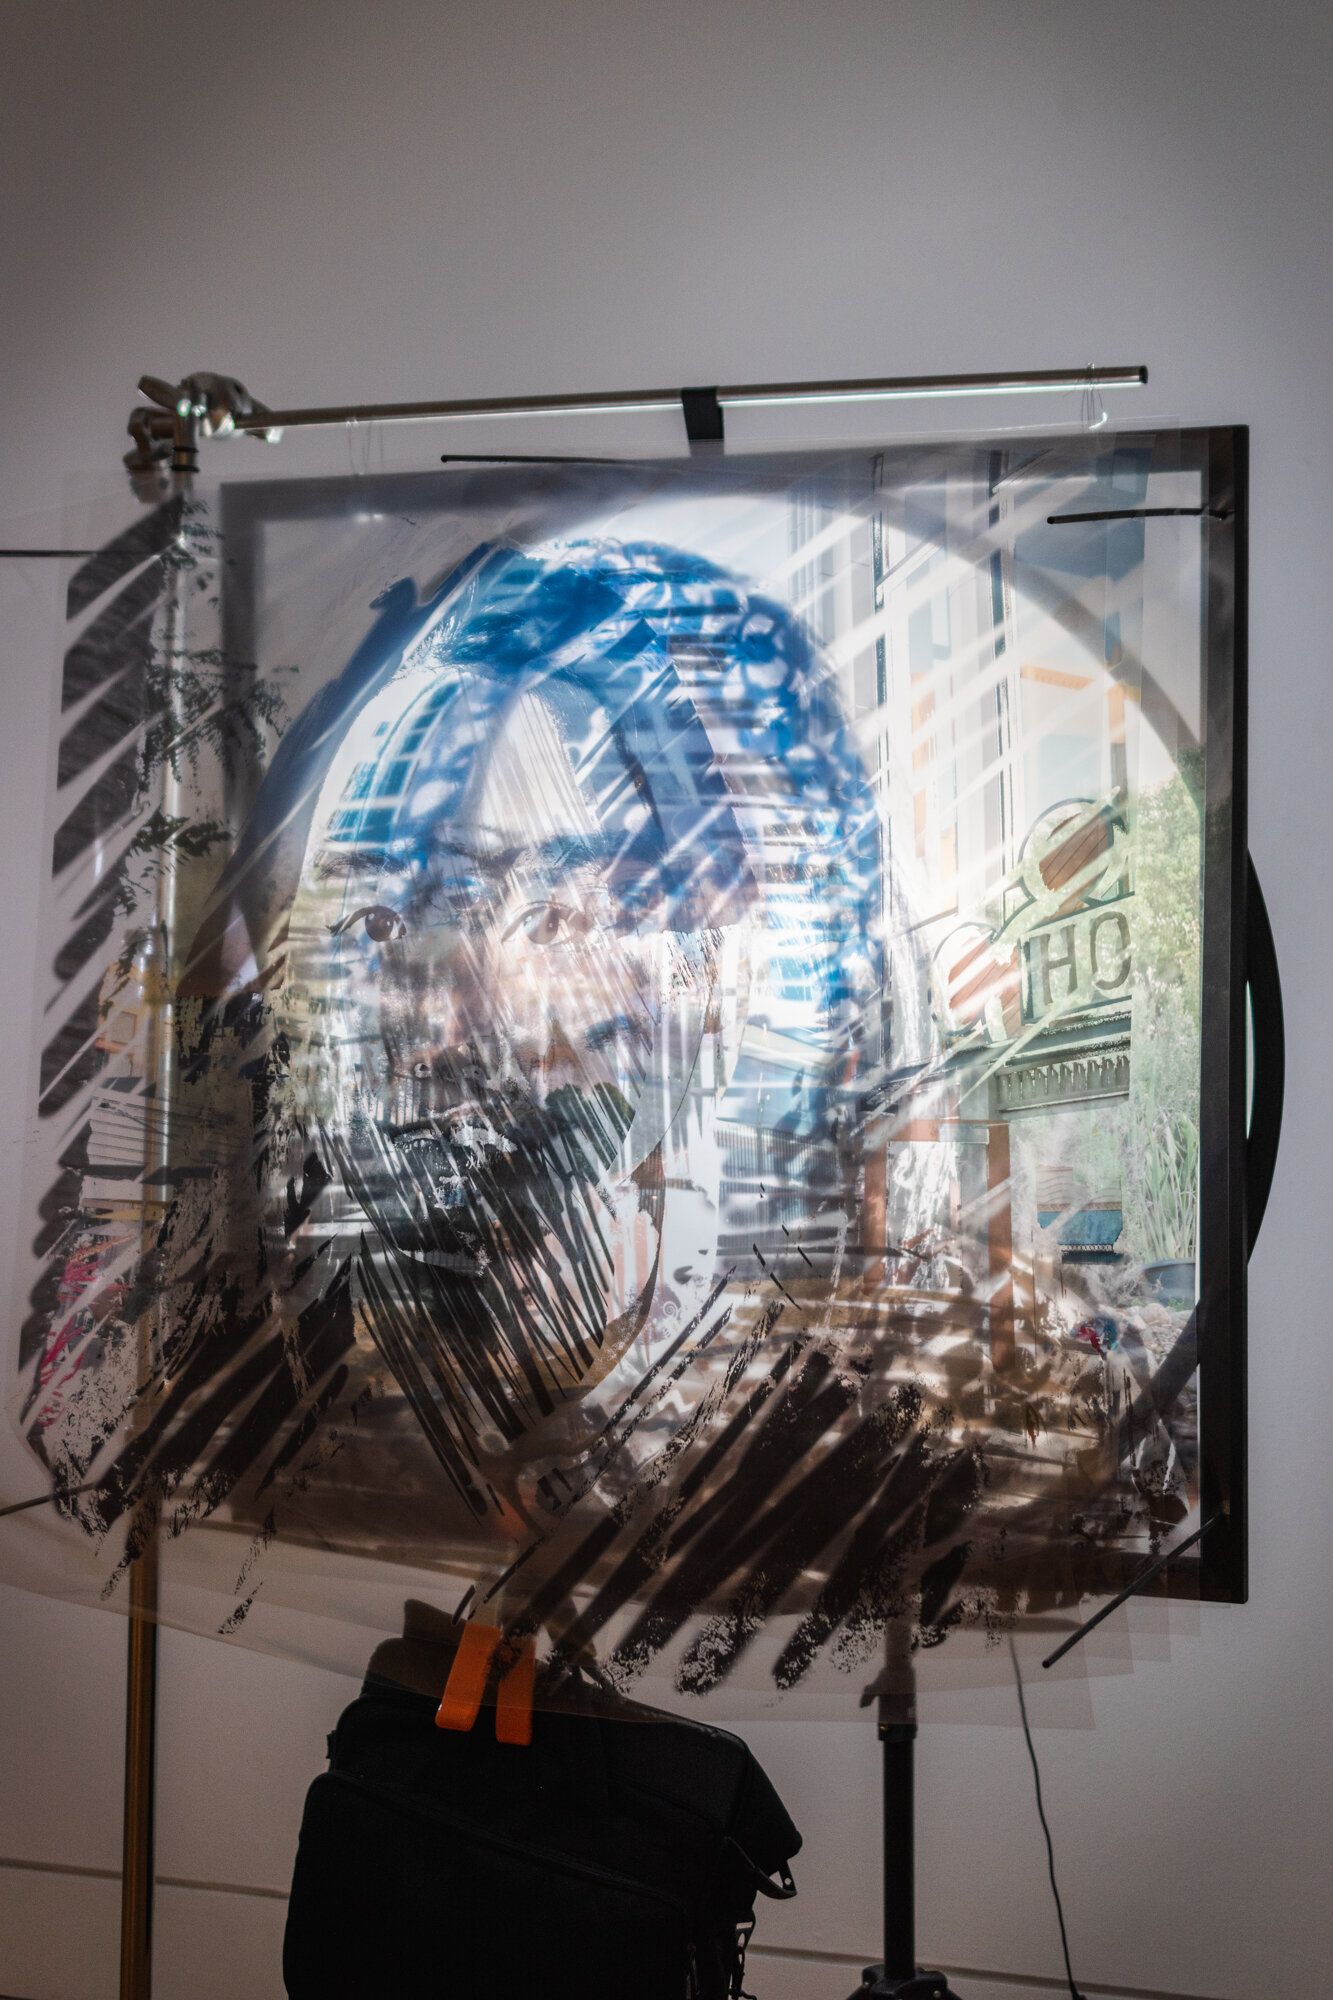
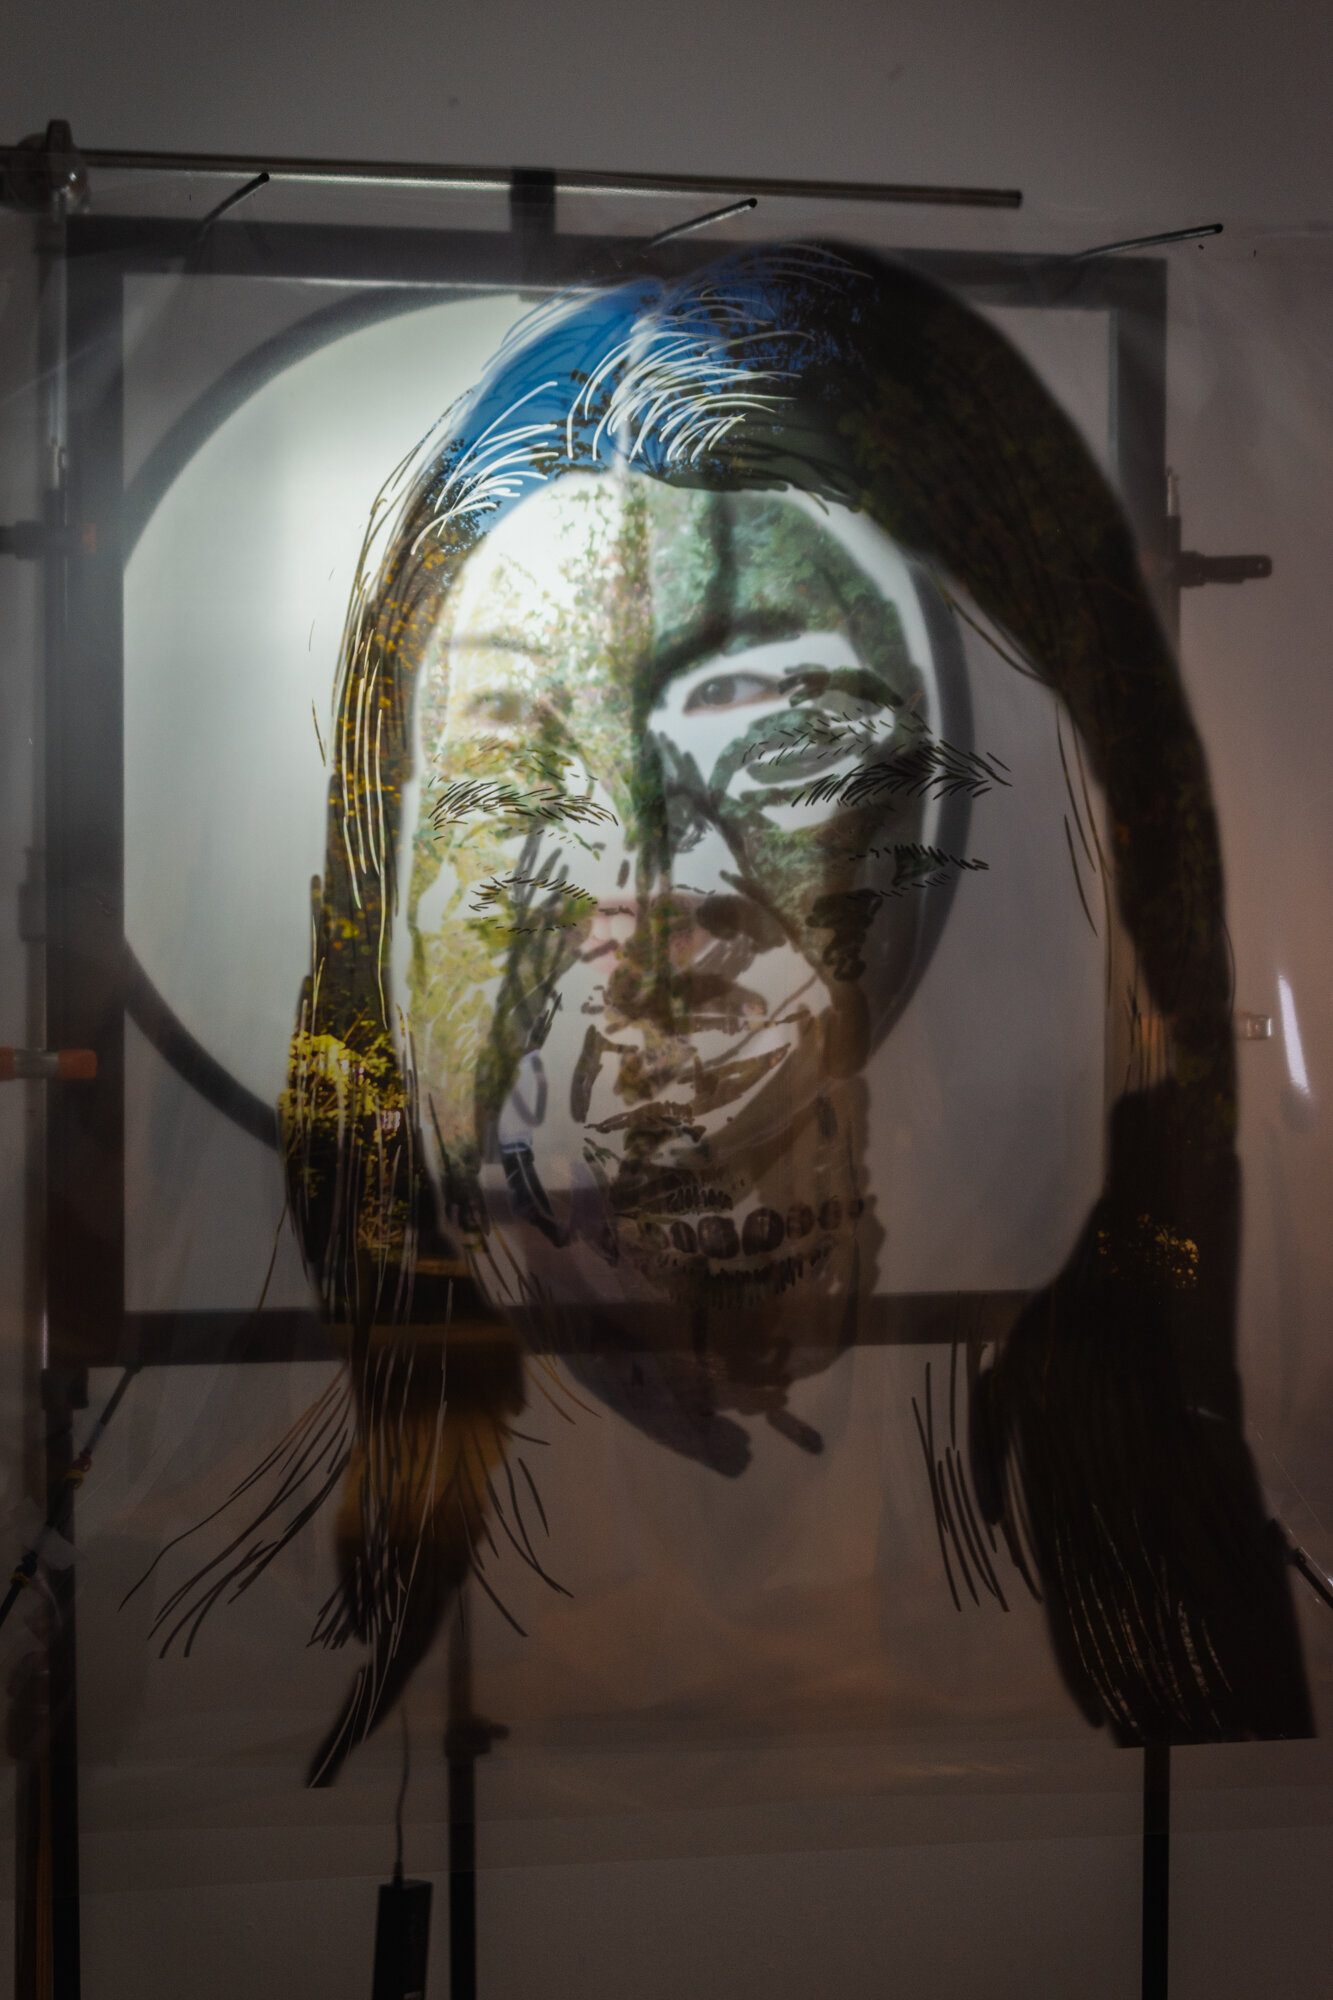
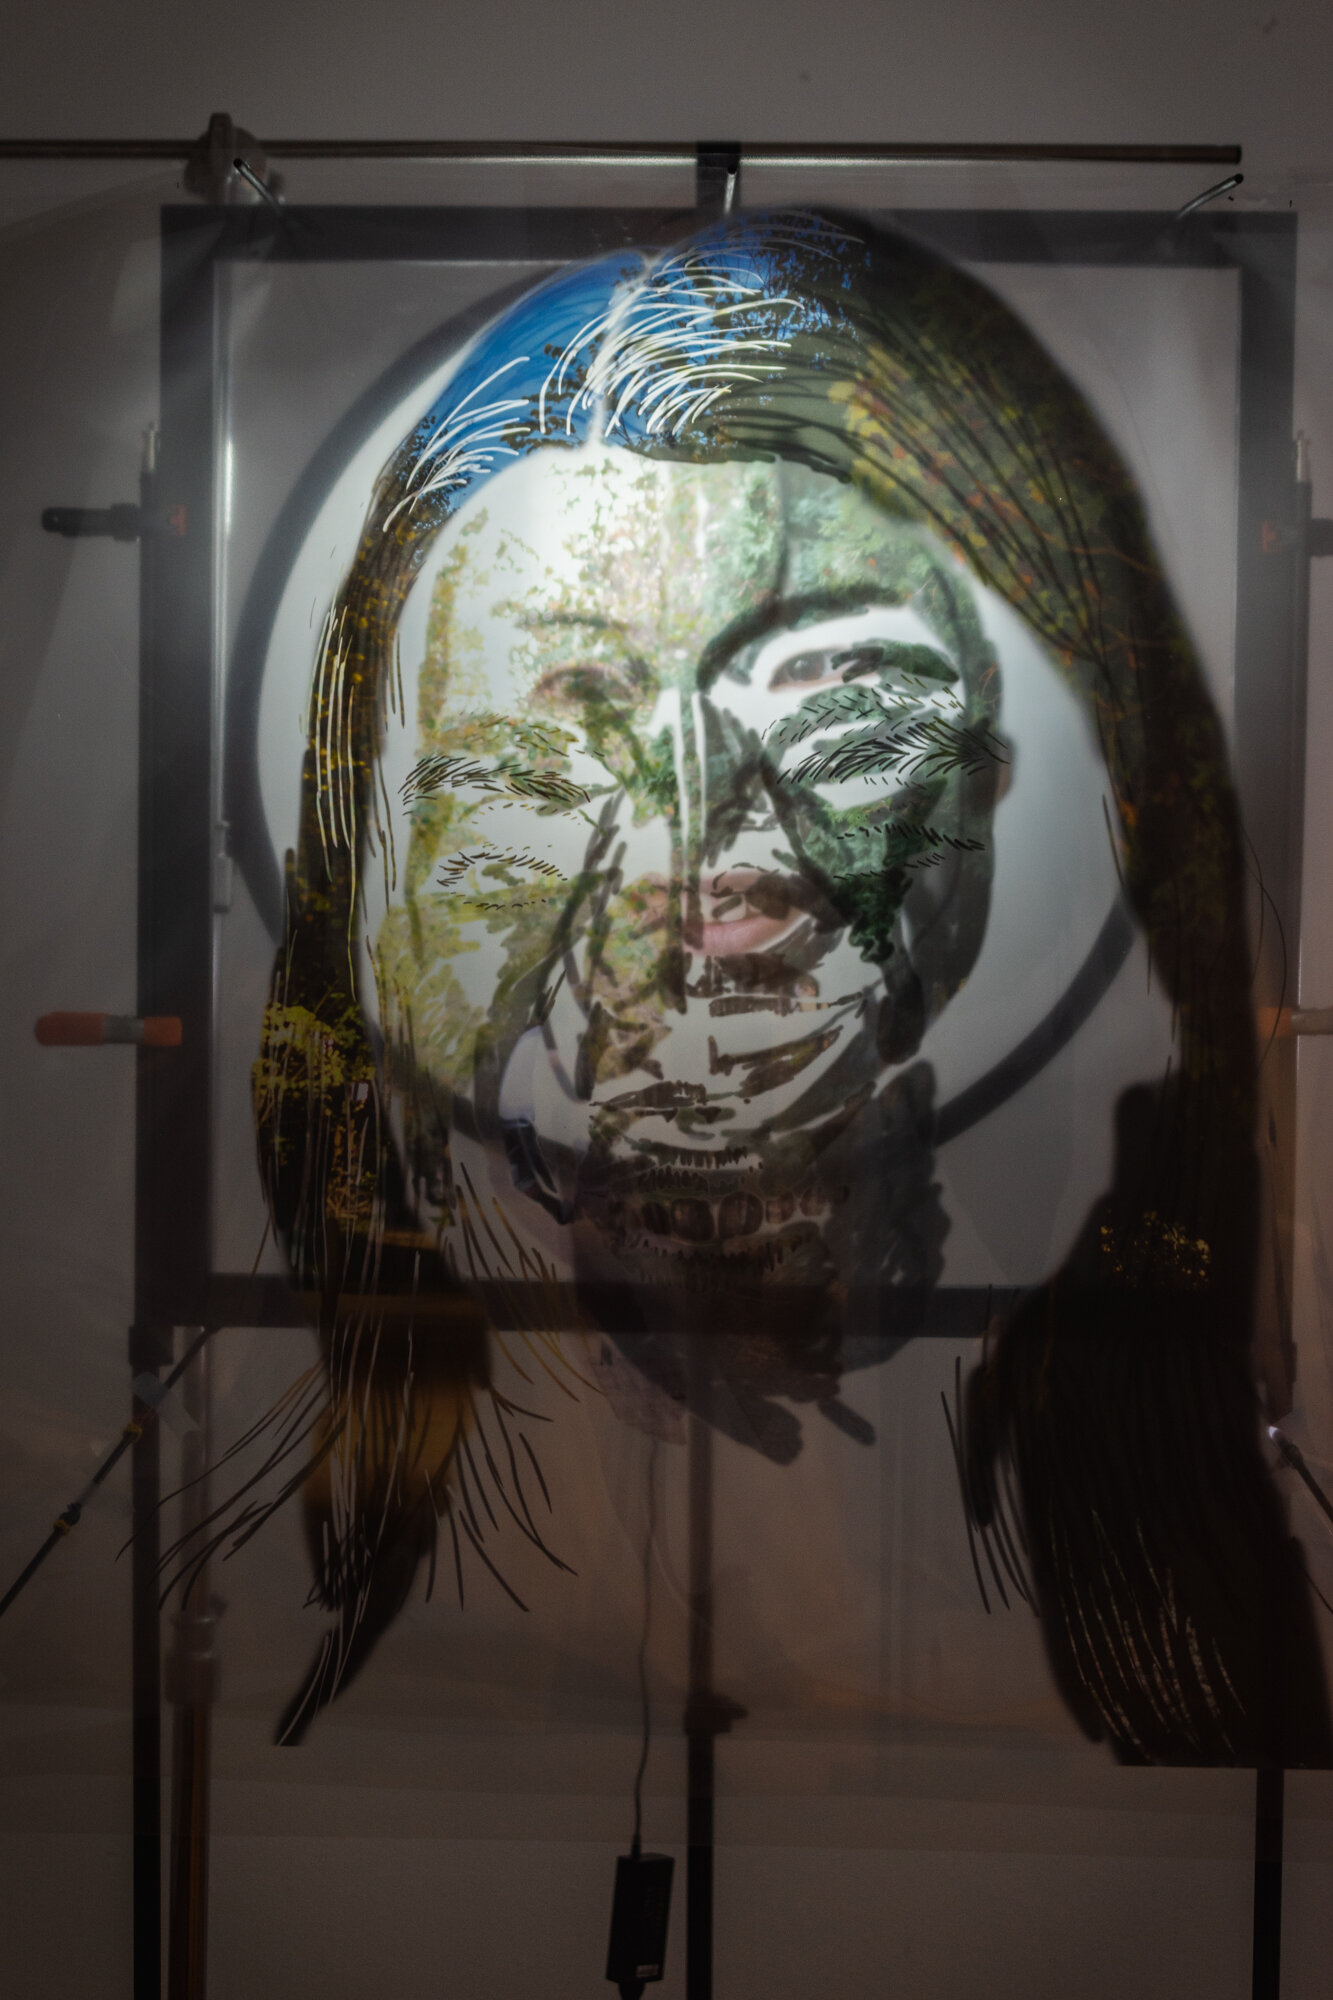
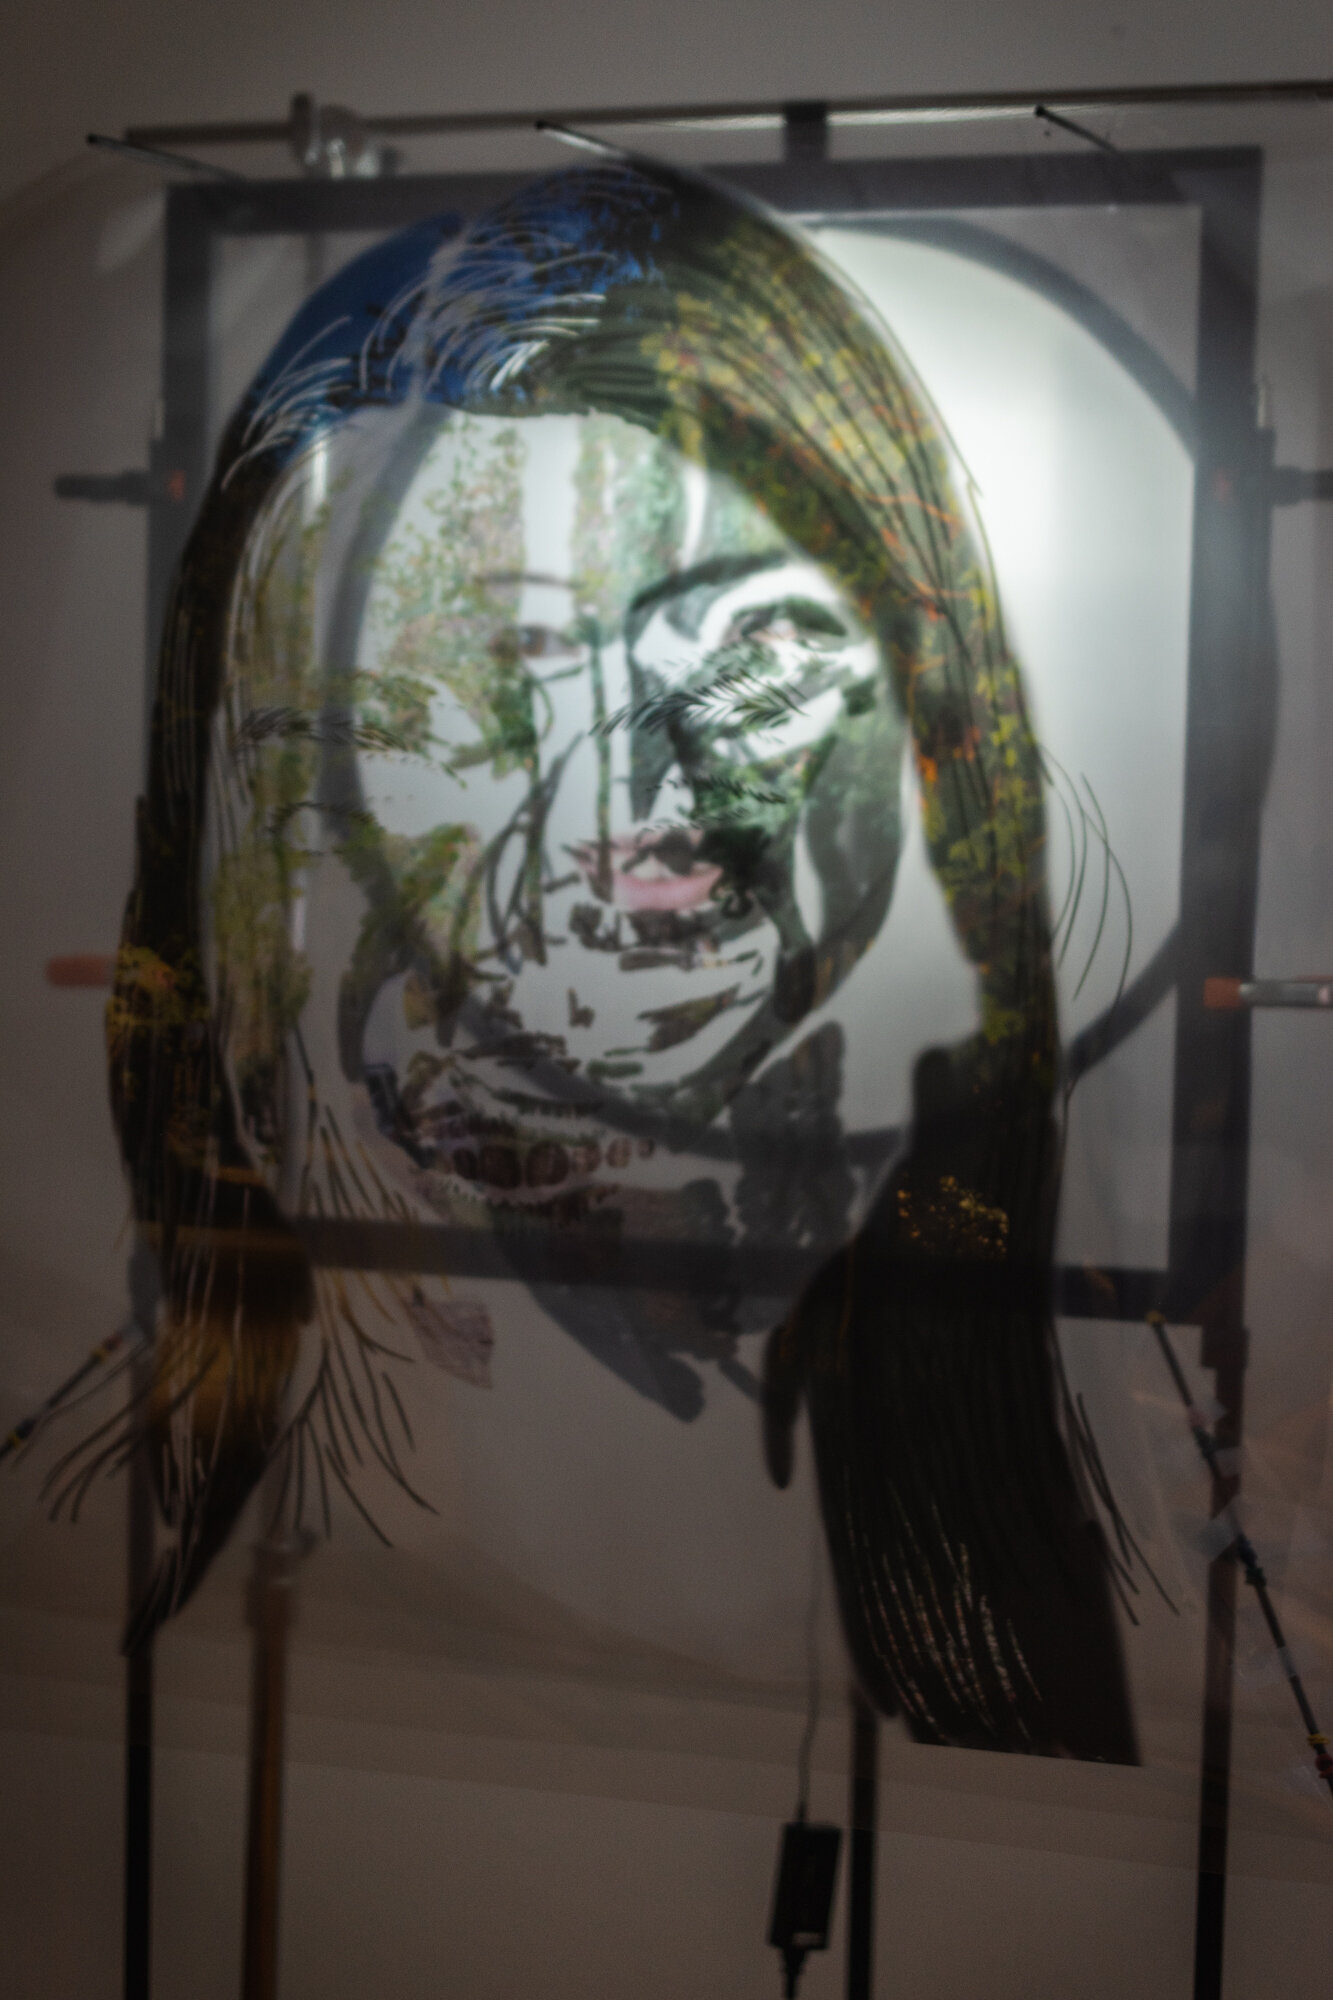
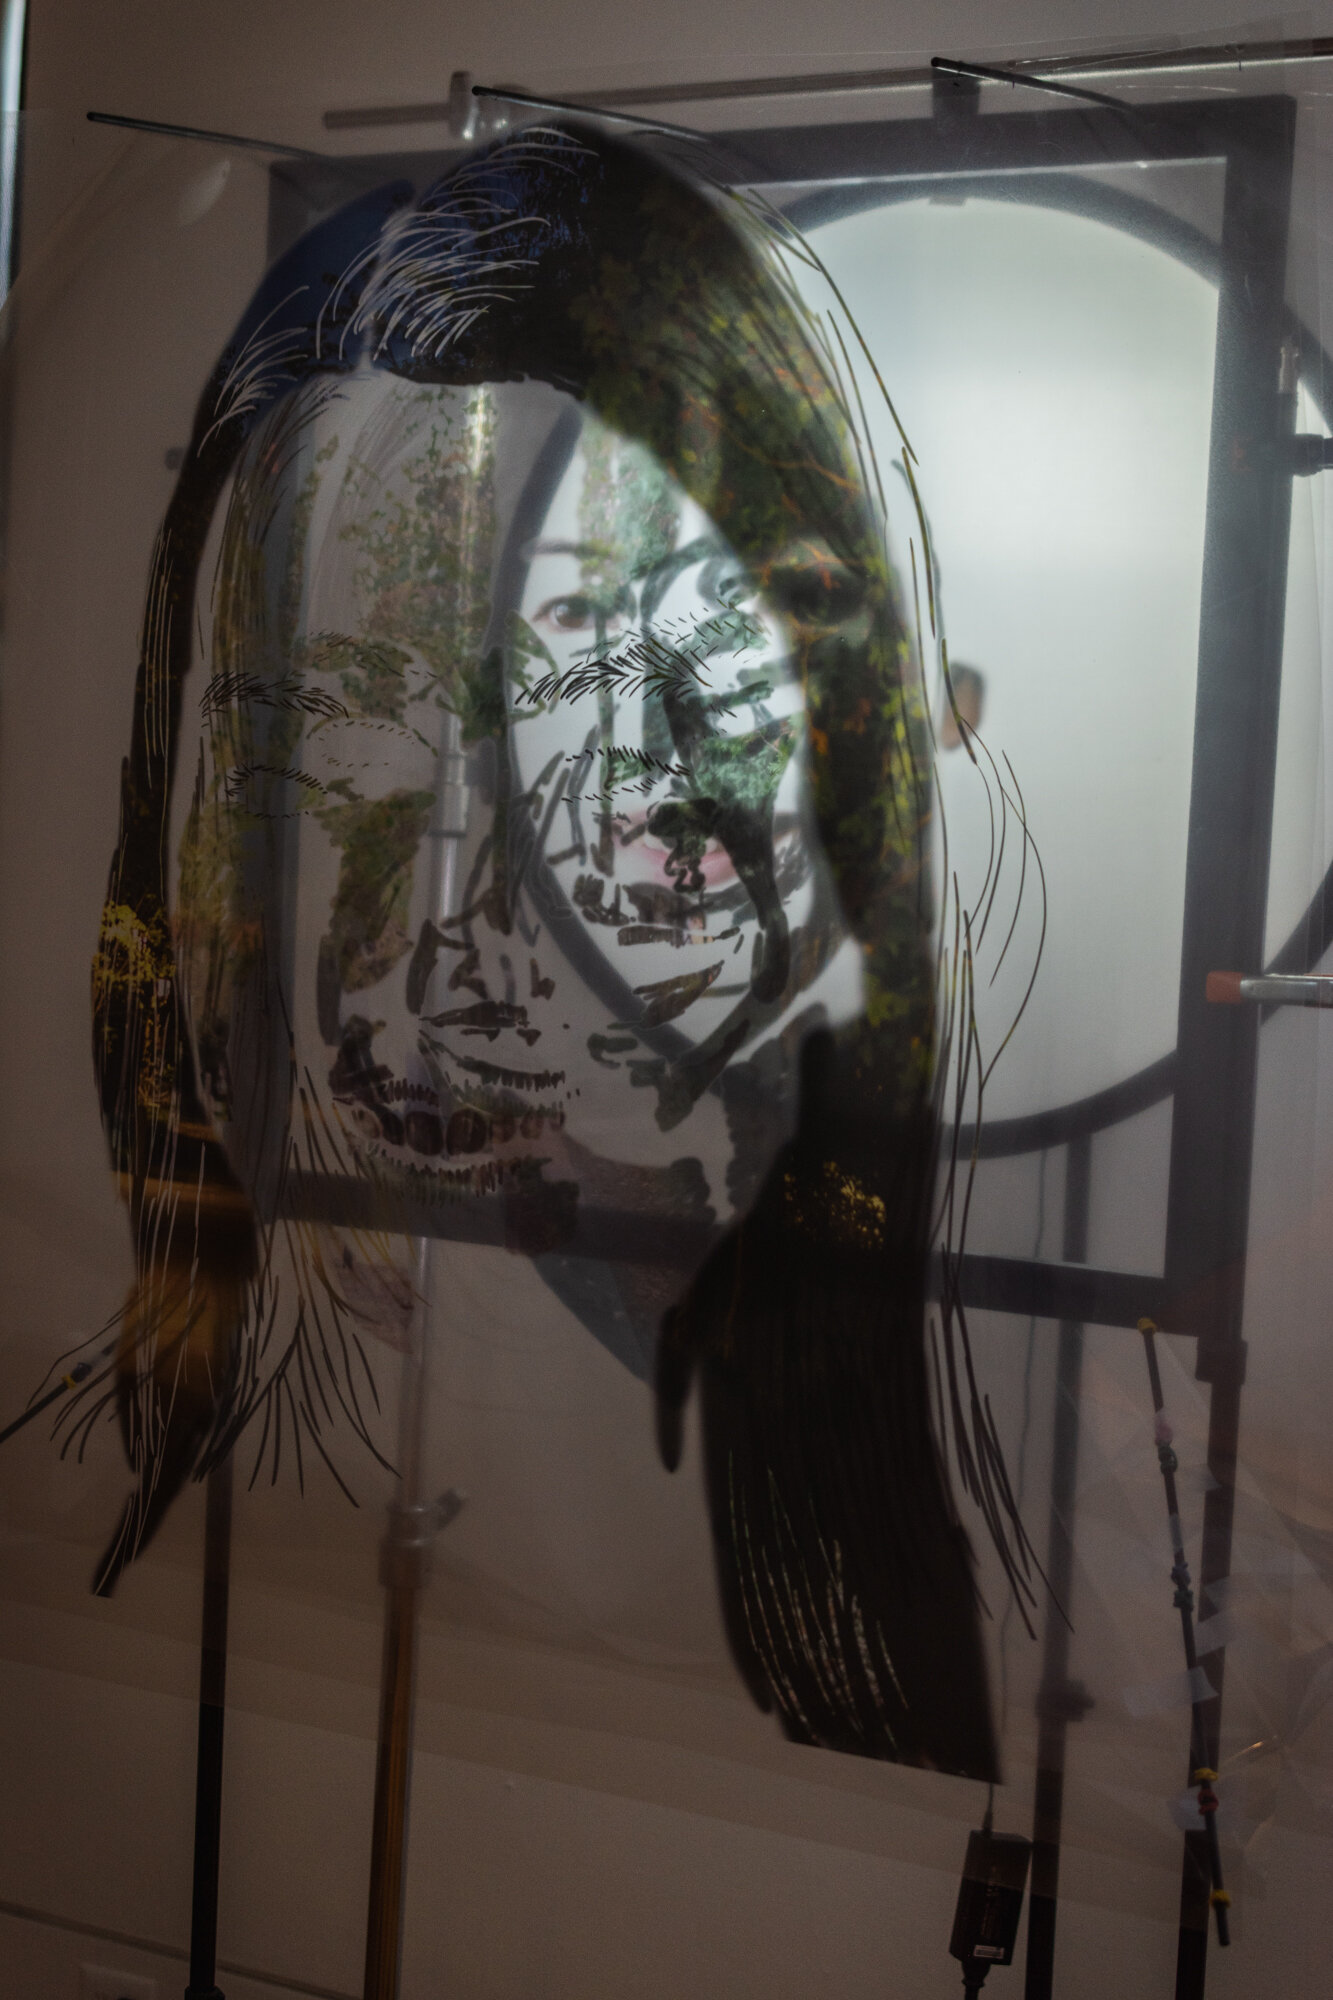
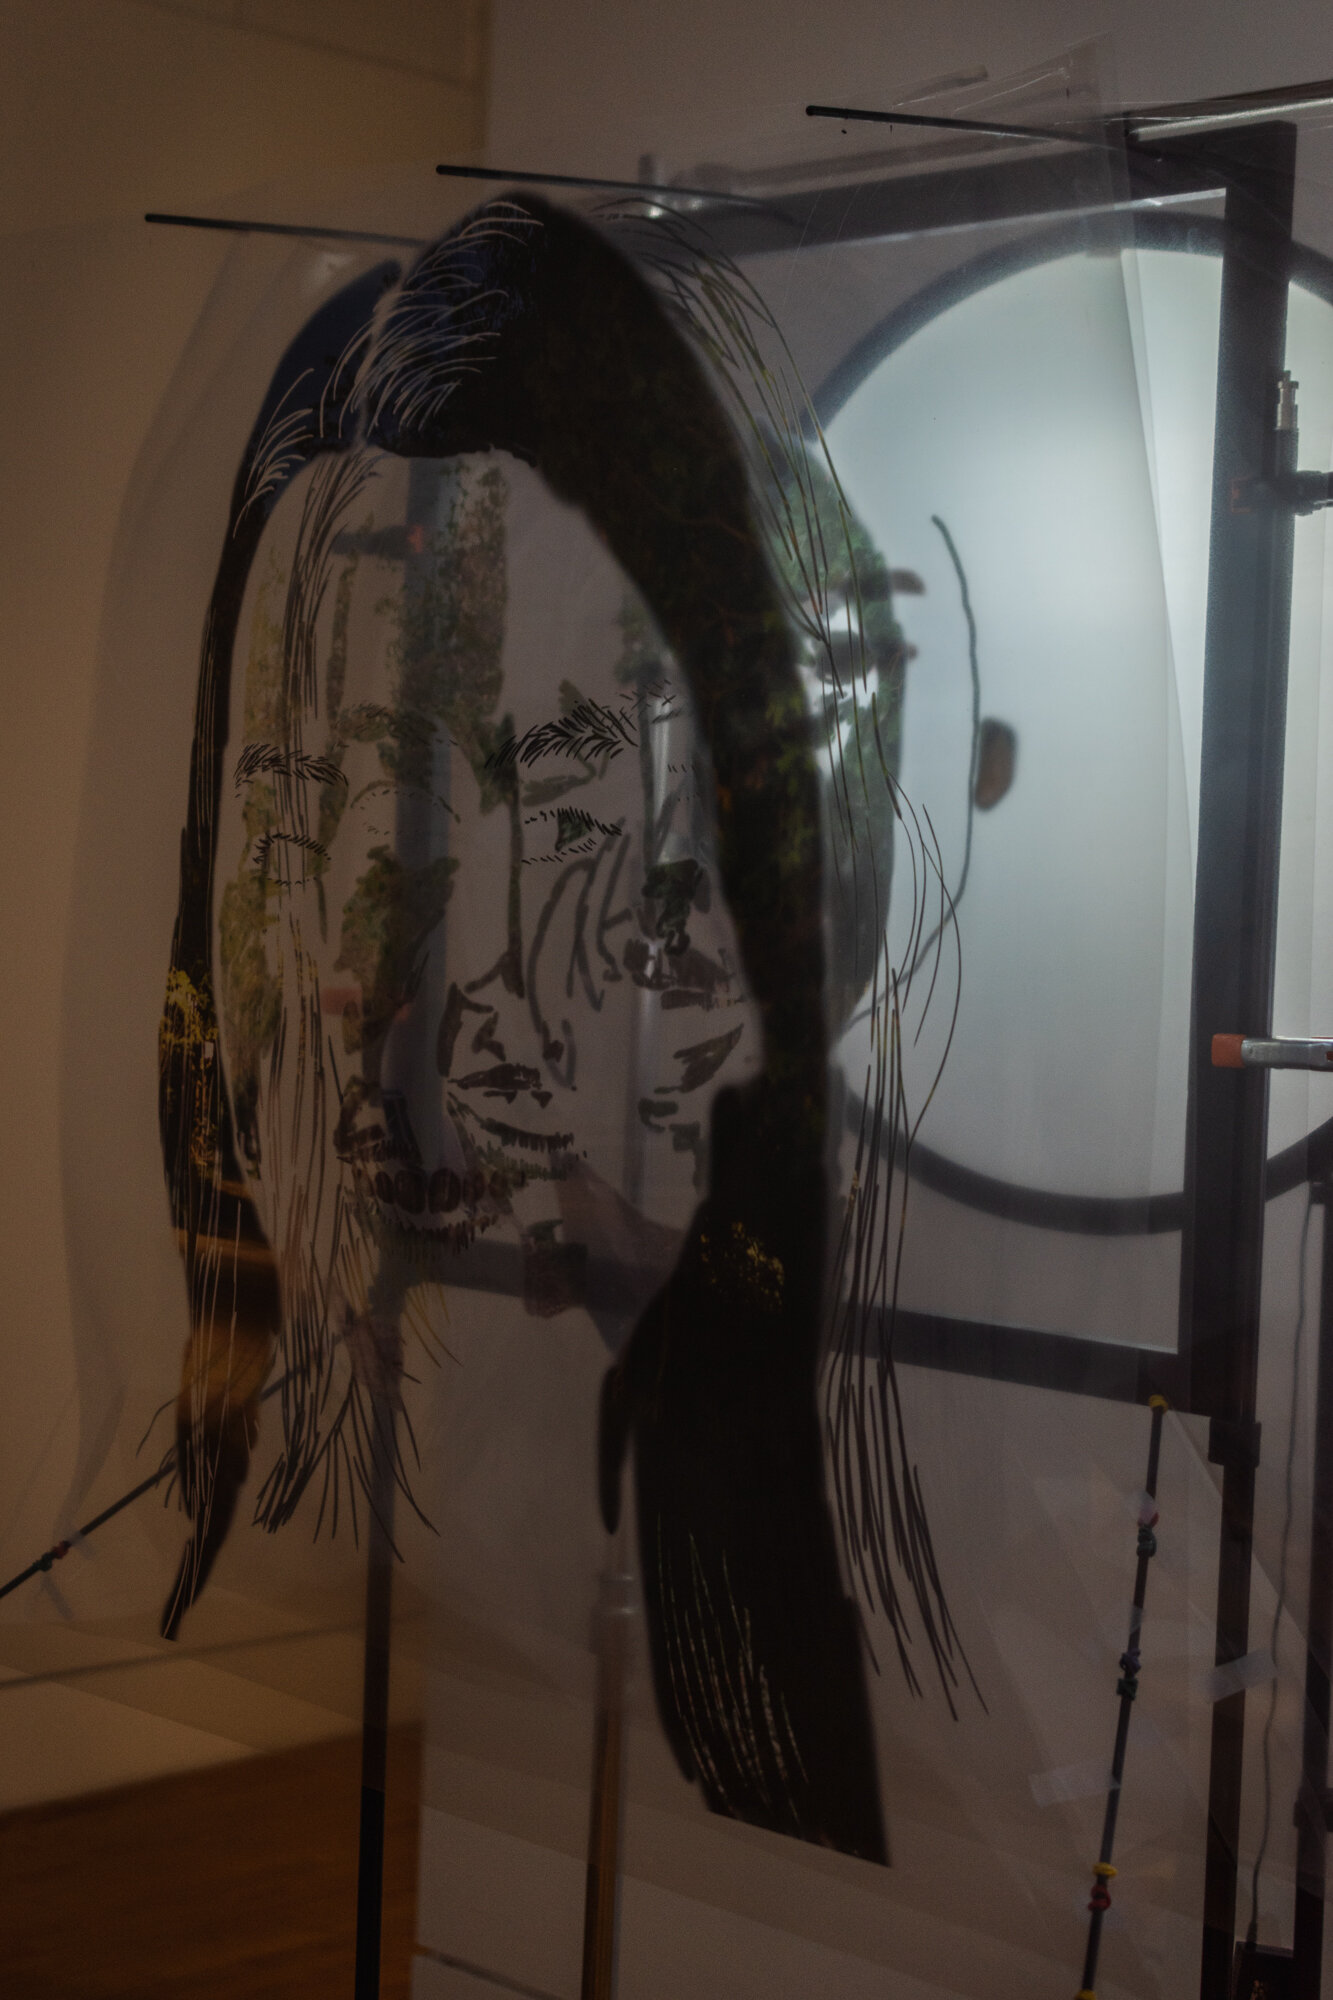
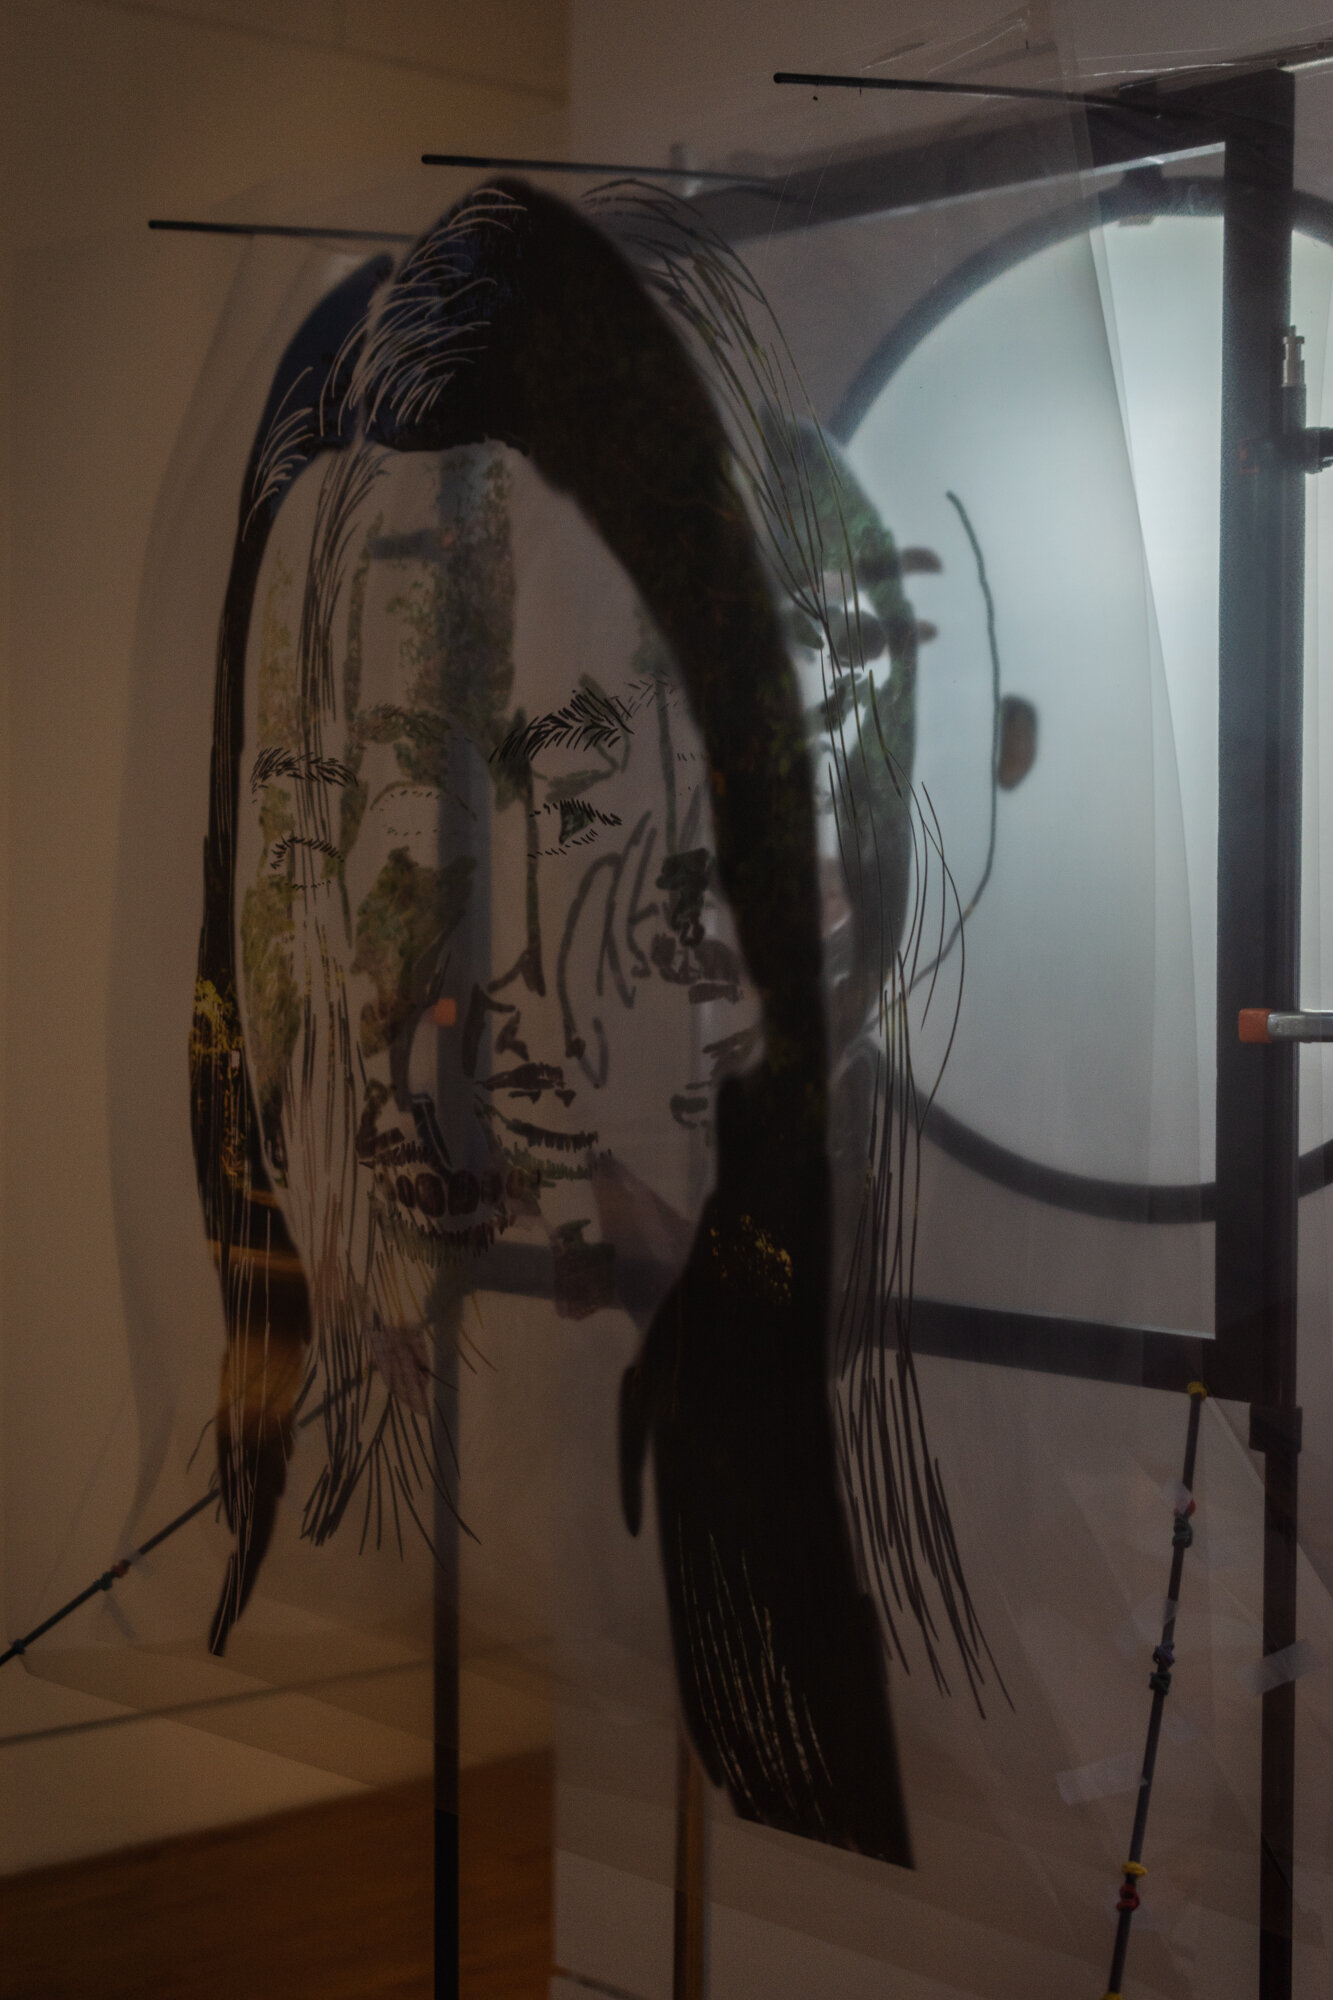
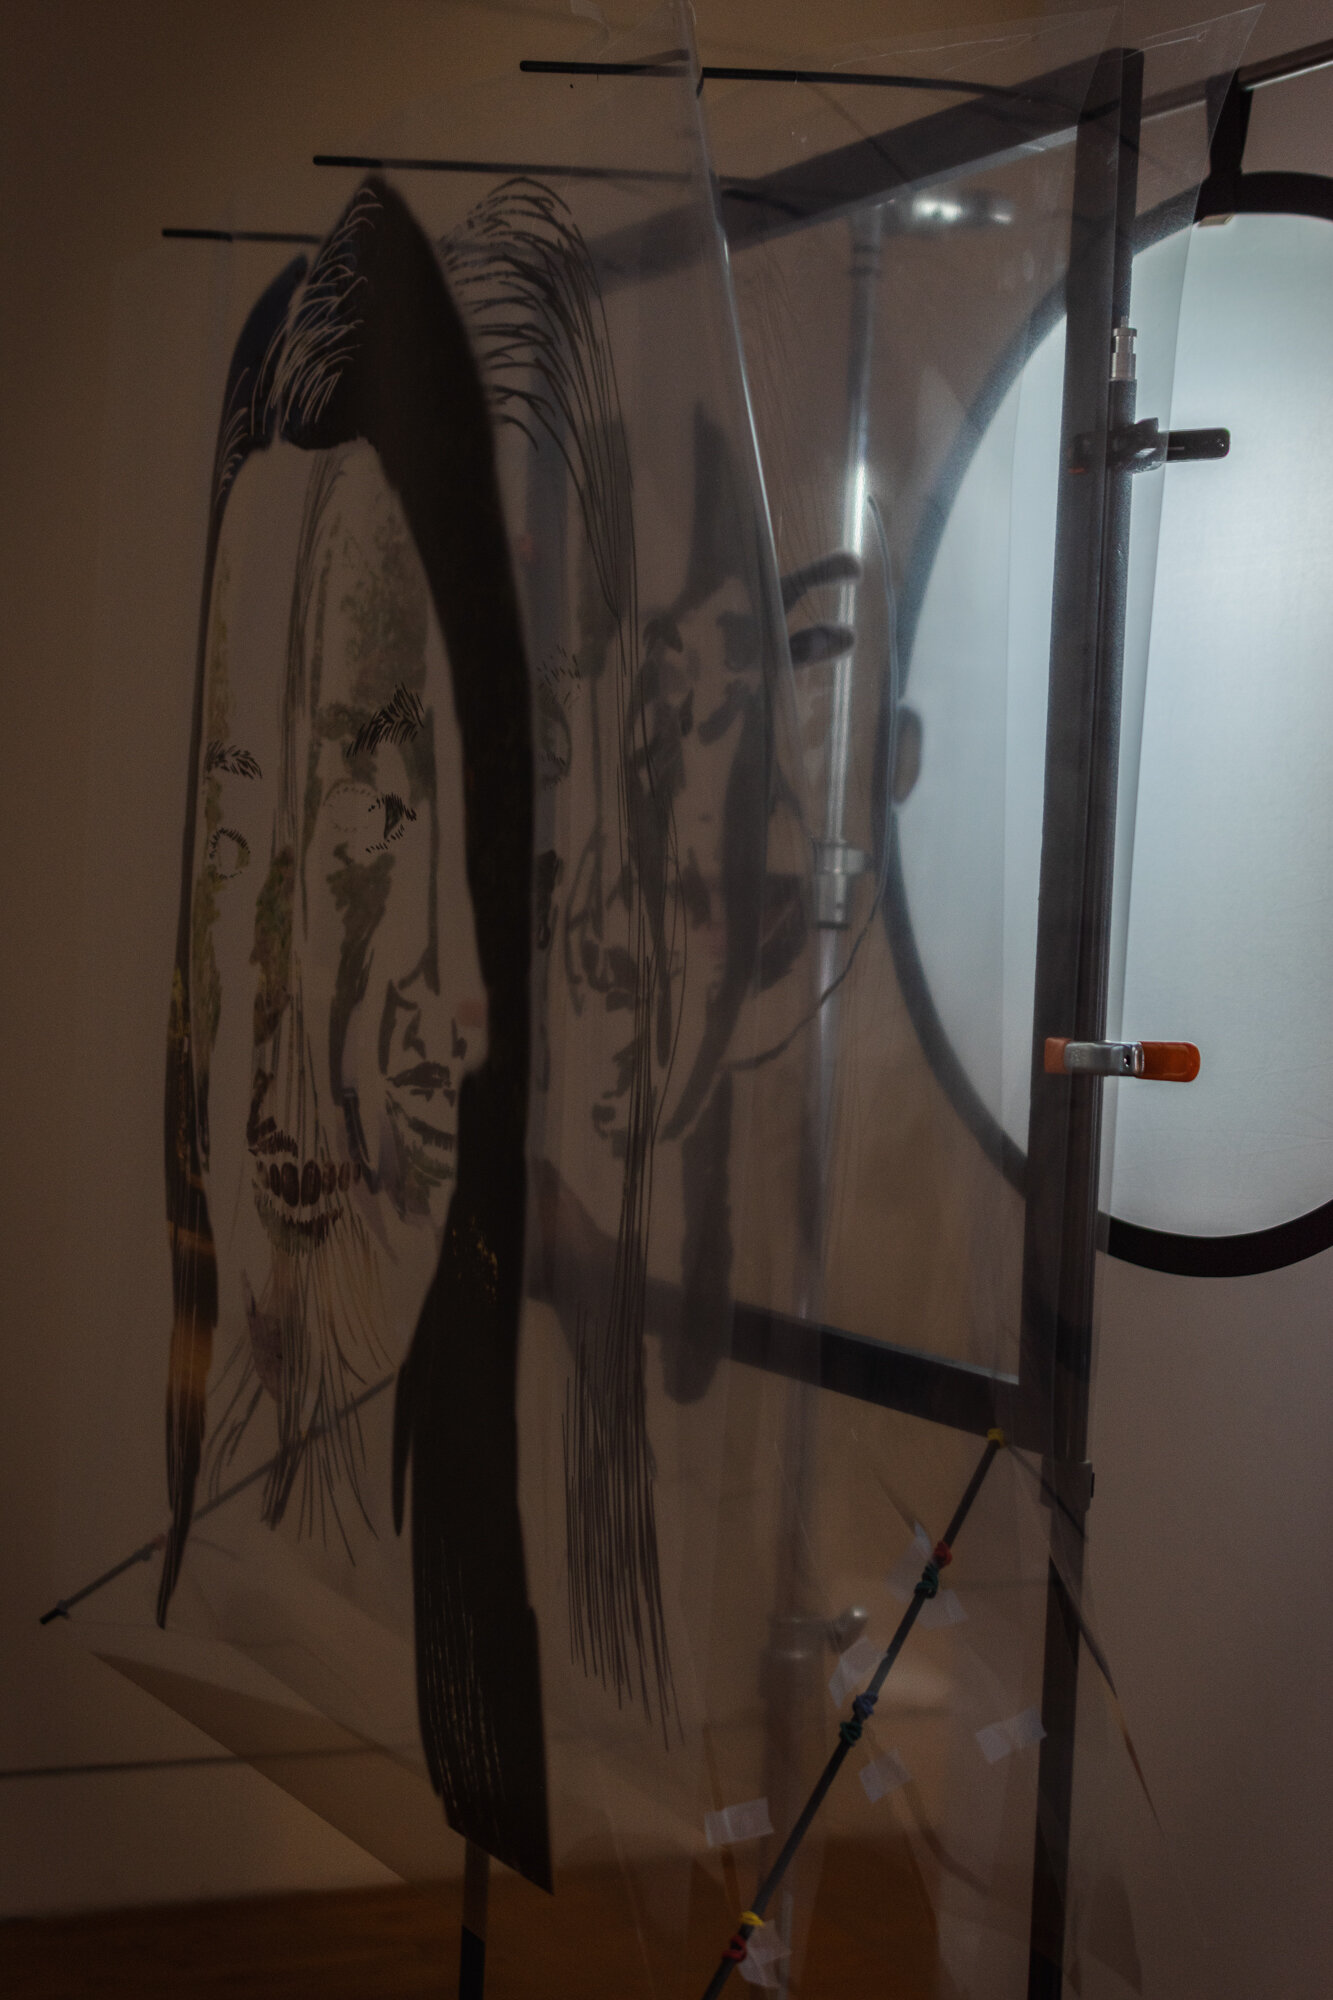
Audrey, 38’’ x 44’’, 6 Transparent Plastic Prints, Wax Paper, Galvanized Wire, Tripod
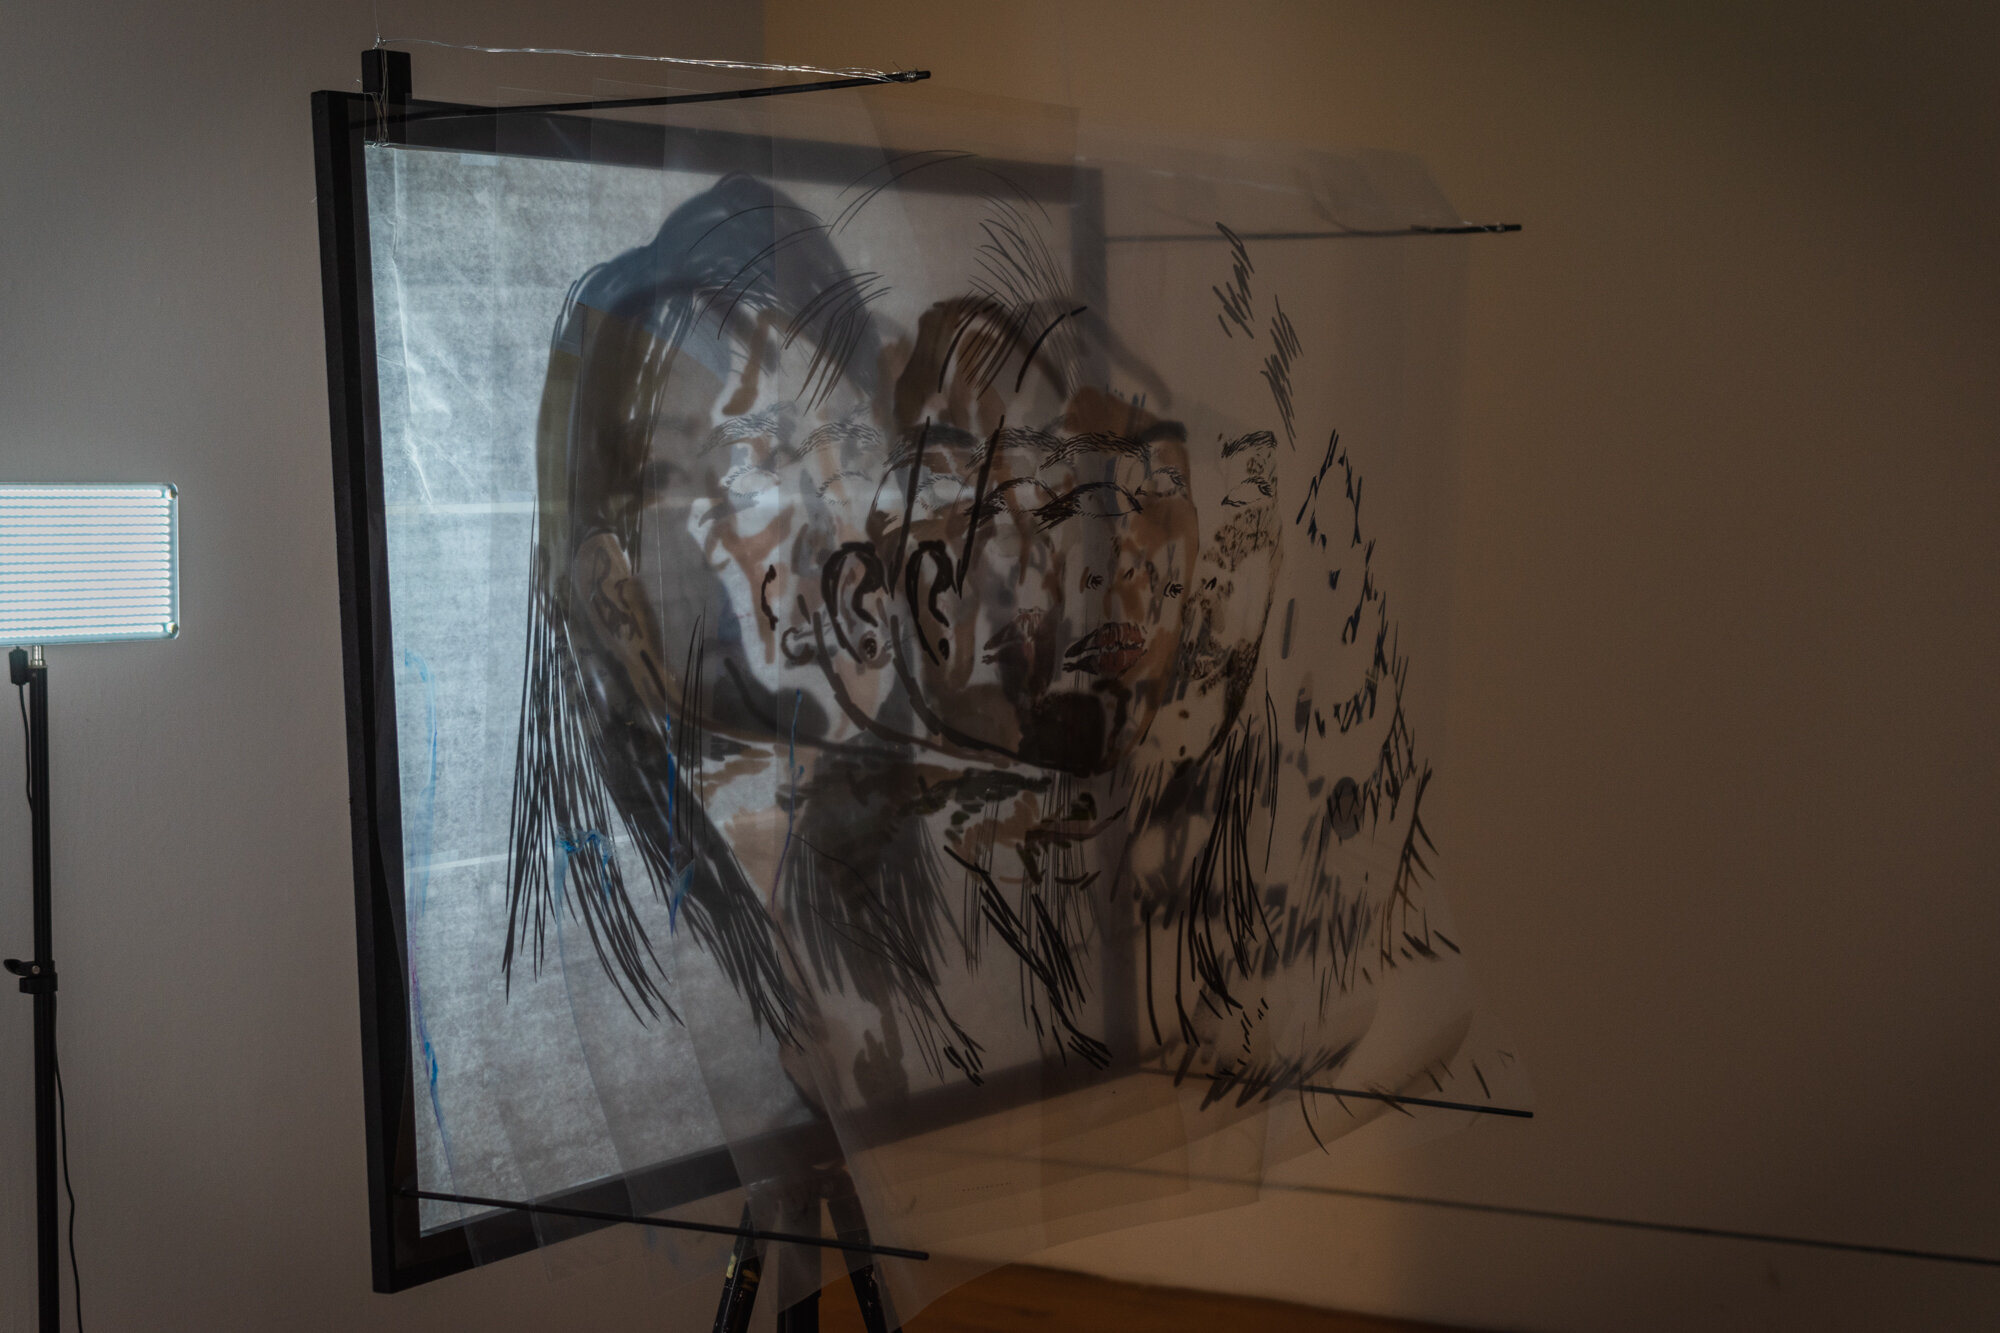
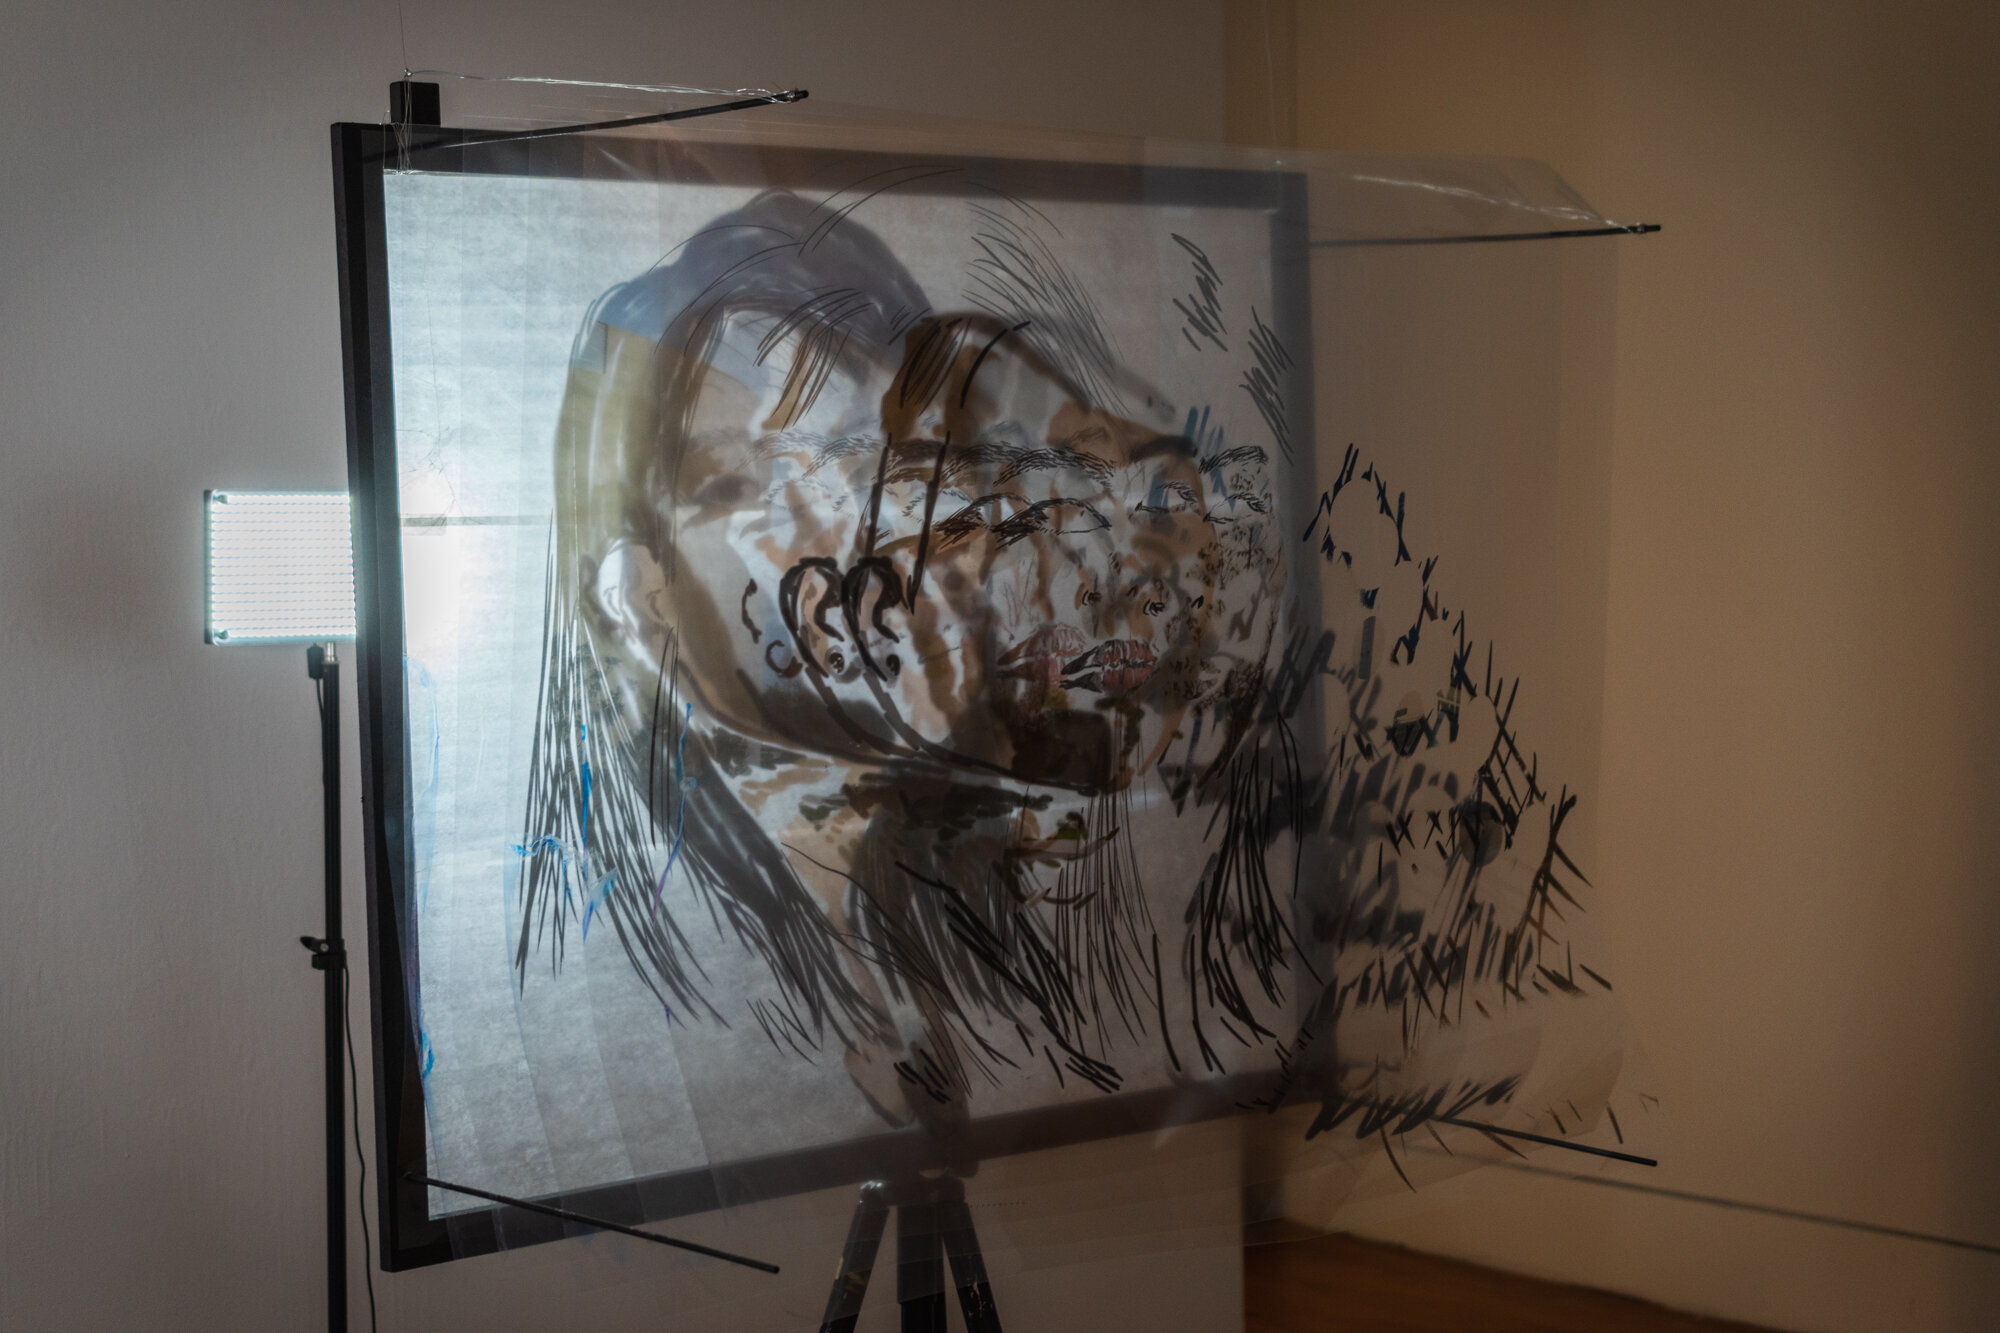
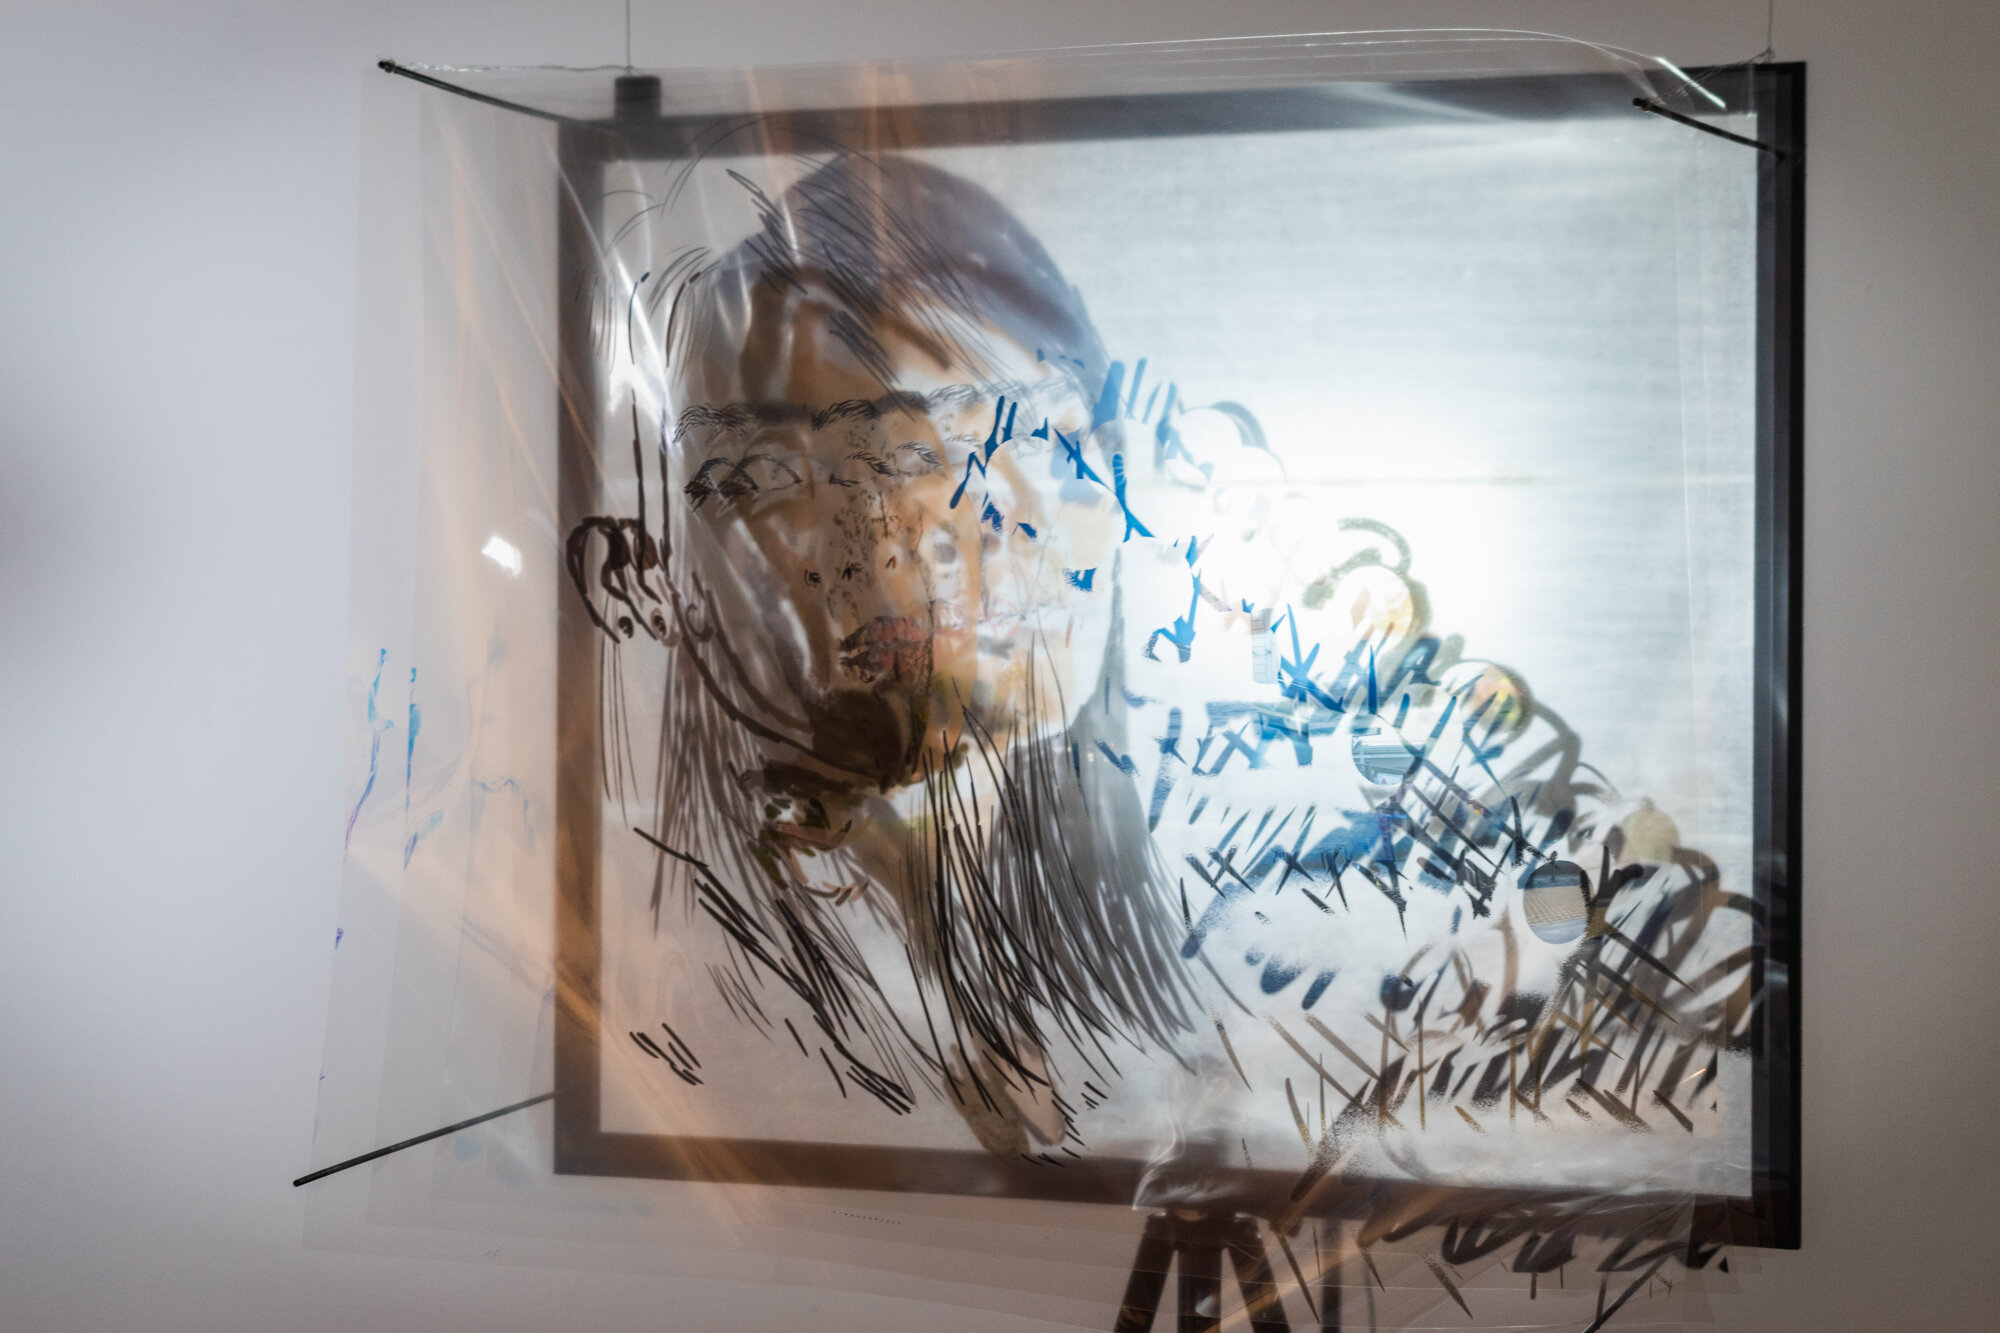

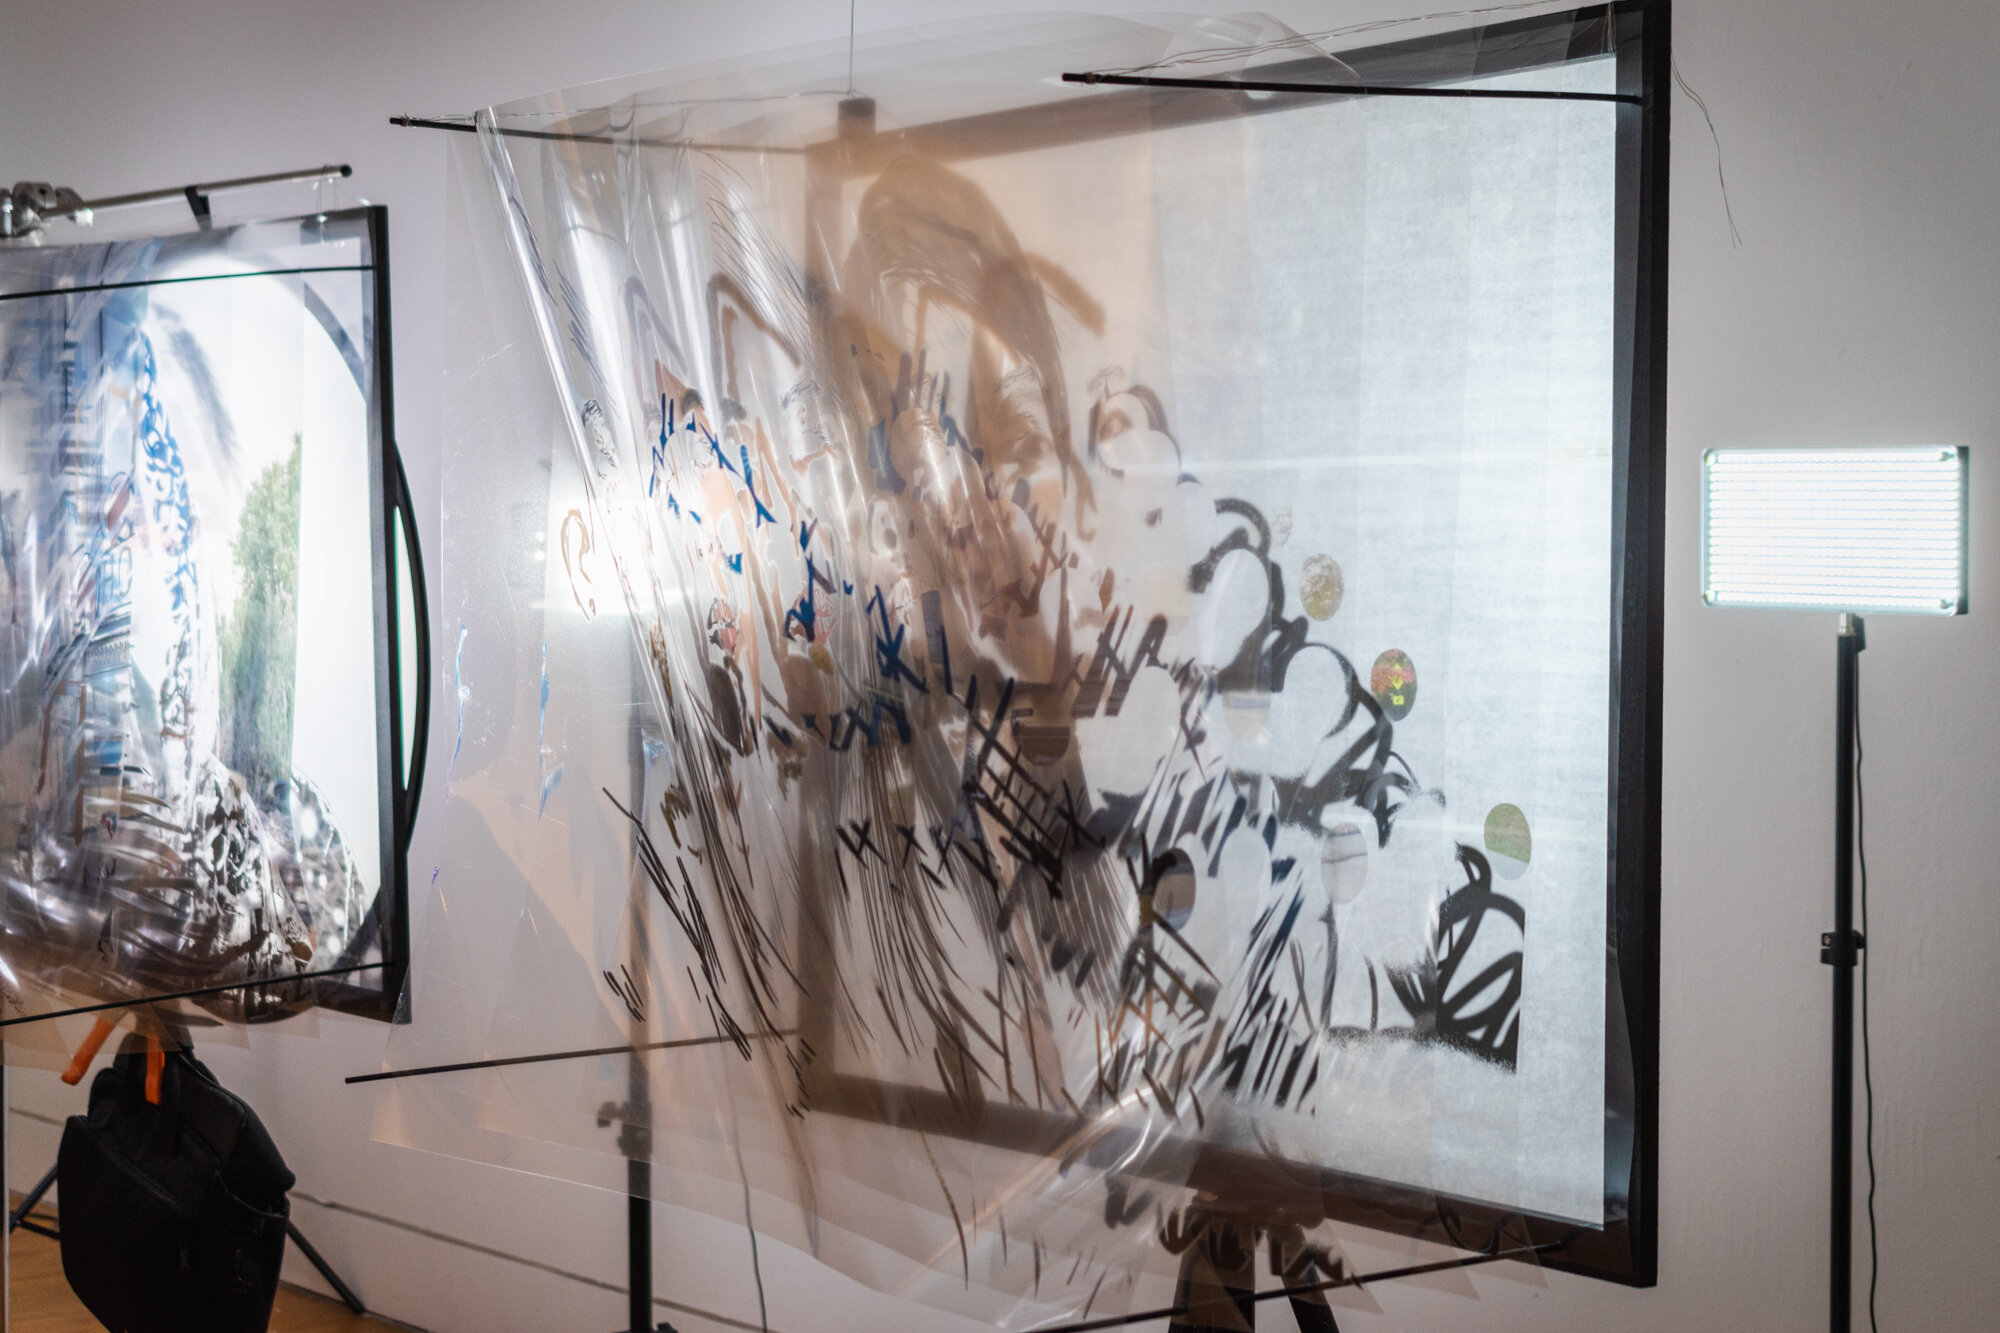
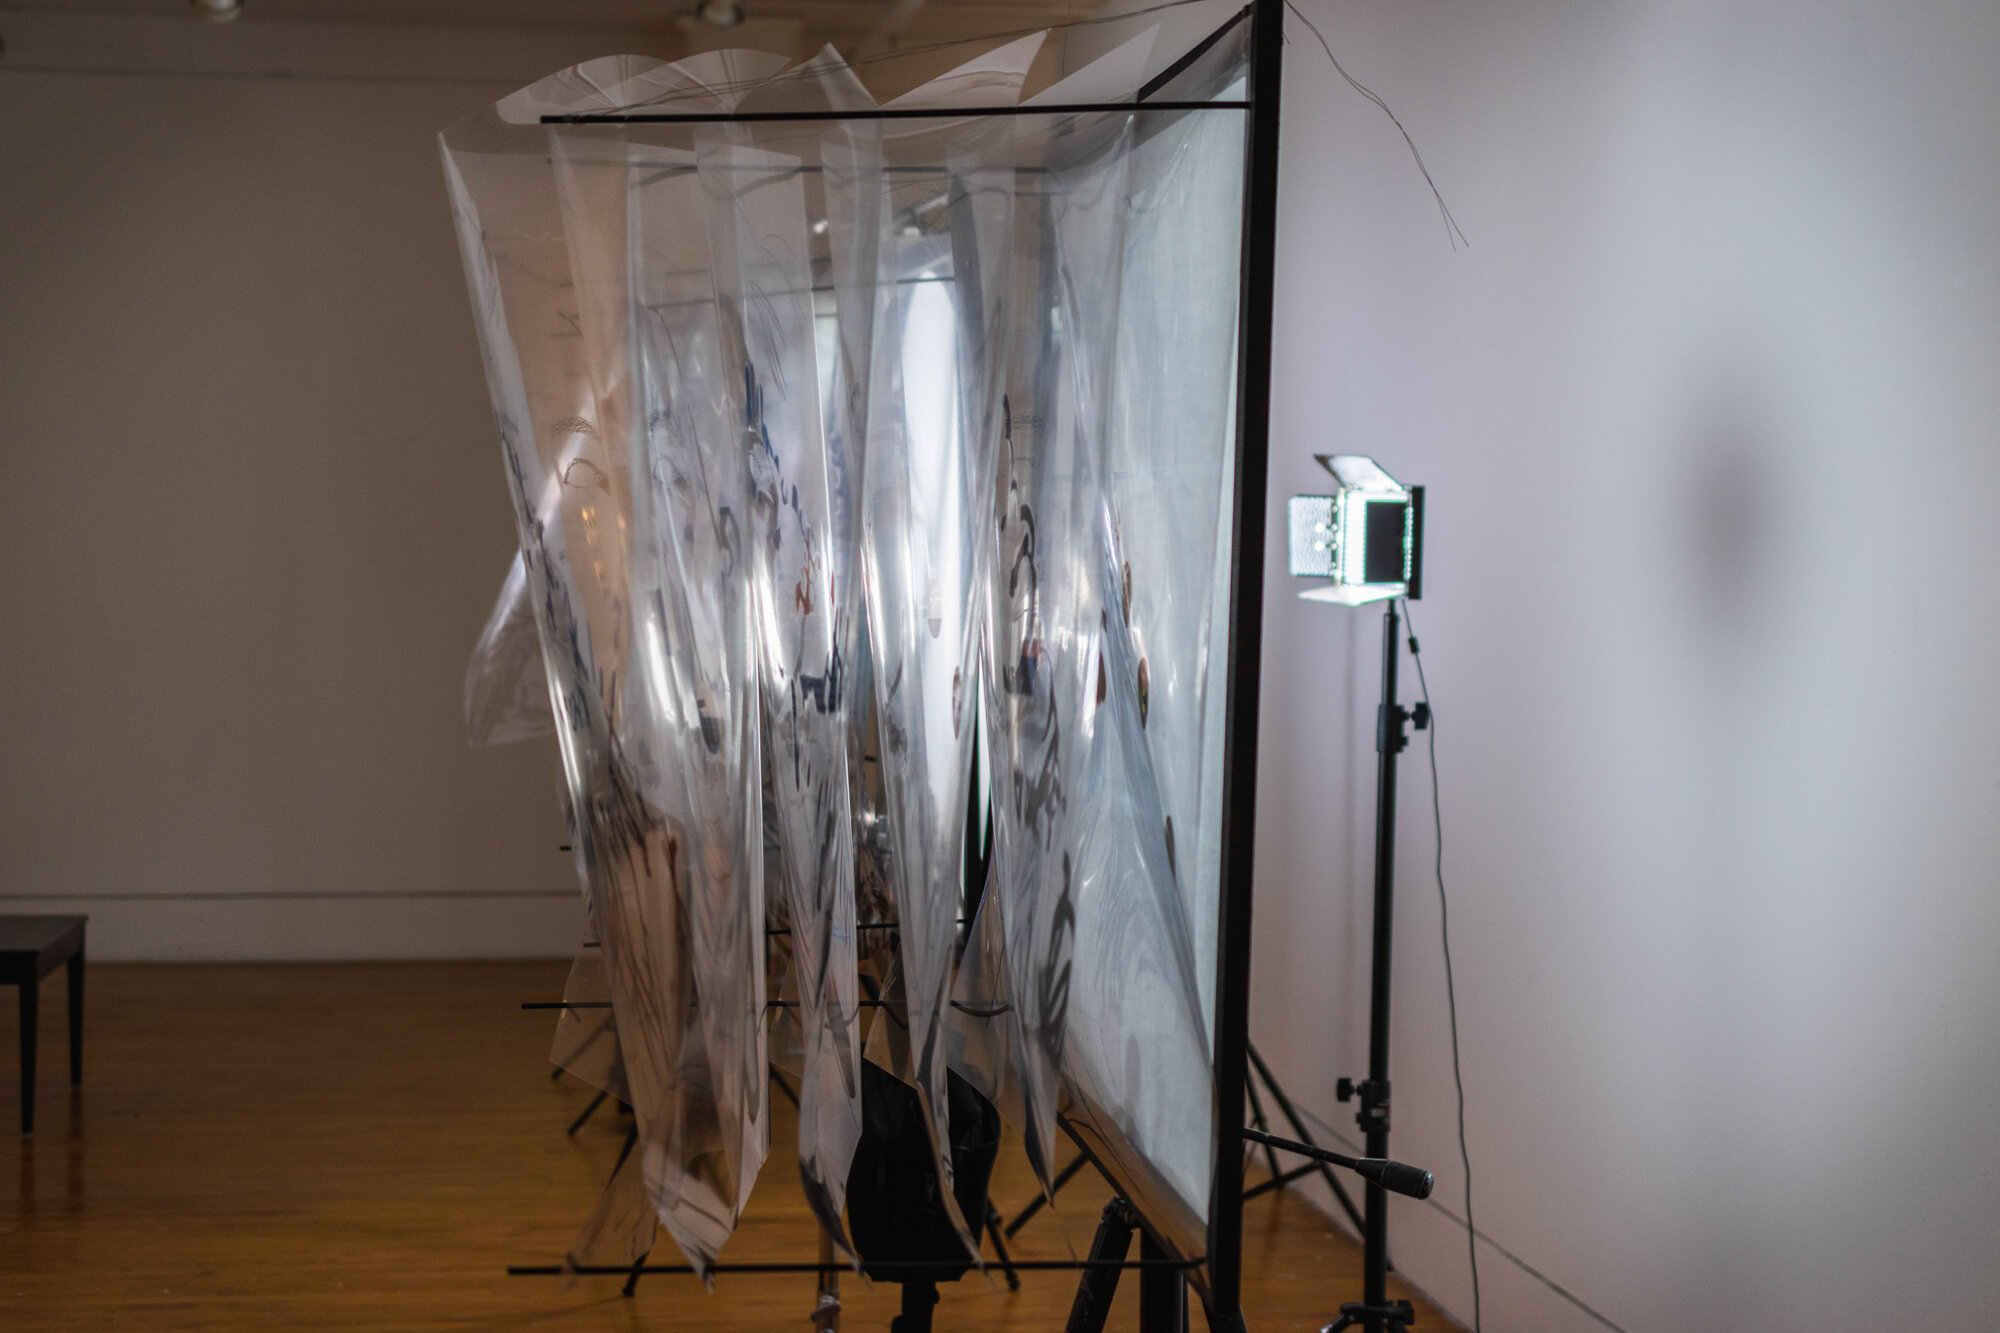
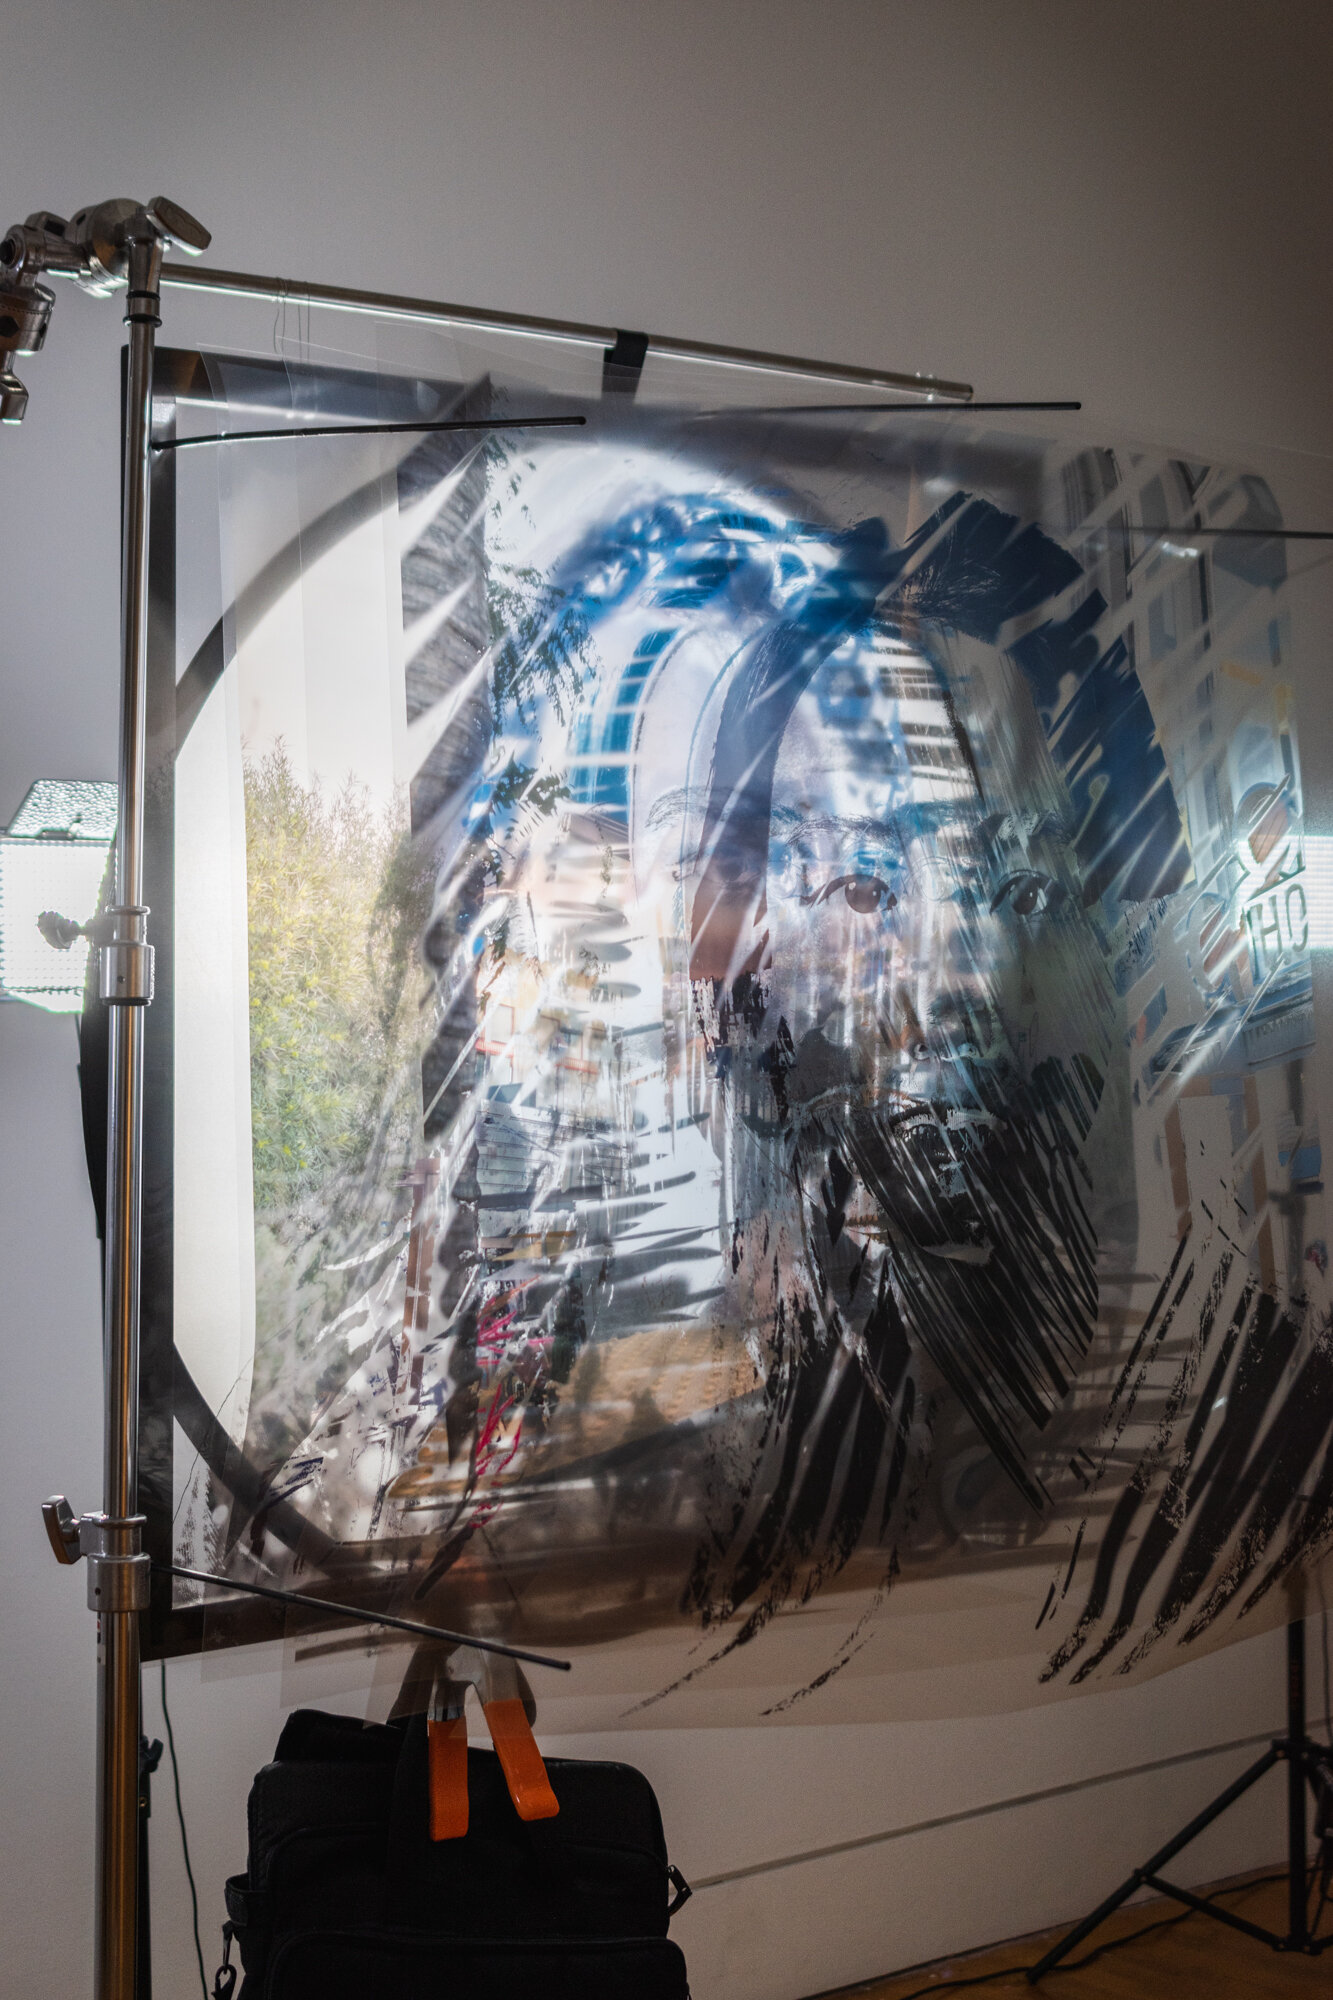
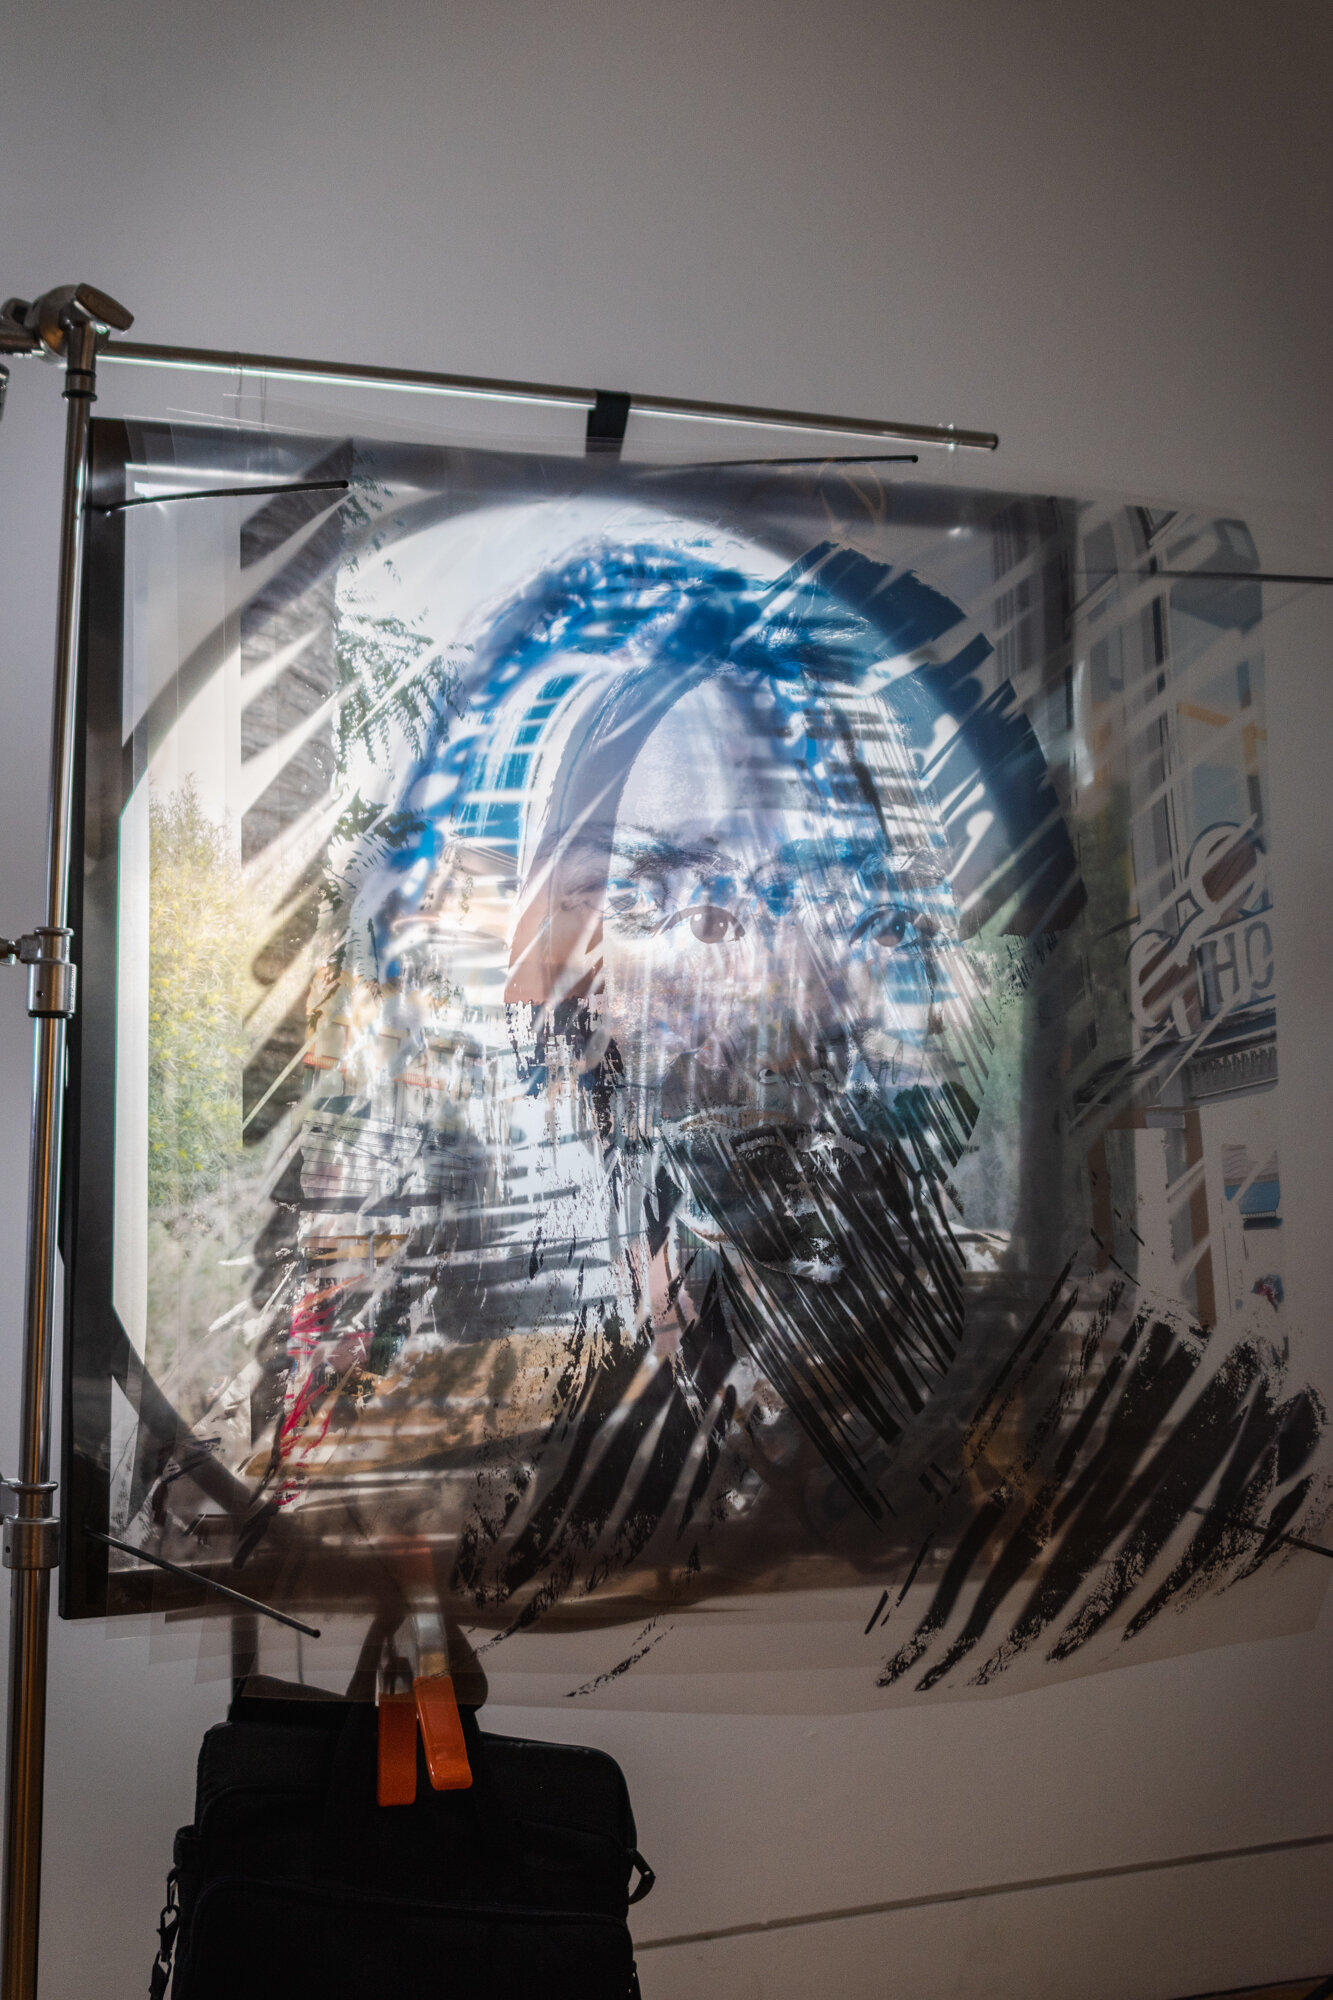
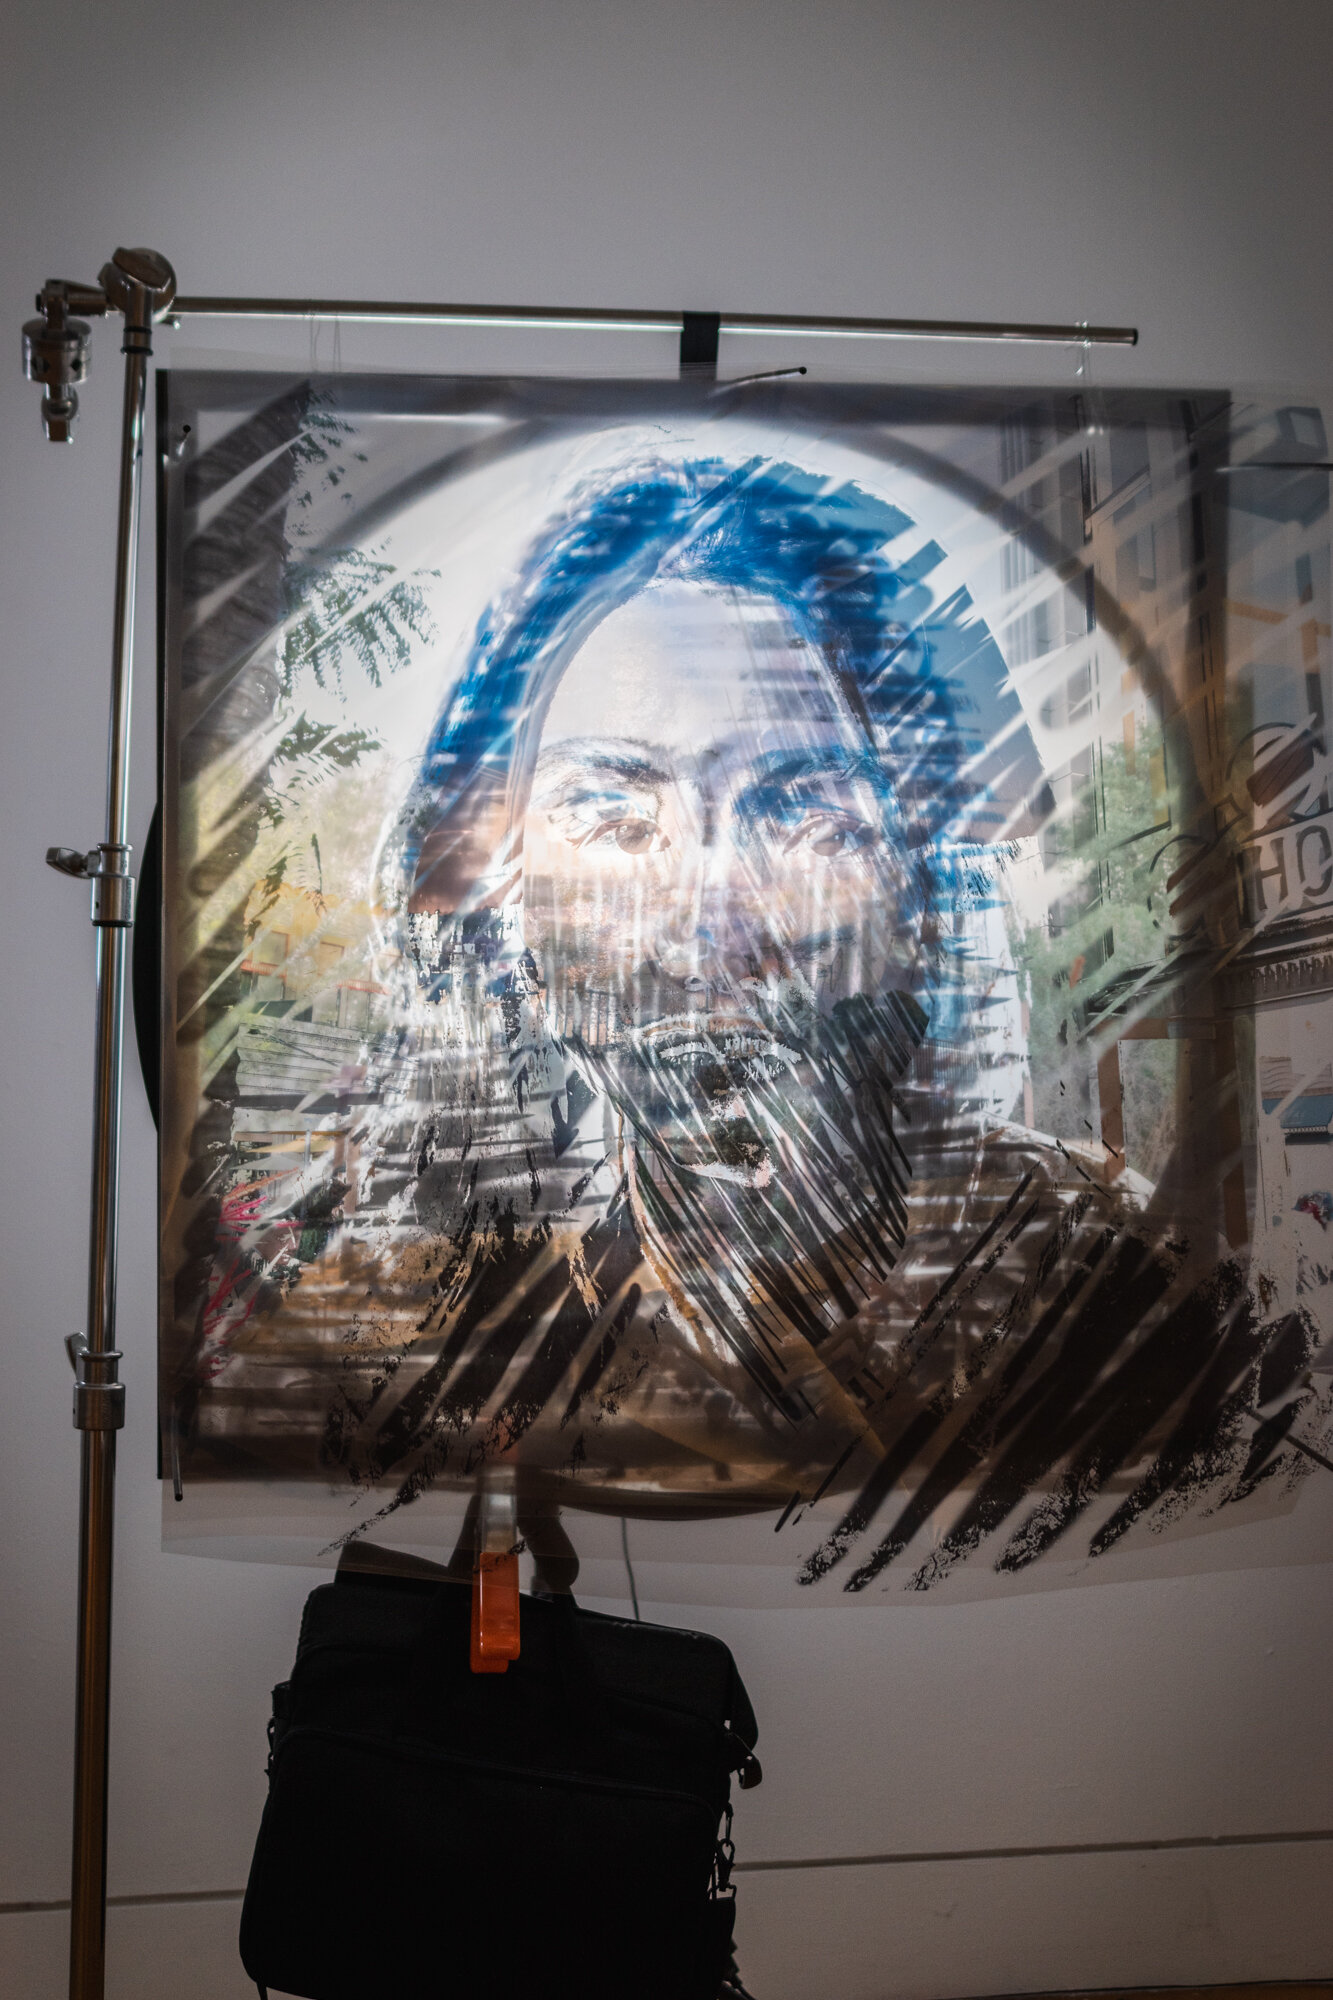
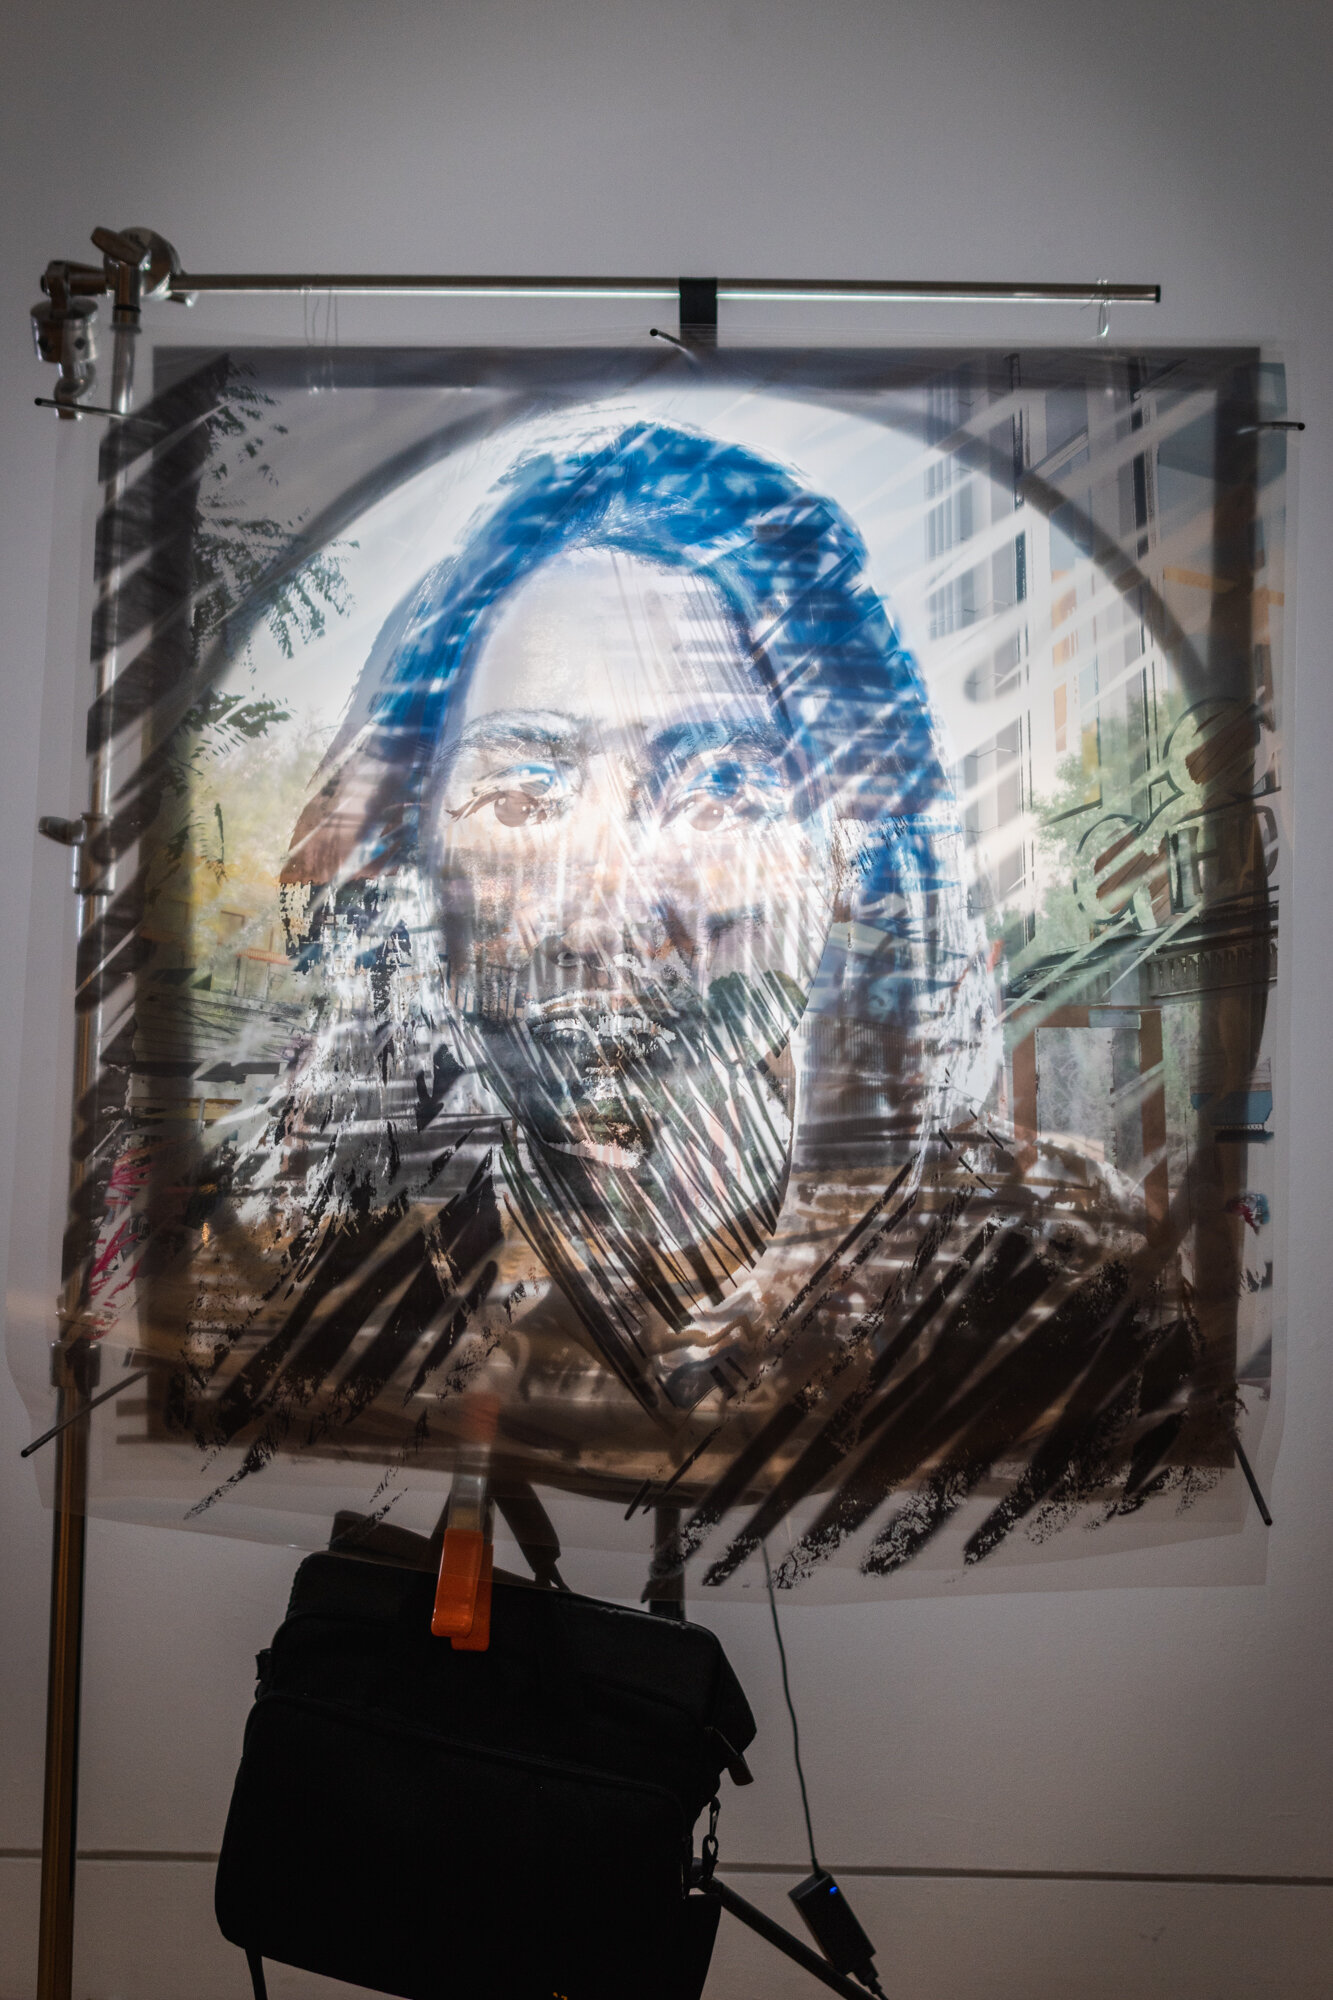
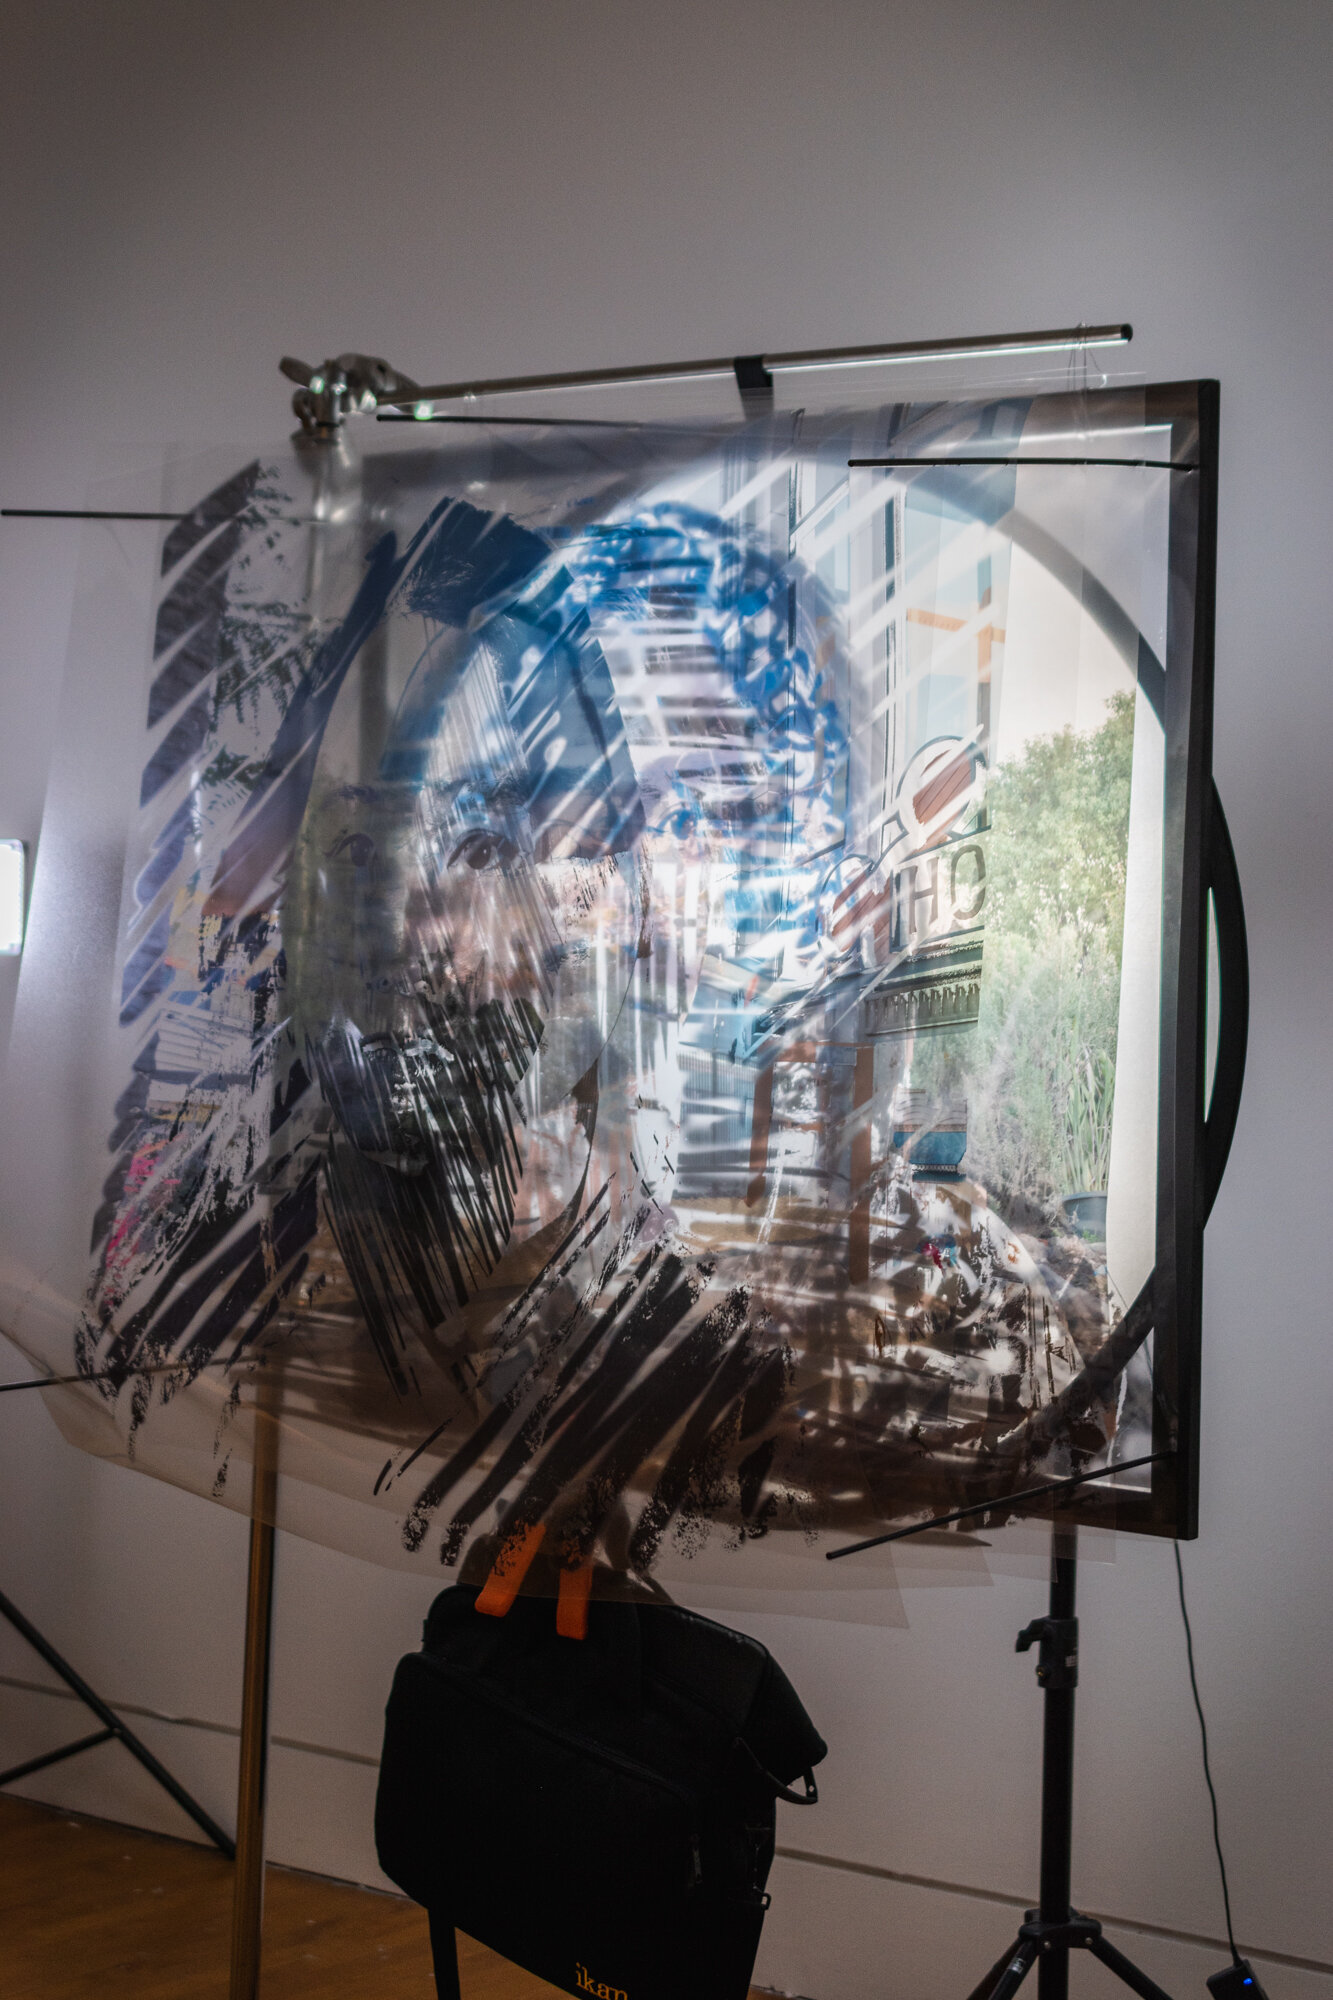
Sanna, 40‘‘ x 40’’, 5 transparent plastic prints, c-stand, diffuser, LED panel light
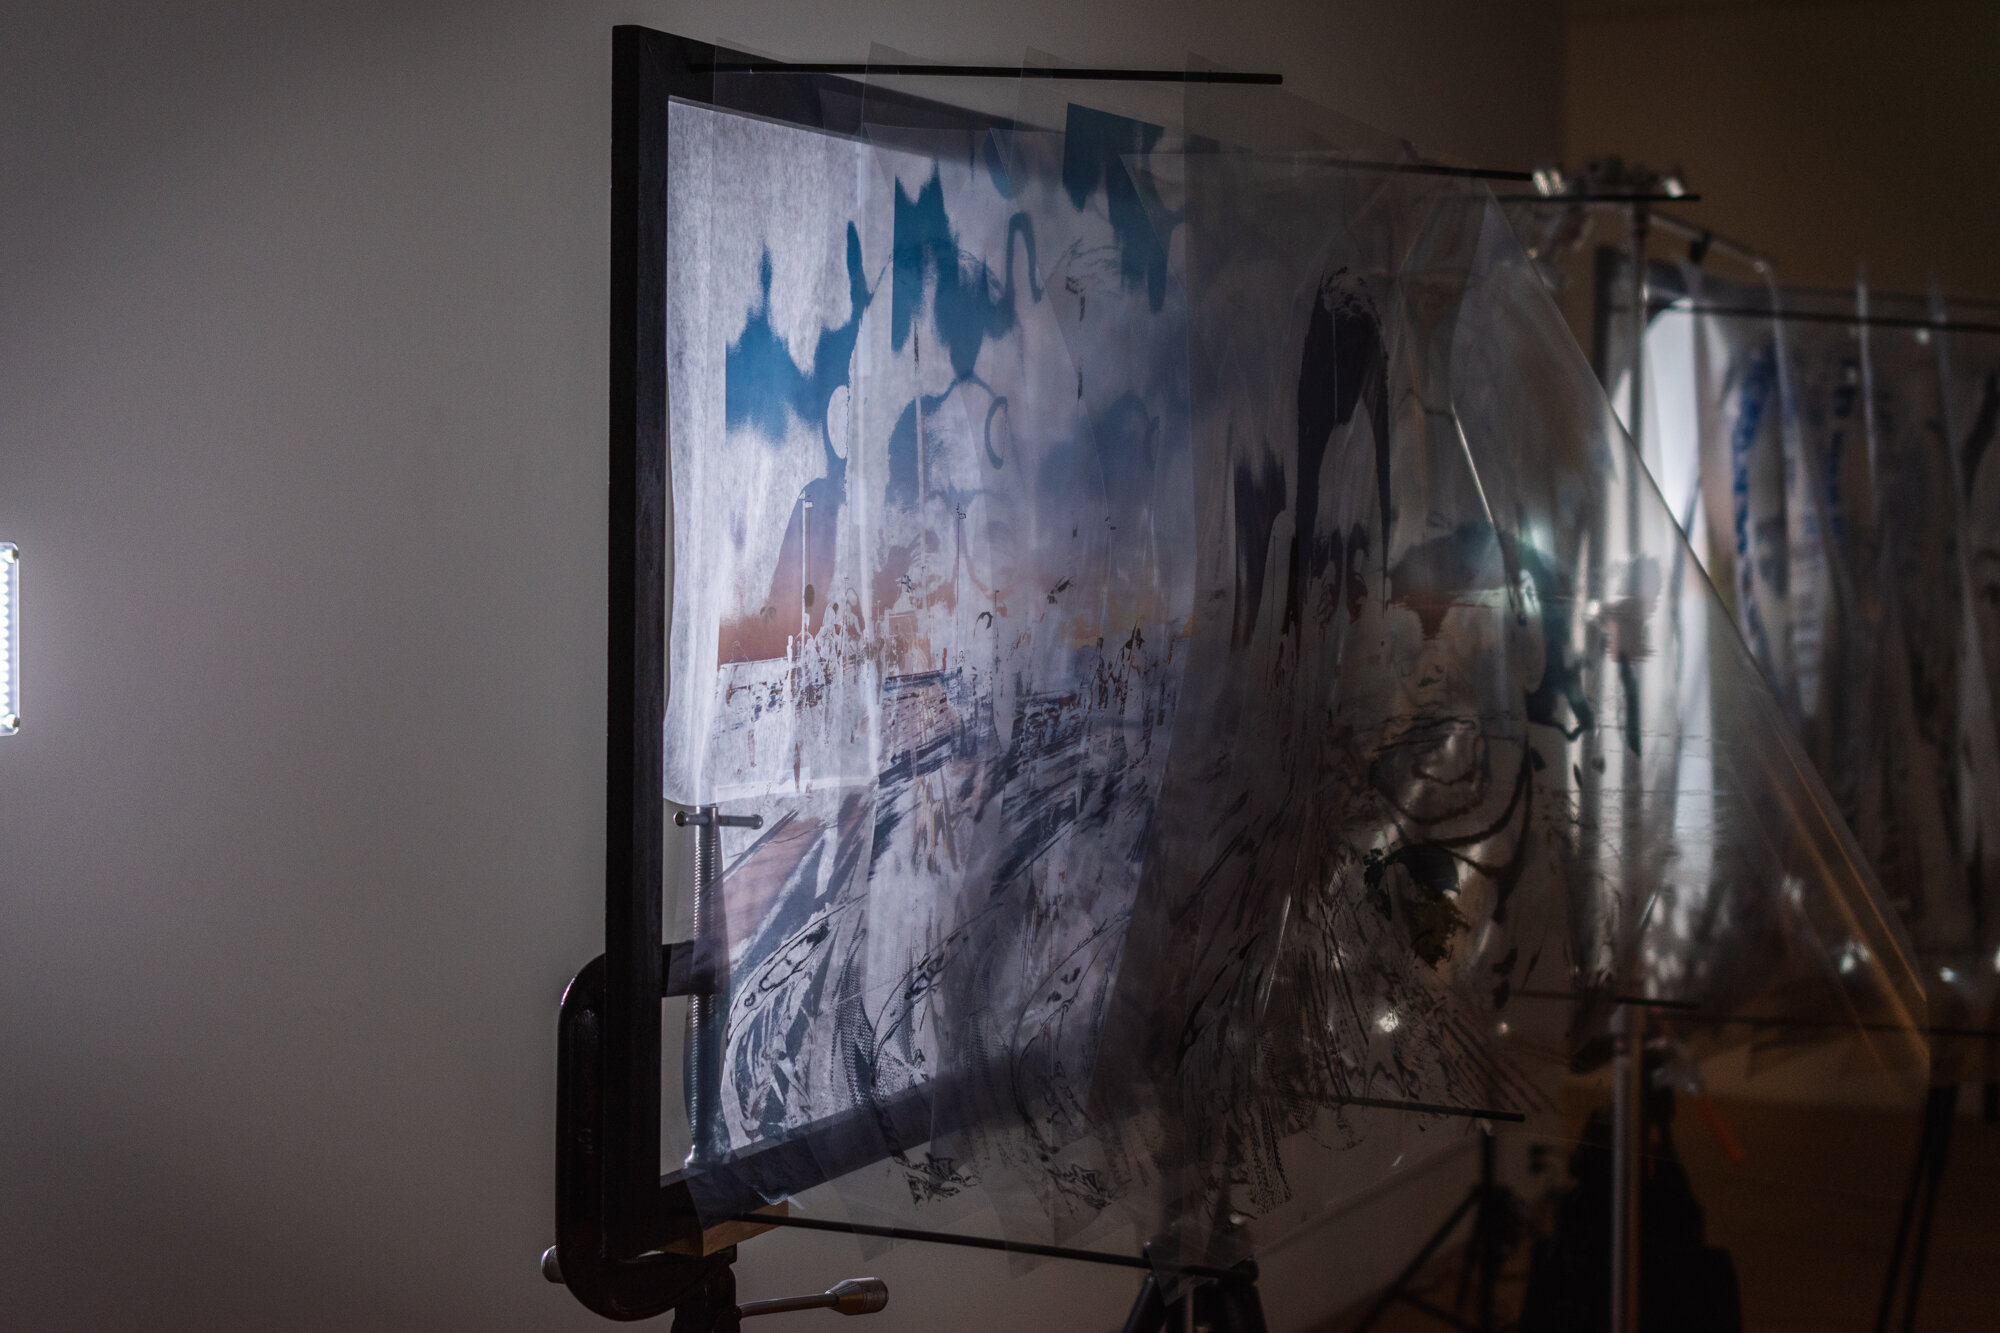
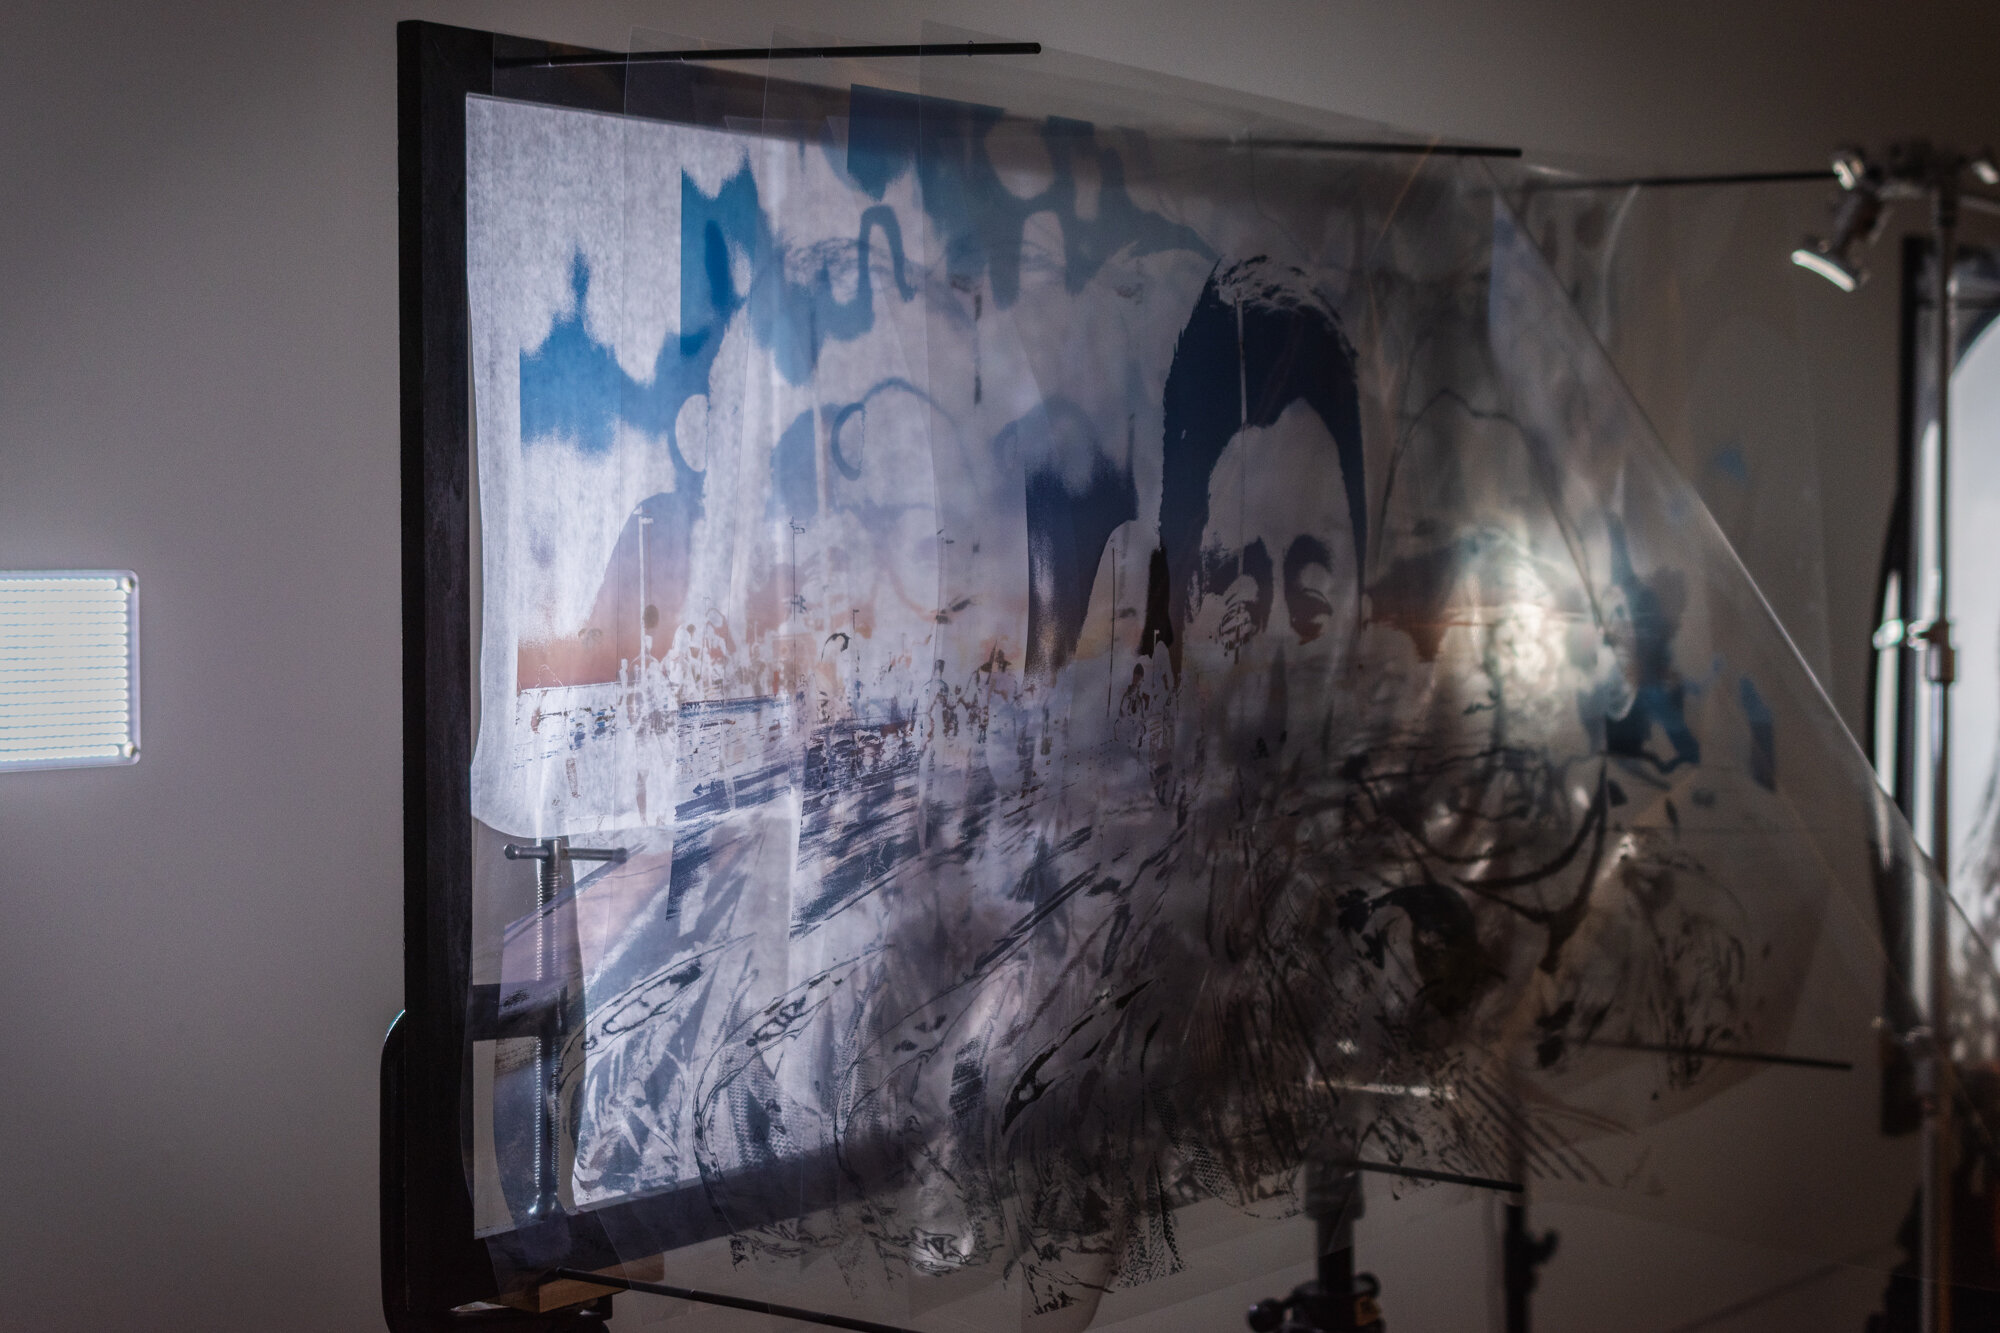
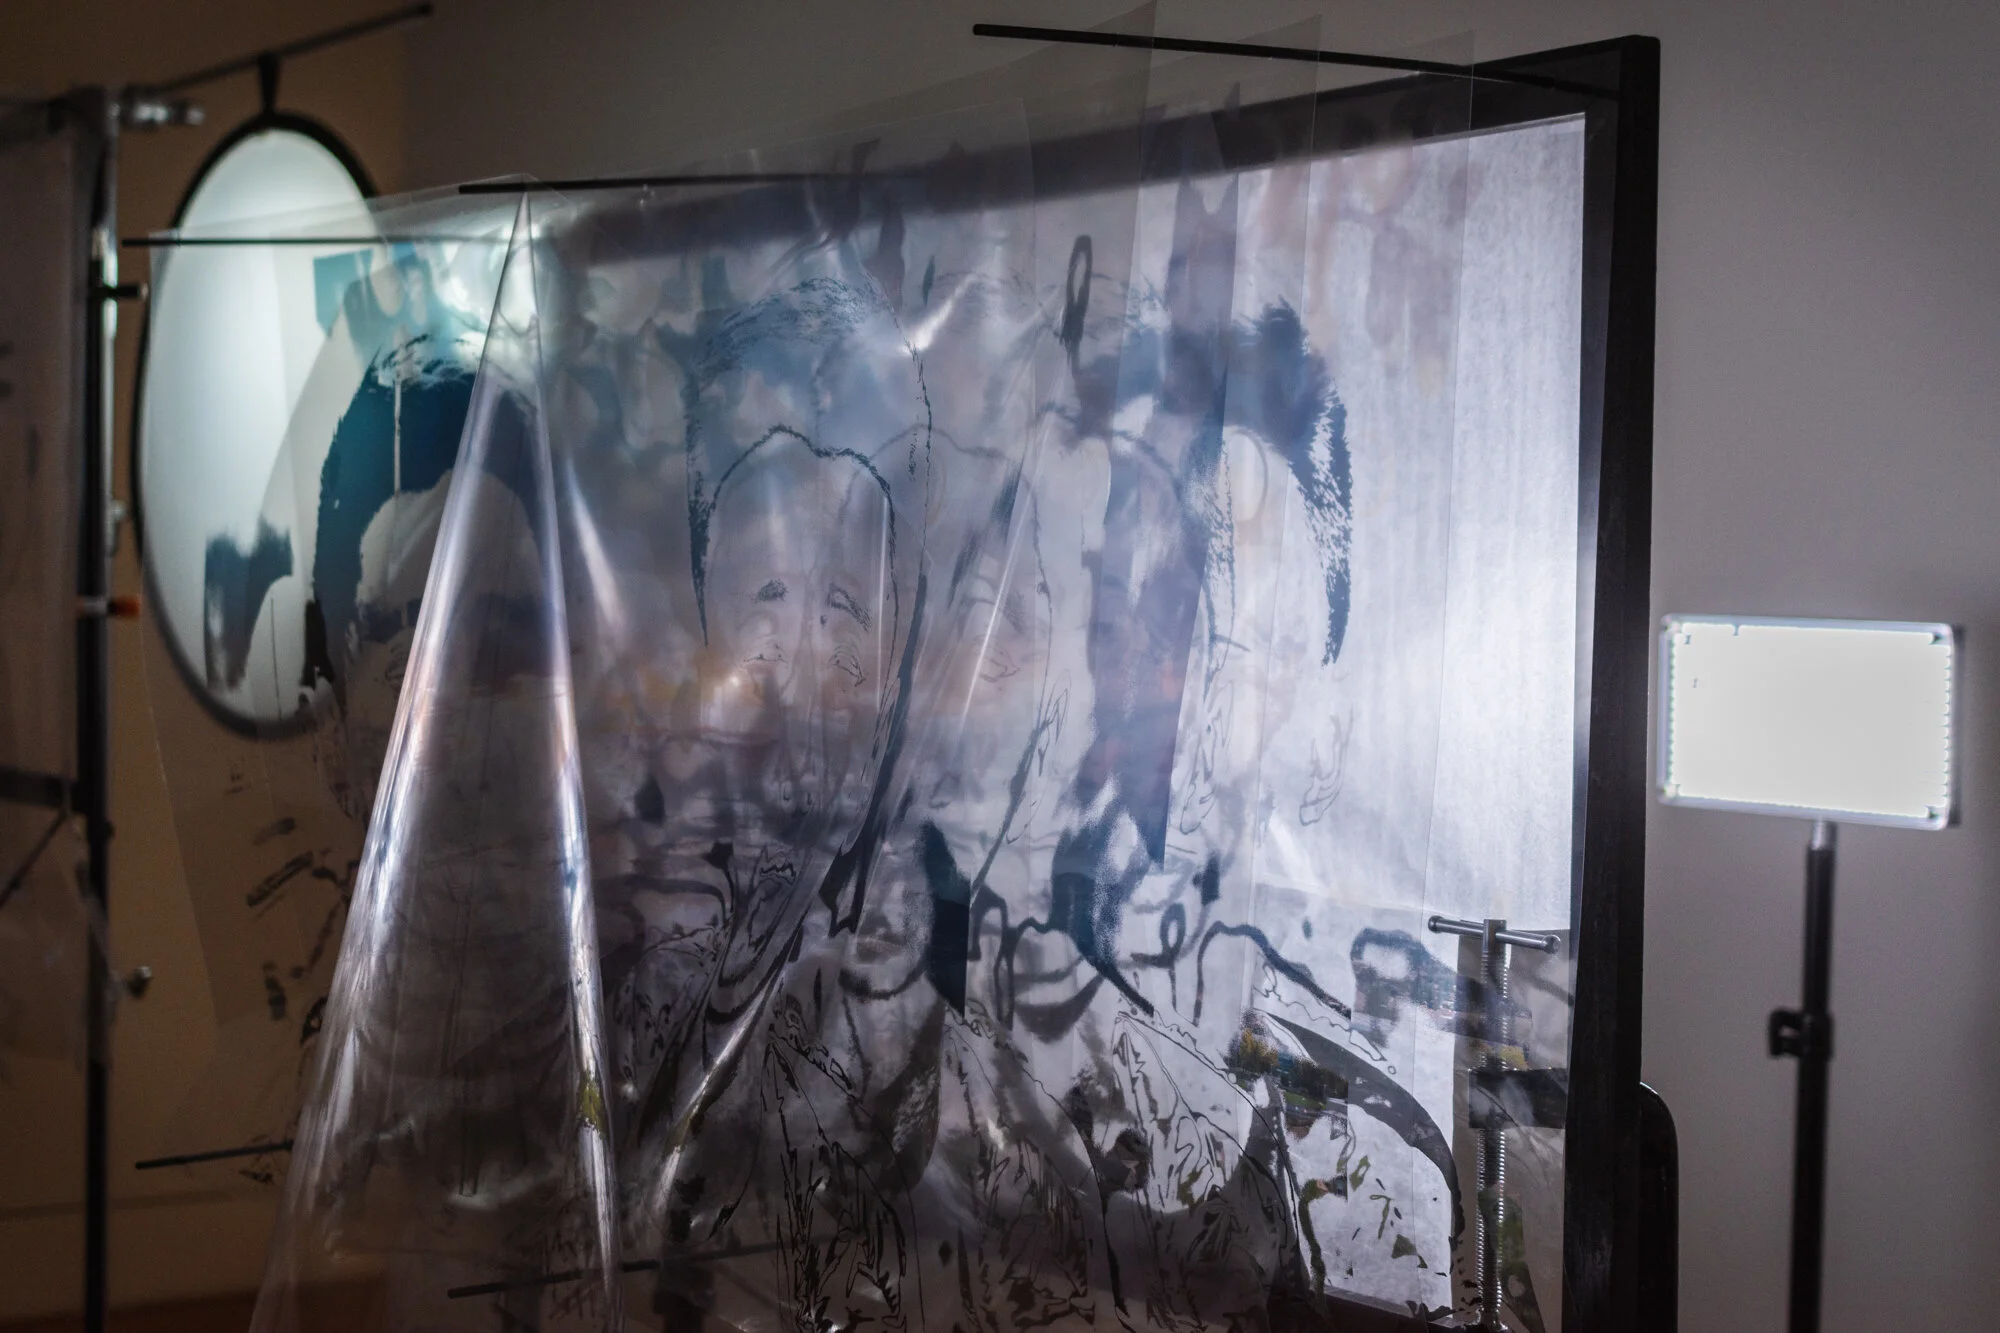
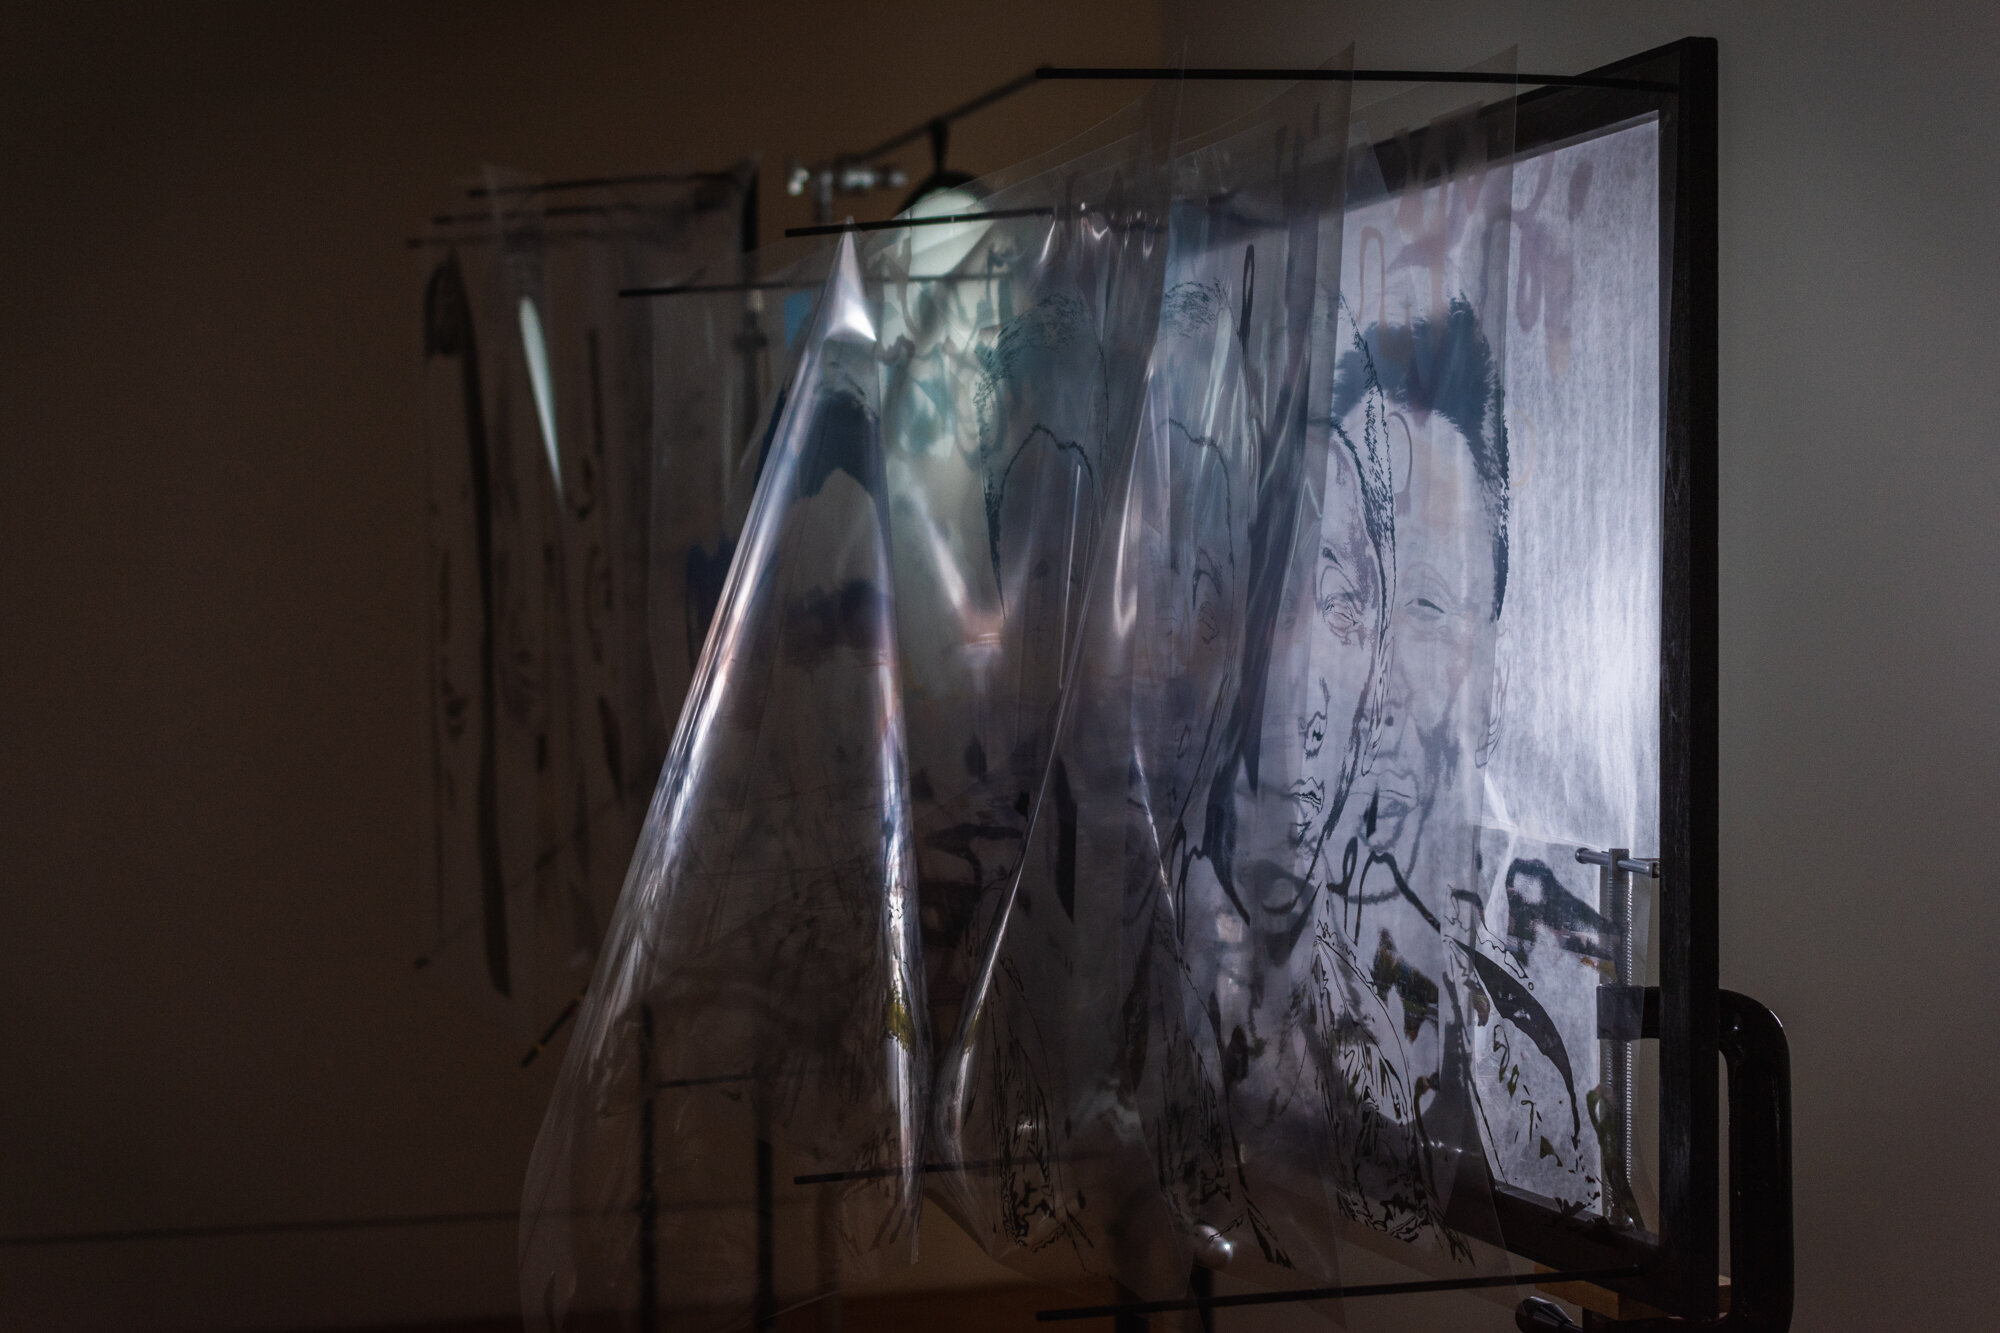
Ben, 30’’ x 50’’, 8 transparent plastic prints, 2 tripods, 2 c-clamps, wax paper
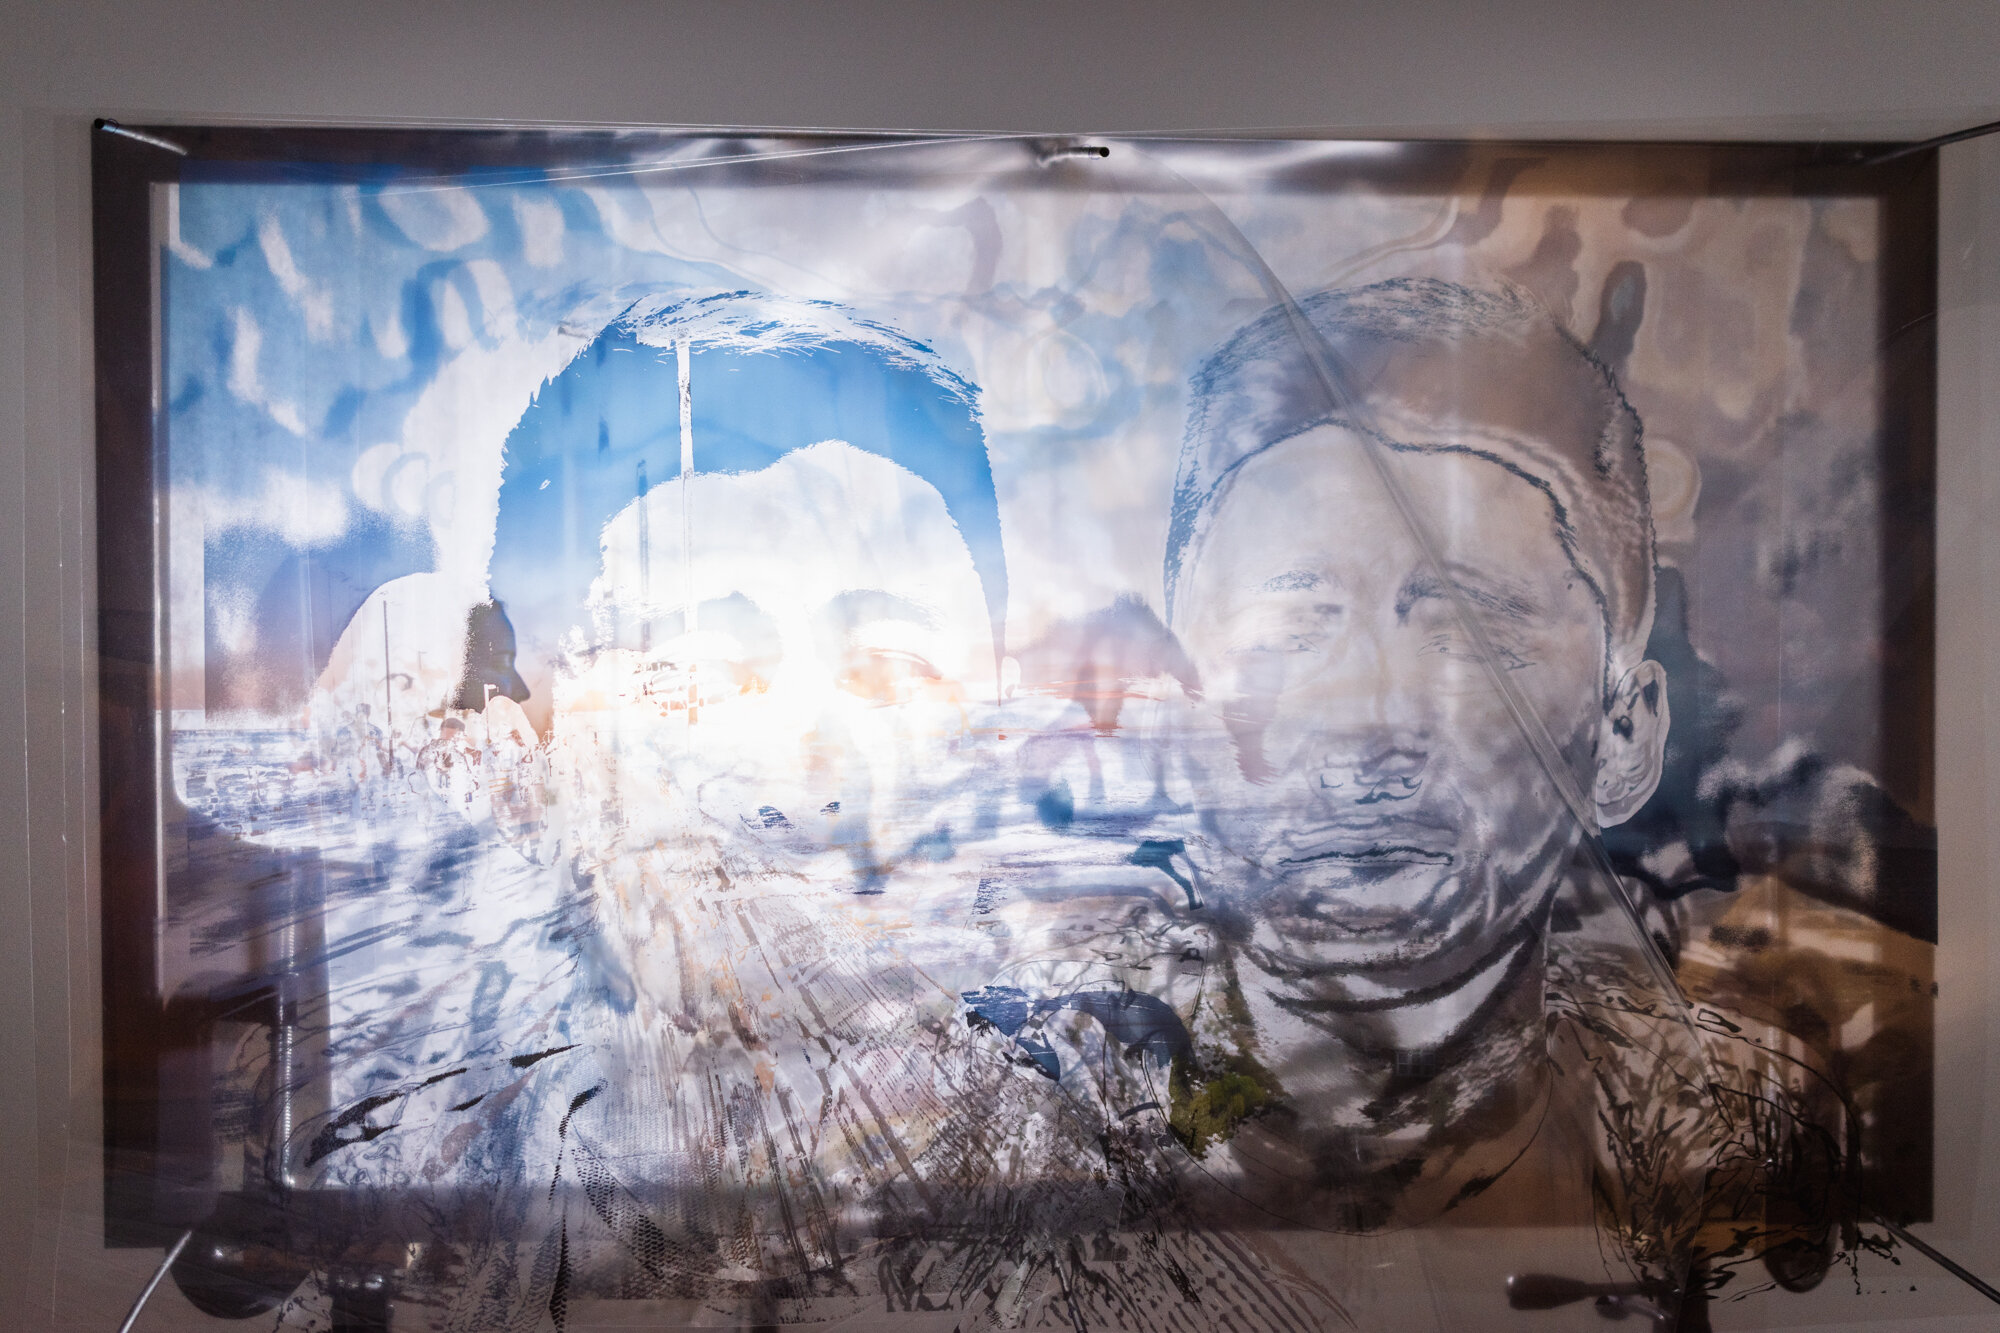
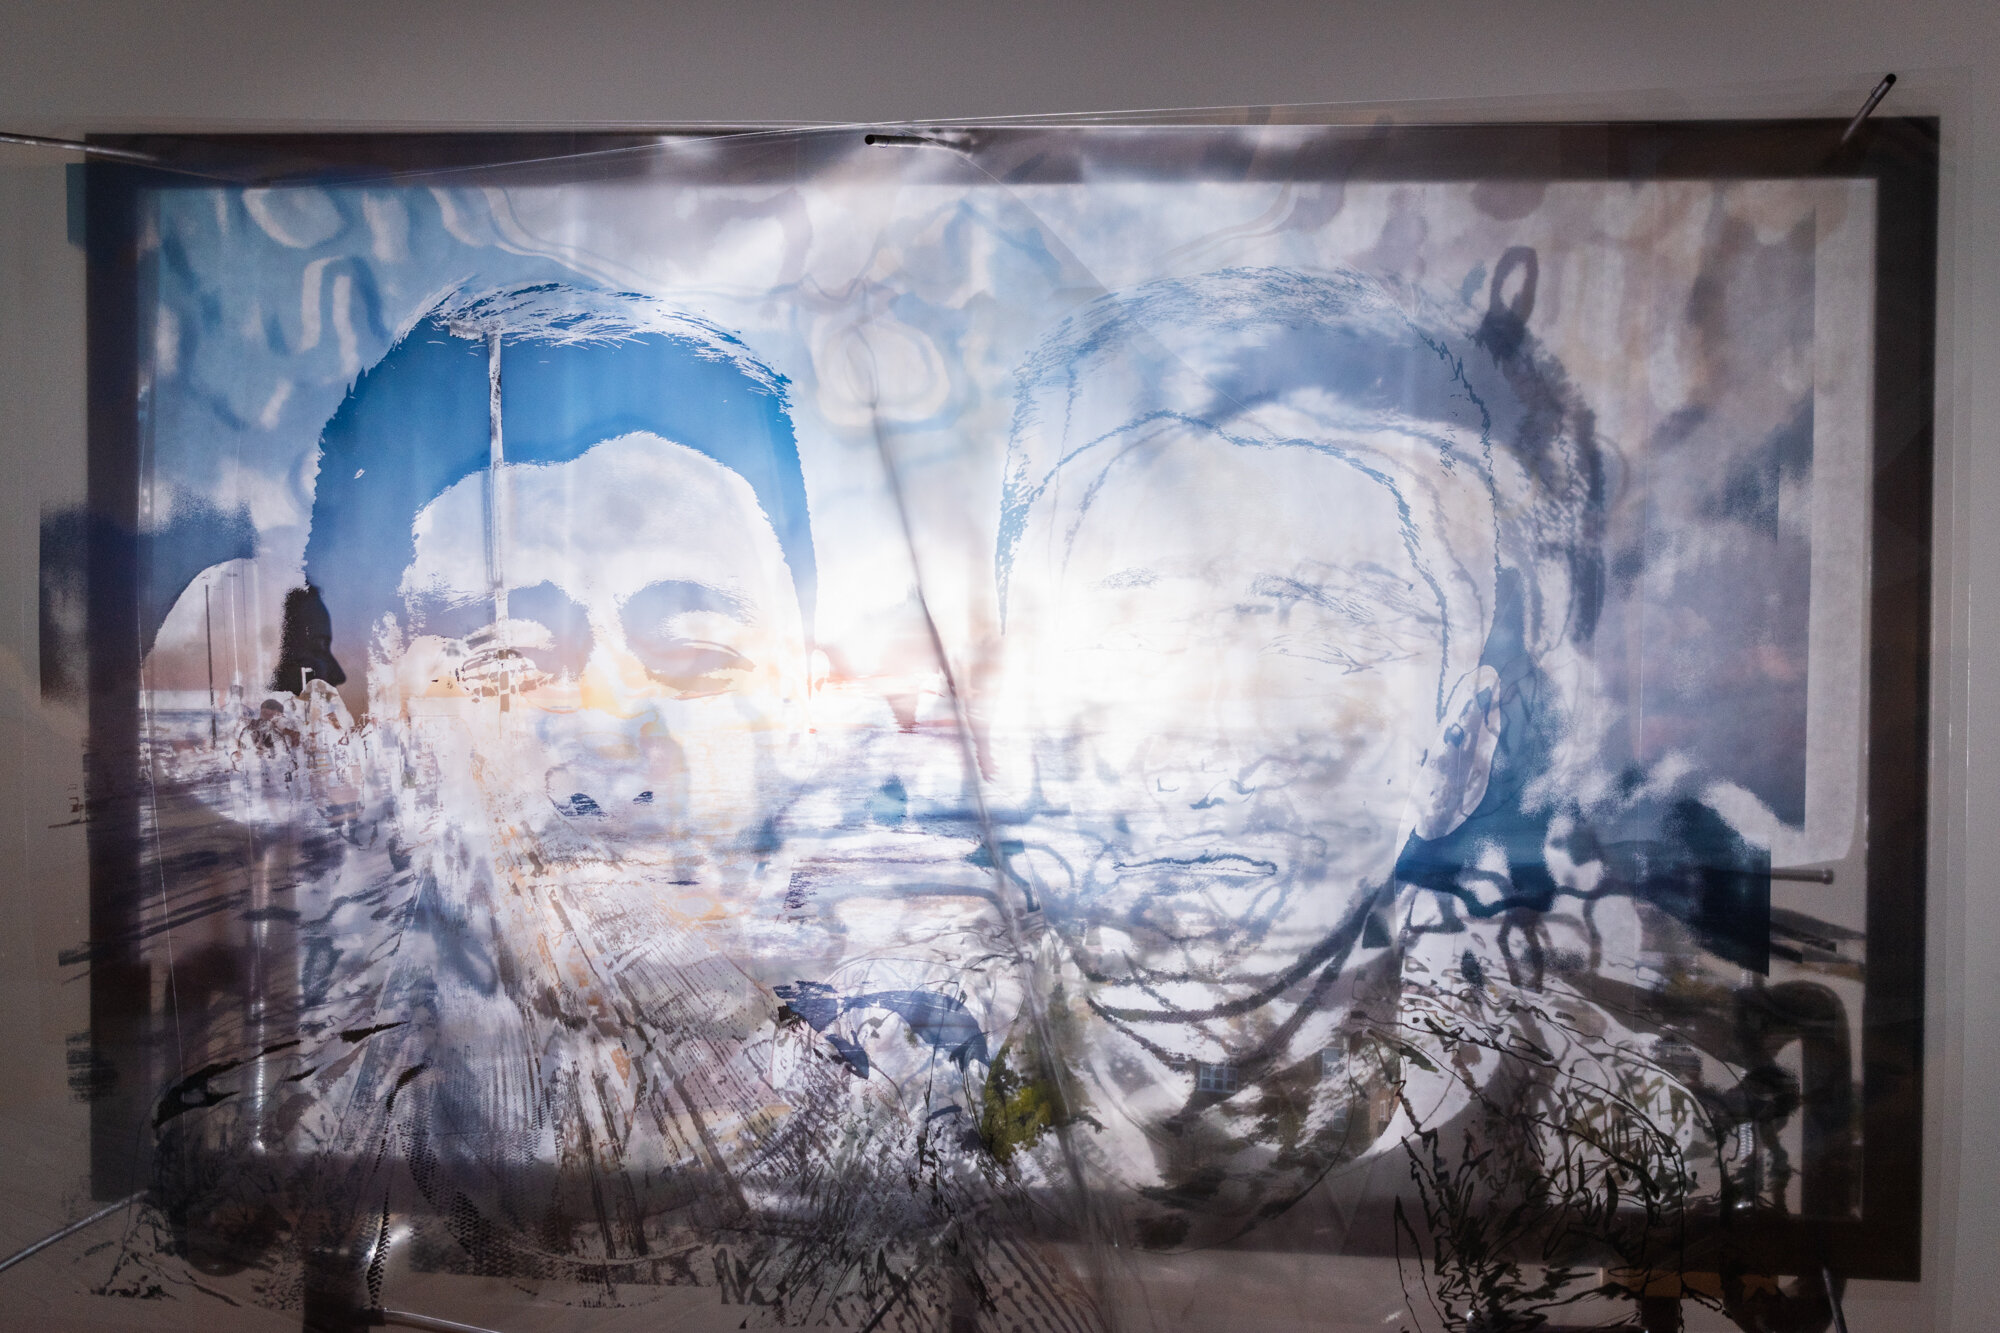
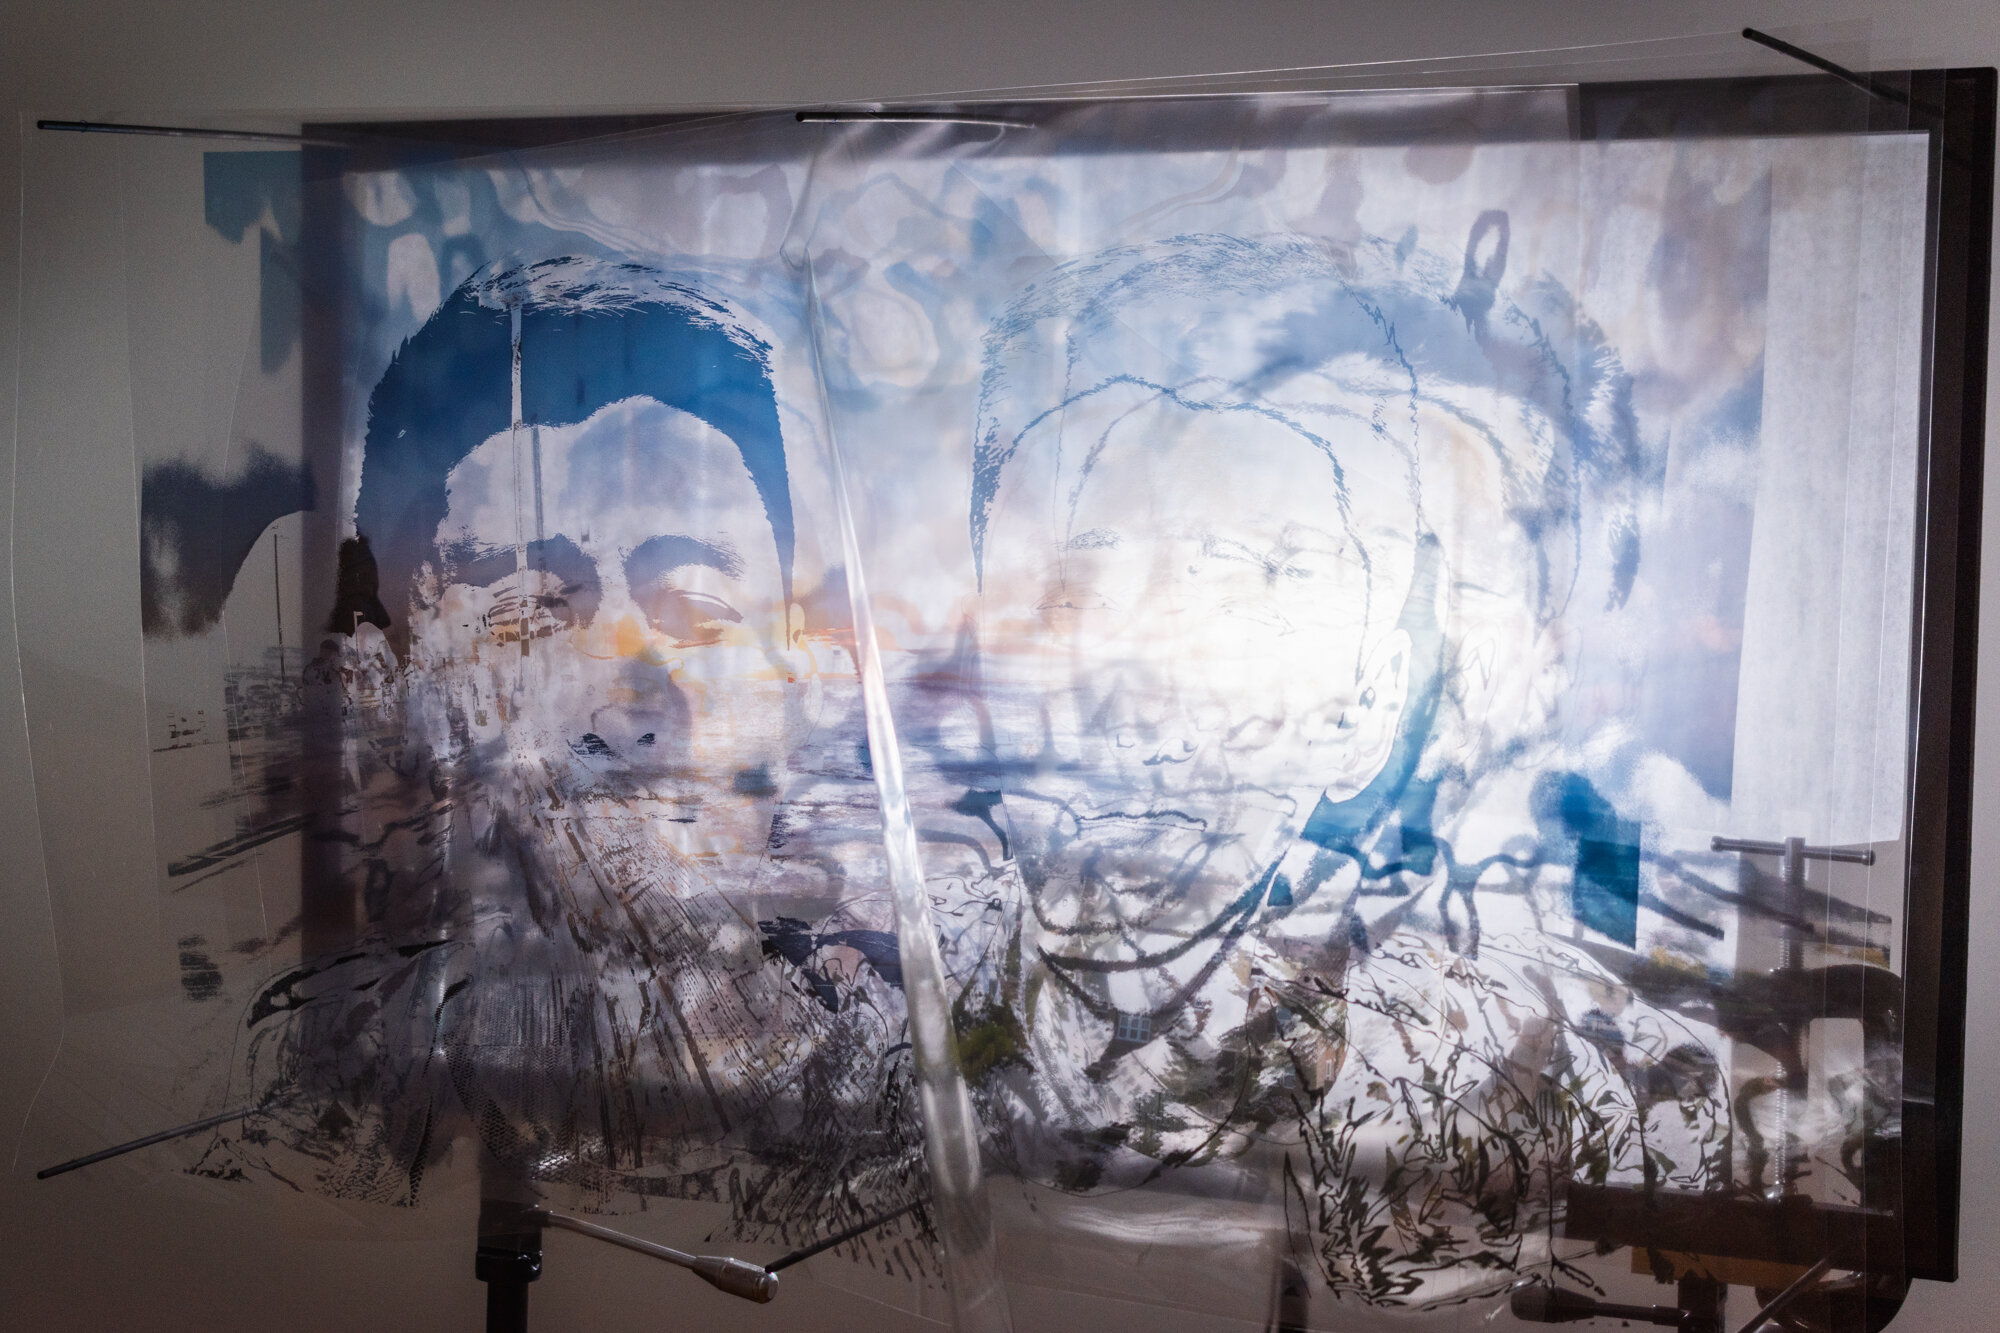
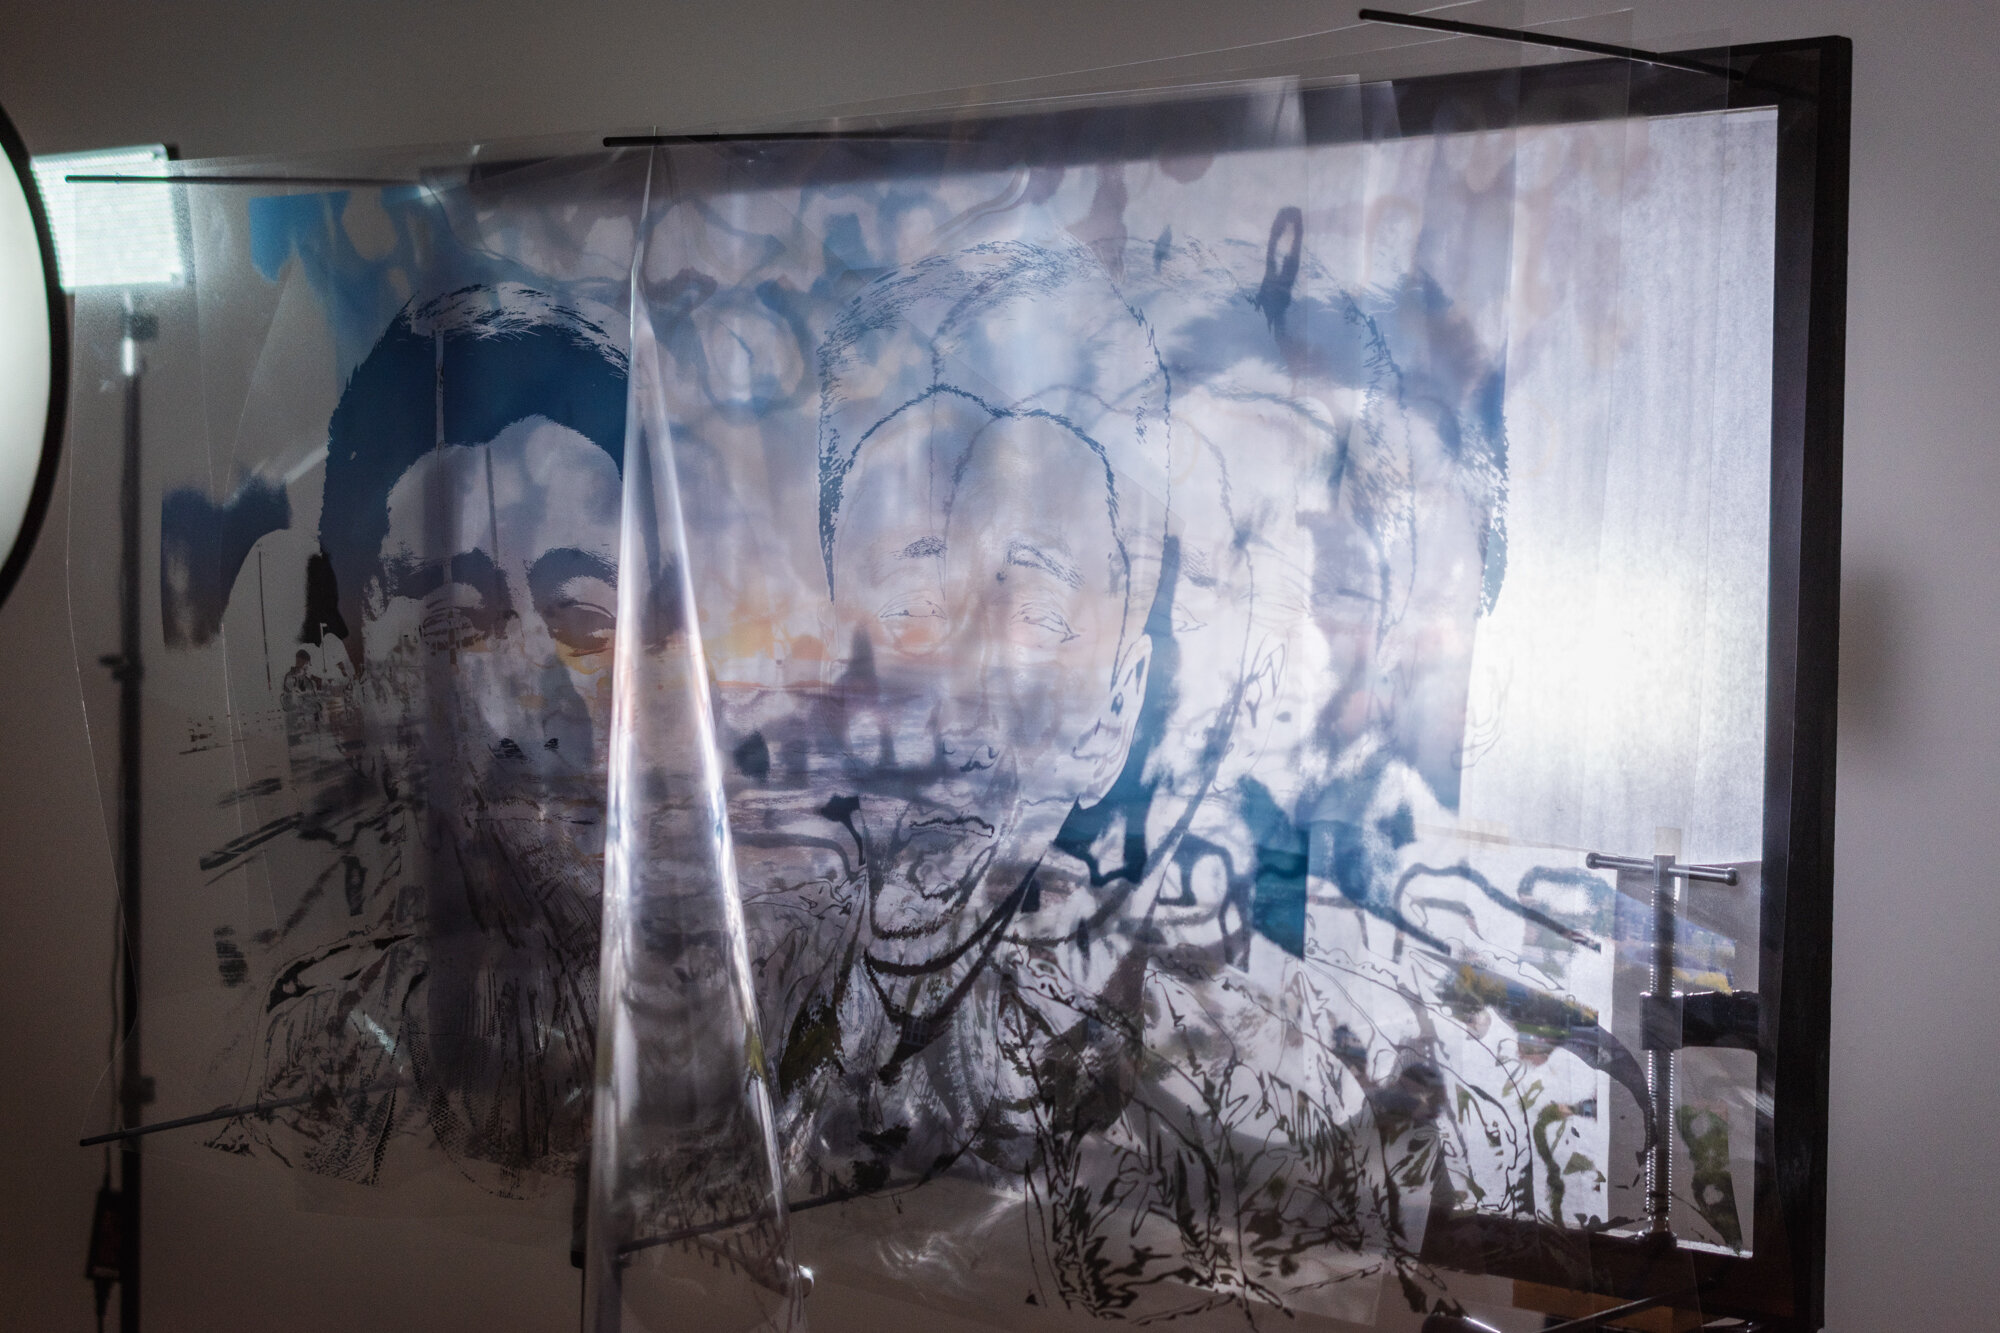
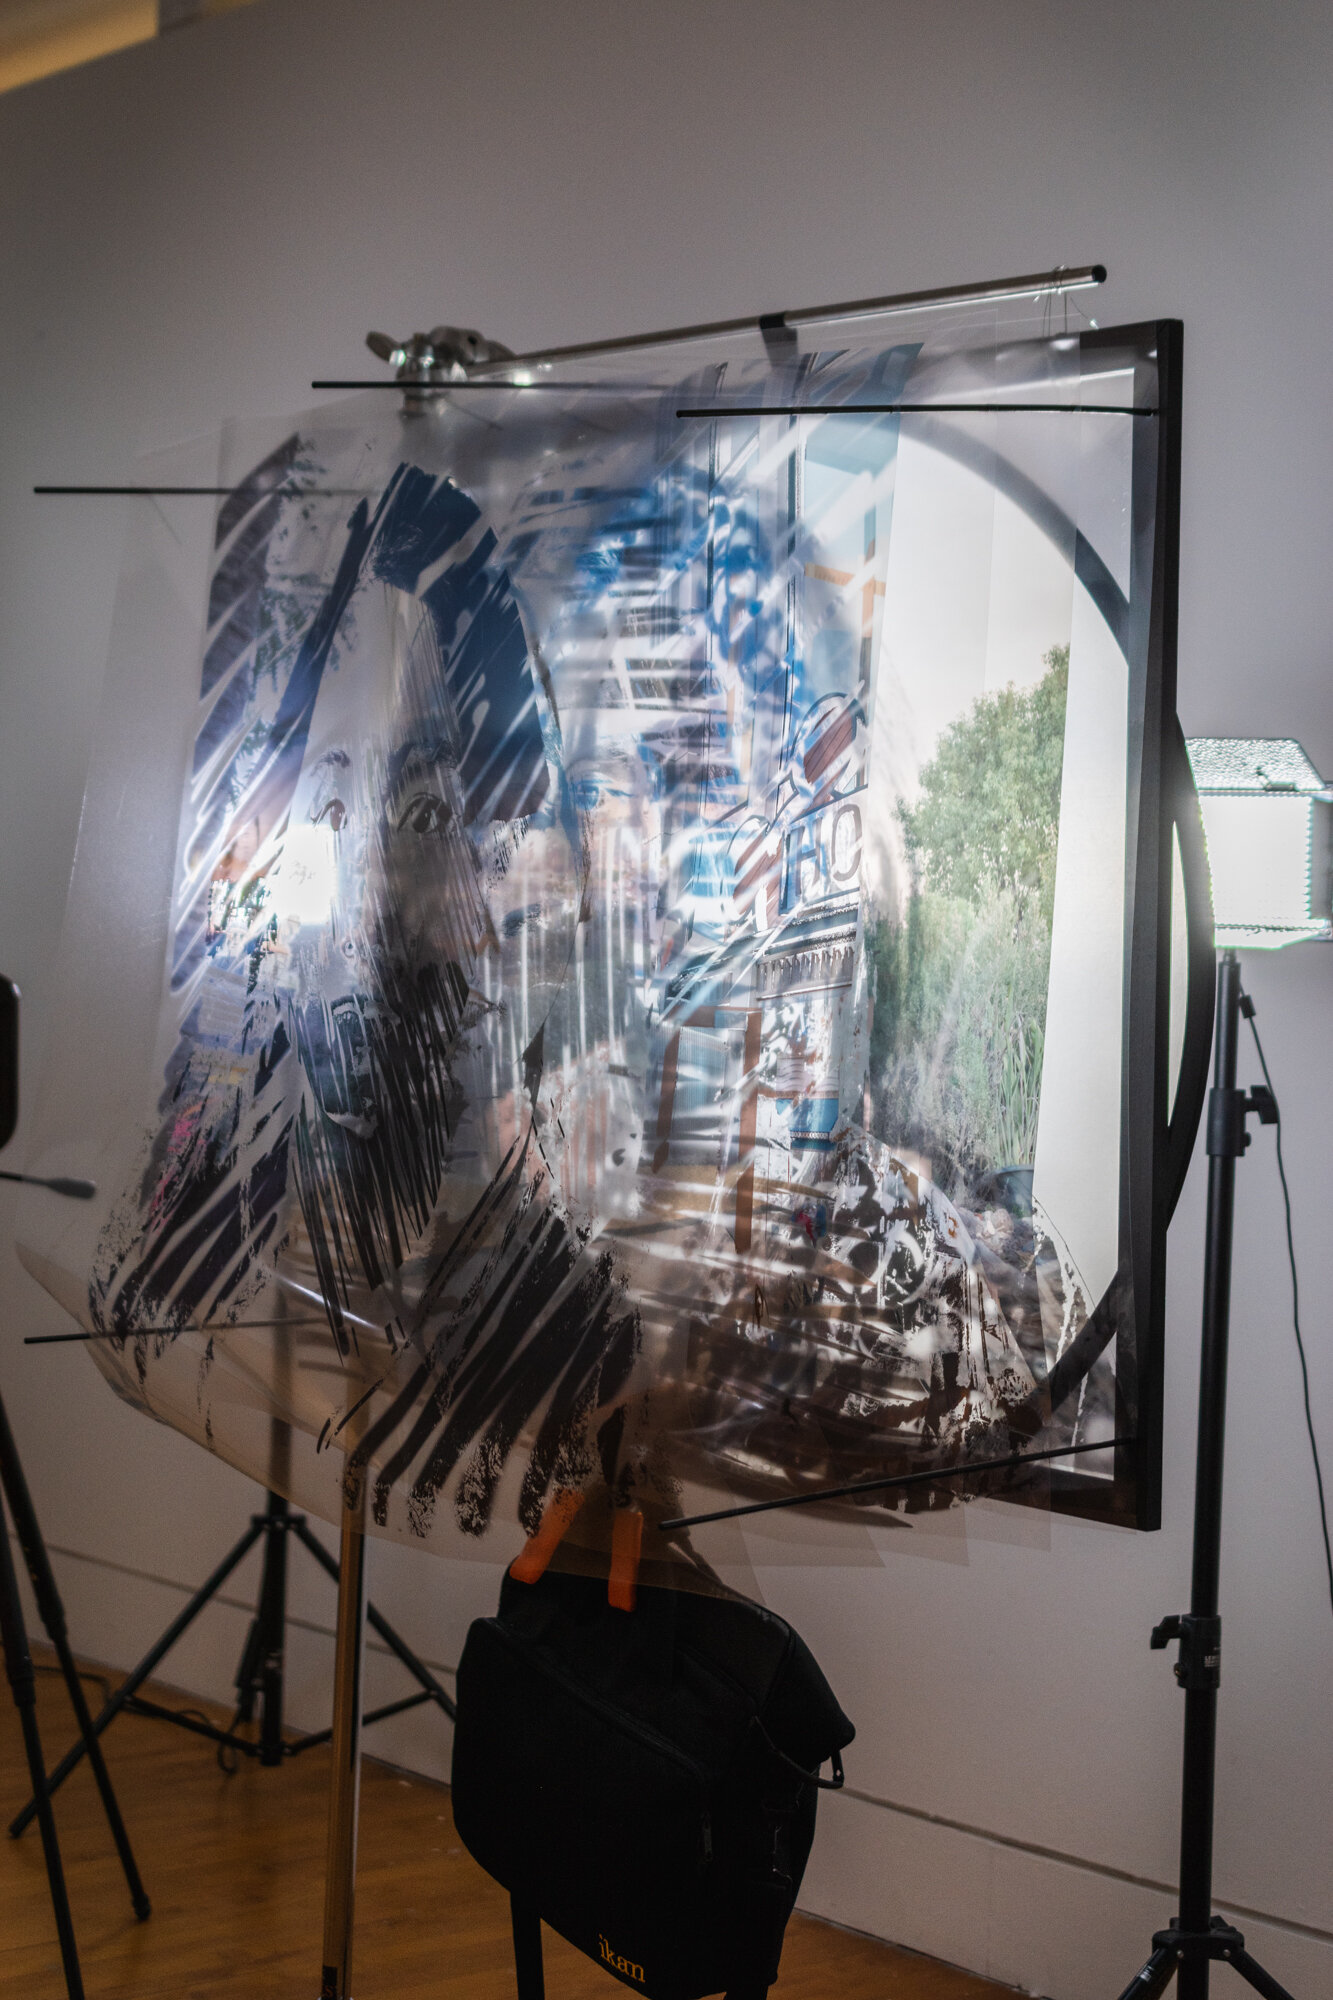
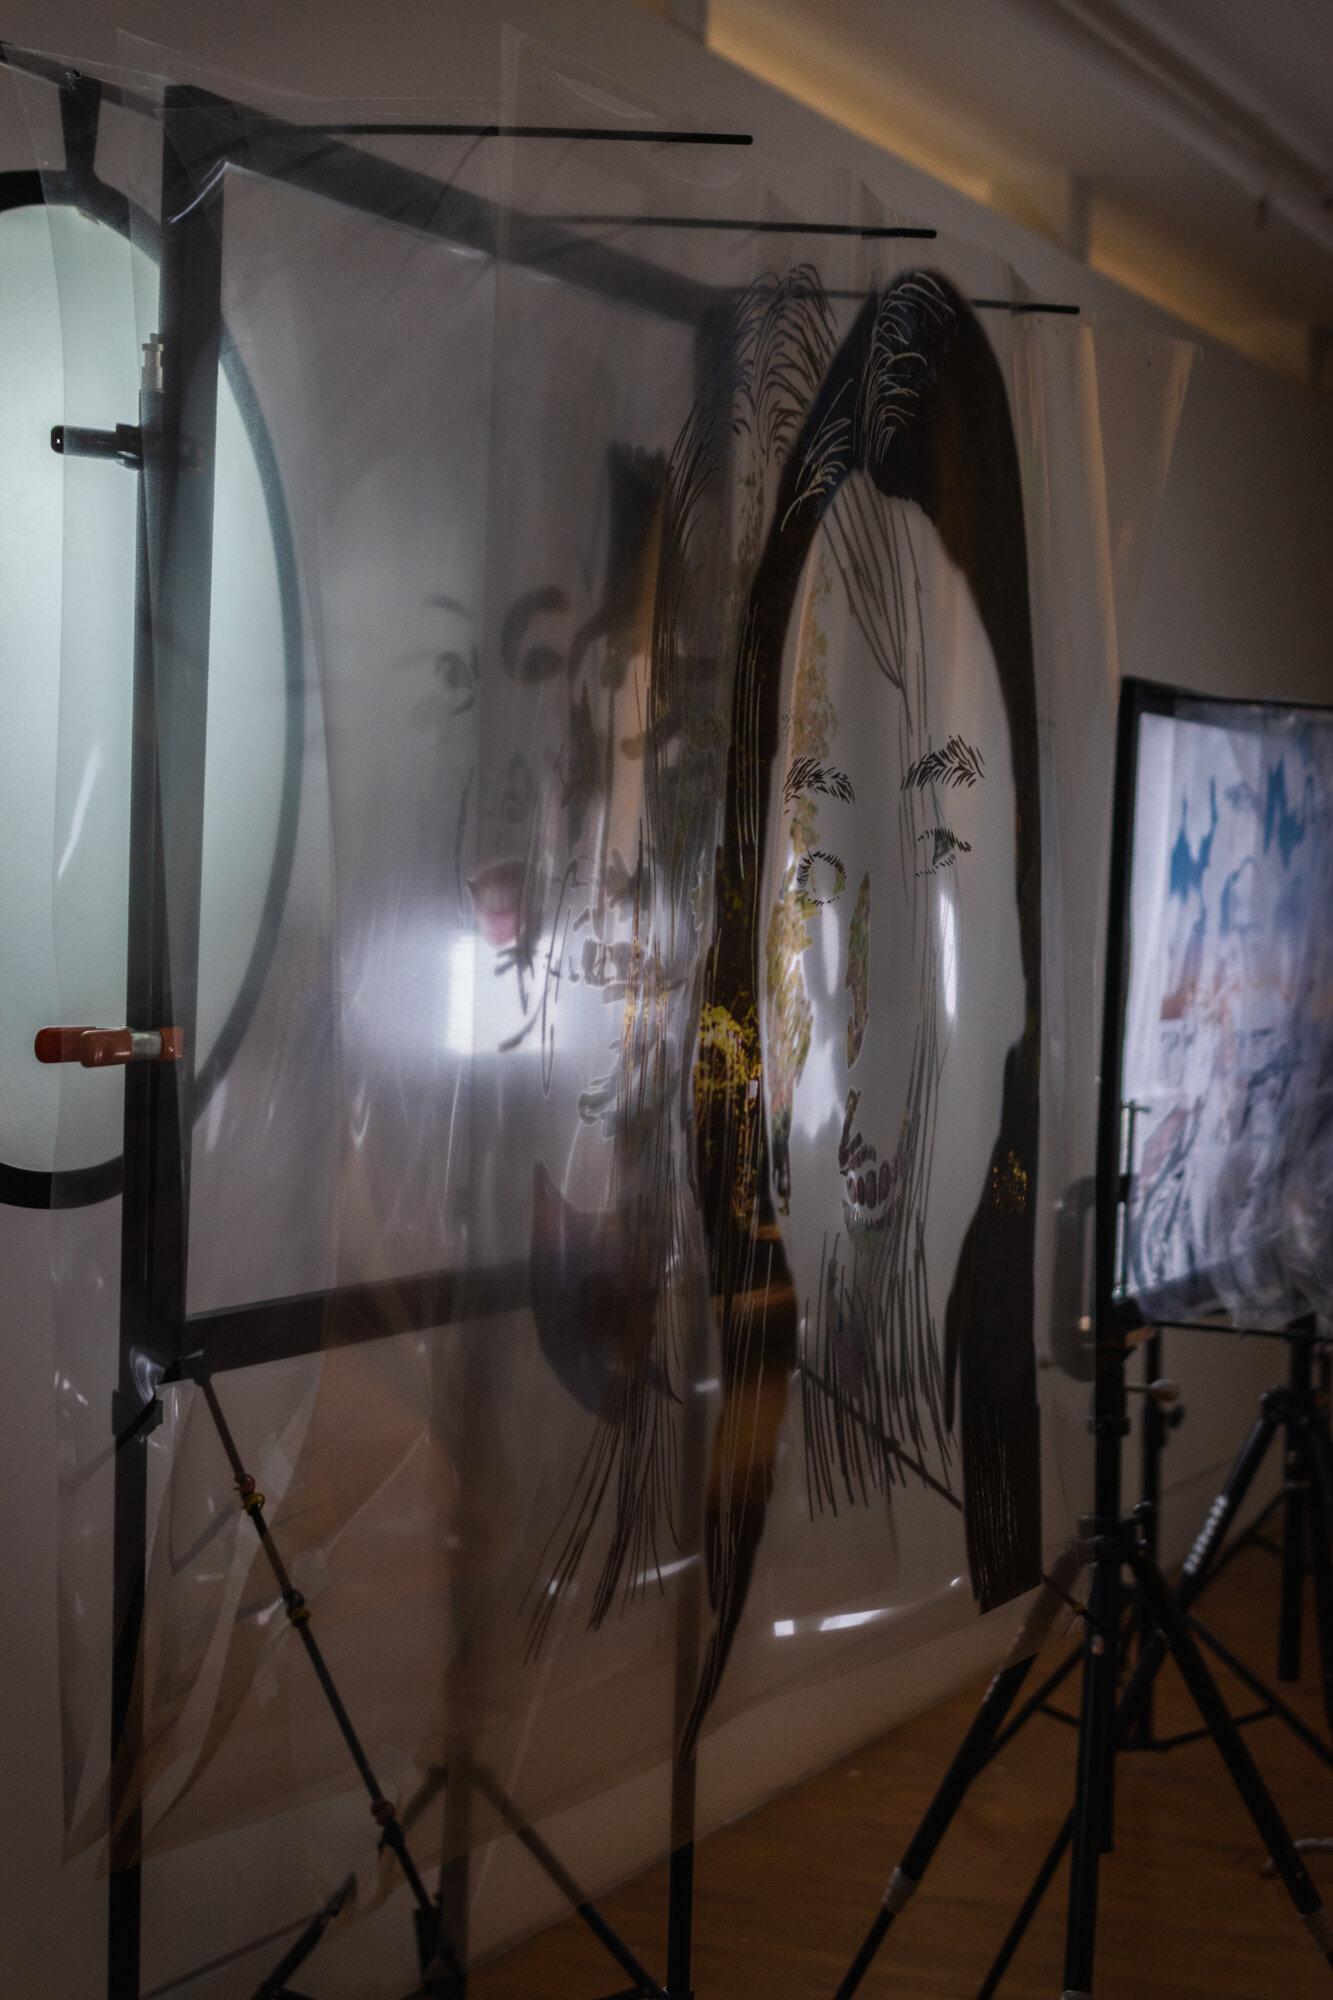
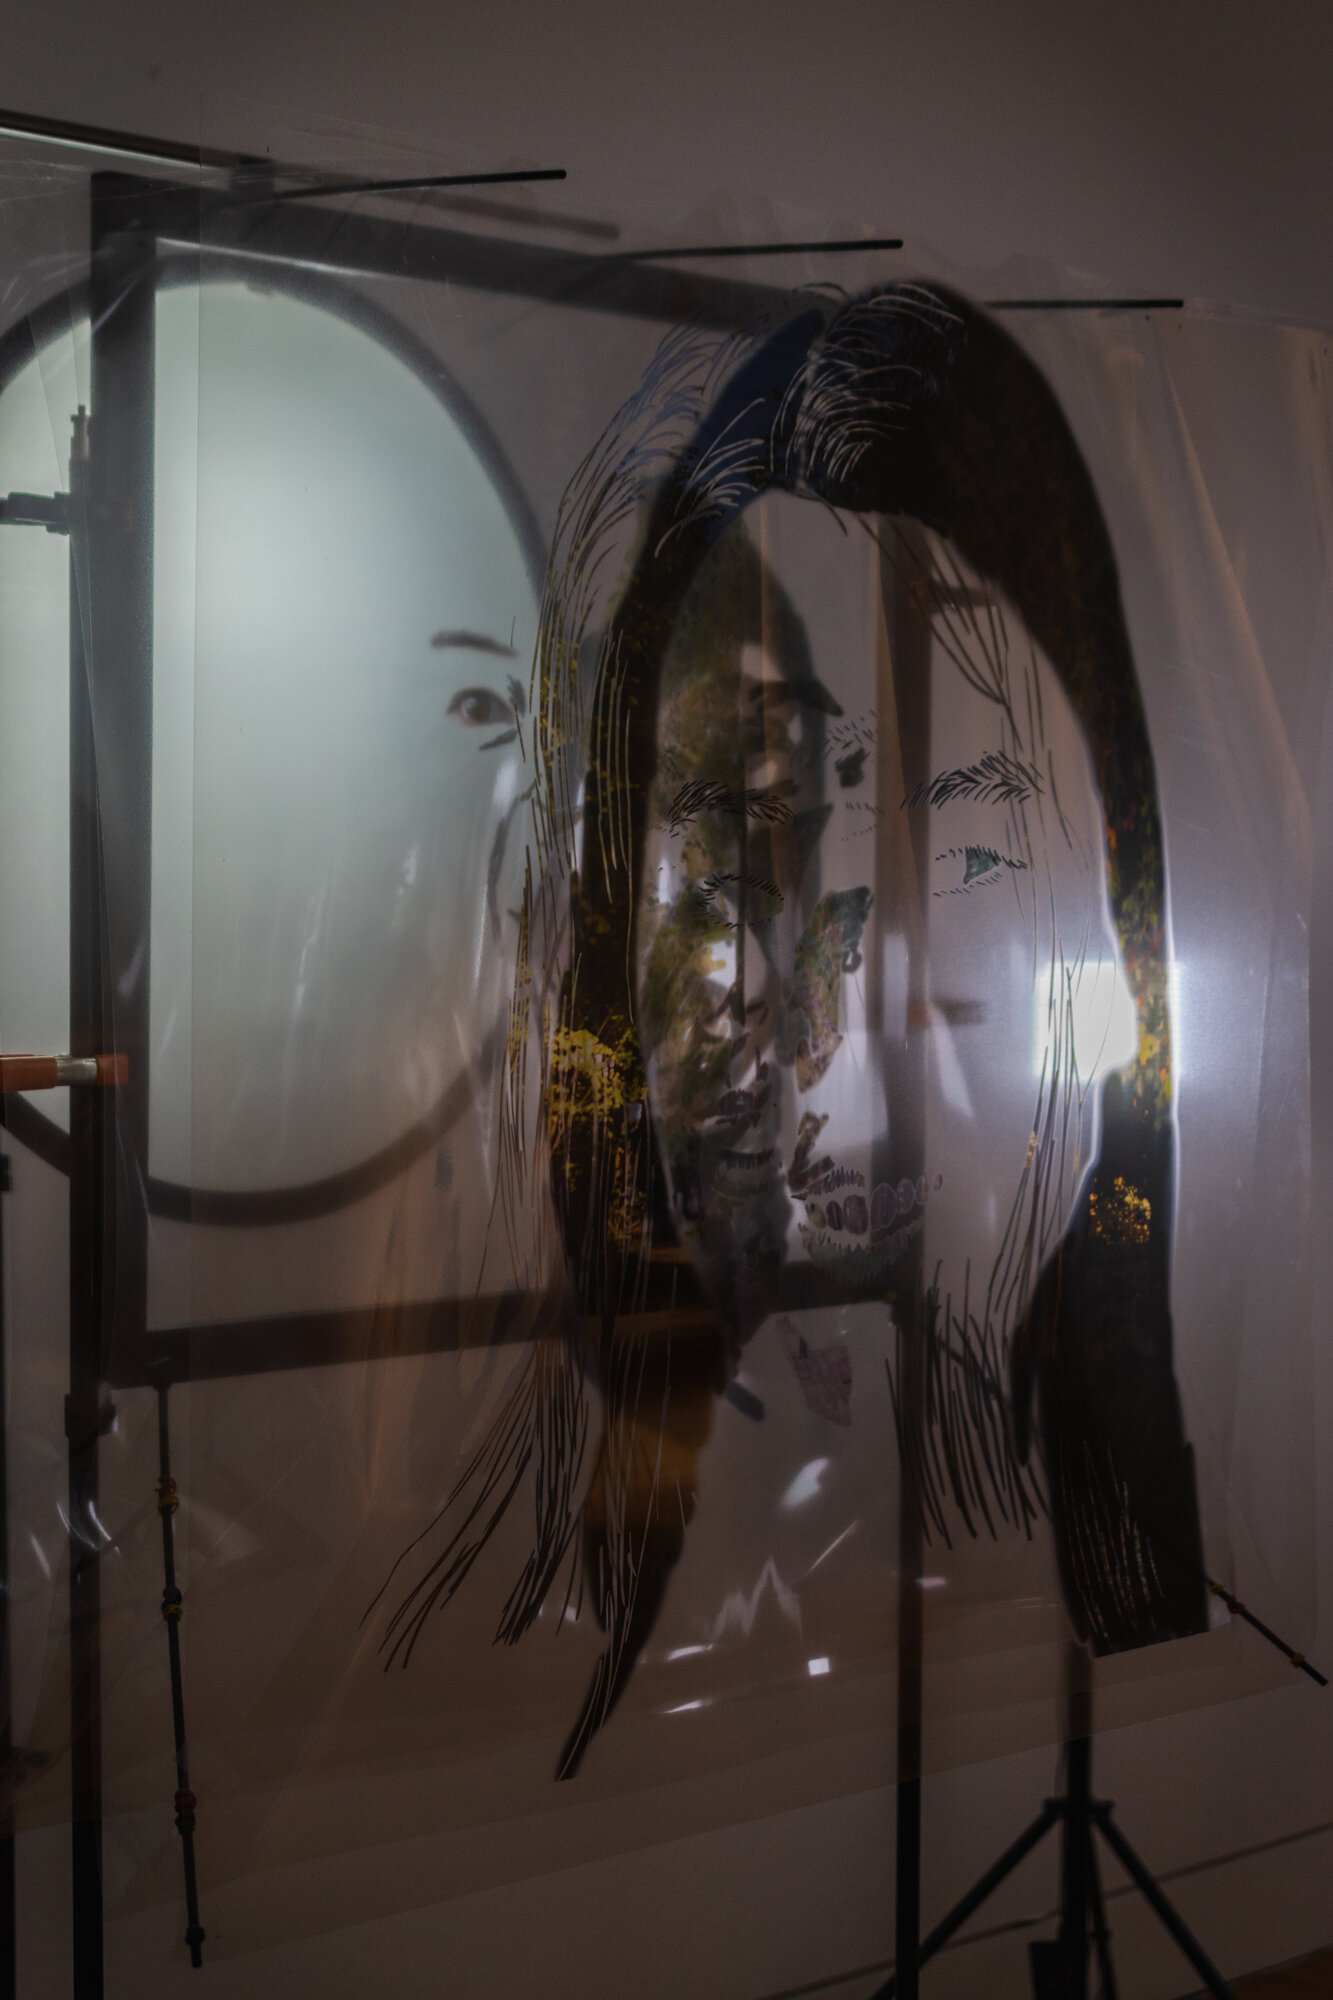
Jessica, 32’’ x 32’’ to 40’’ x 40’’, 6 transparent plastic prints, diffuser, 2 light stands, 4 clamps

Interviews:
I interviewed my friends in different ways before shooting their “portraits”. The gallery installation included a text-only video projection, a Virtual Reality headset, a pair of headphones, and an equirectangular video projection
listen
watch
behind the scenes
thoughts leading up to the show
My fascination with timelapses started when I got my first DSLR. I bought it to complete a final project for my writing seminar - Uses of Photography (or something like that) - and I wanted to make a compilation of timelapses in my hometown over winter break. Since then, I’ve played with different ways of portraying timelapses, mostly in still images.
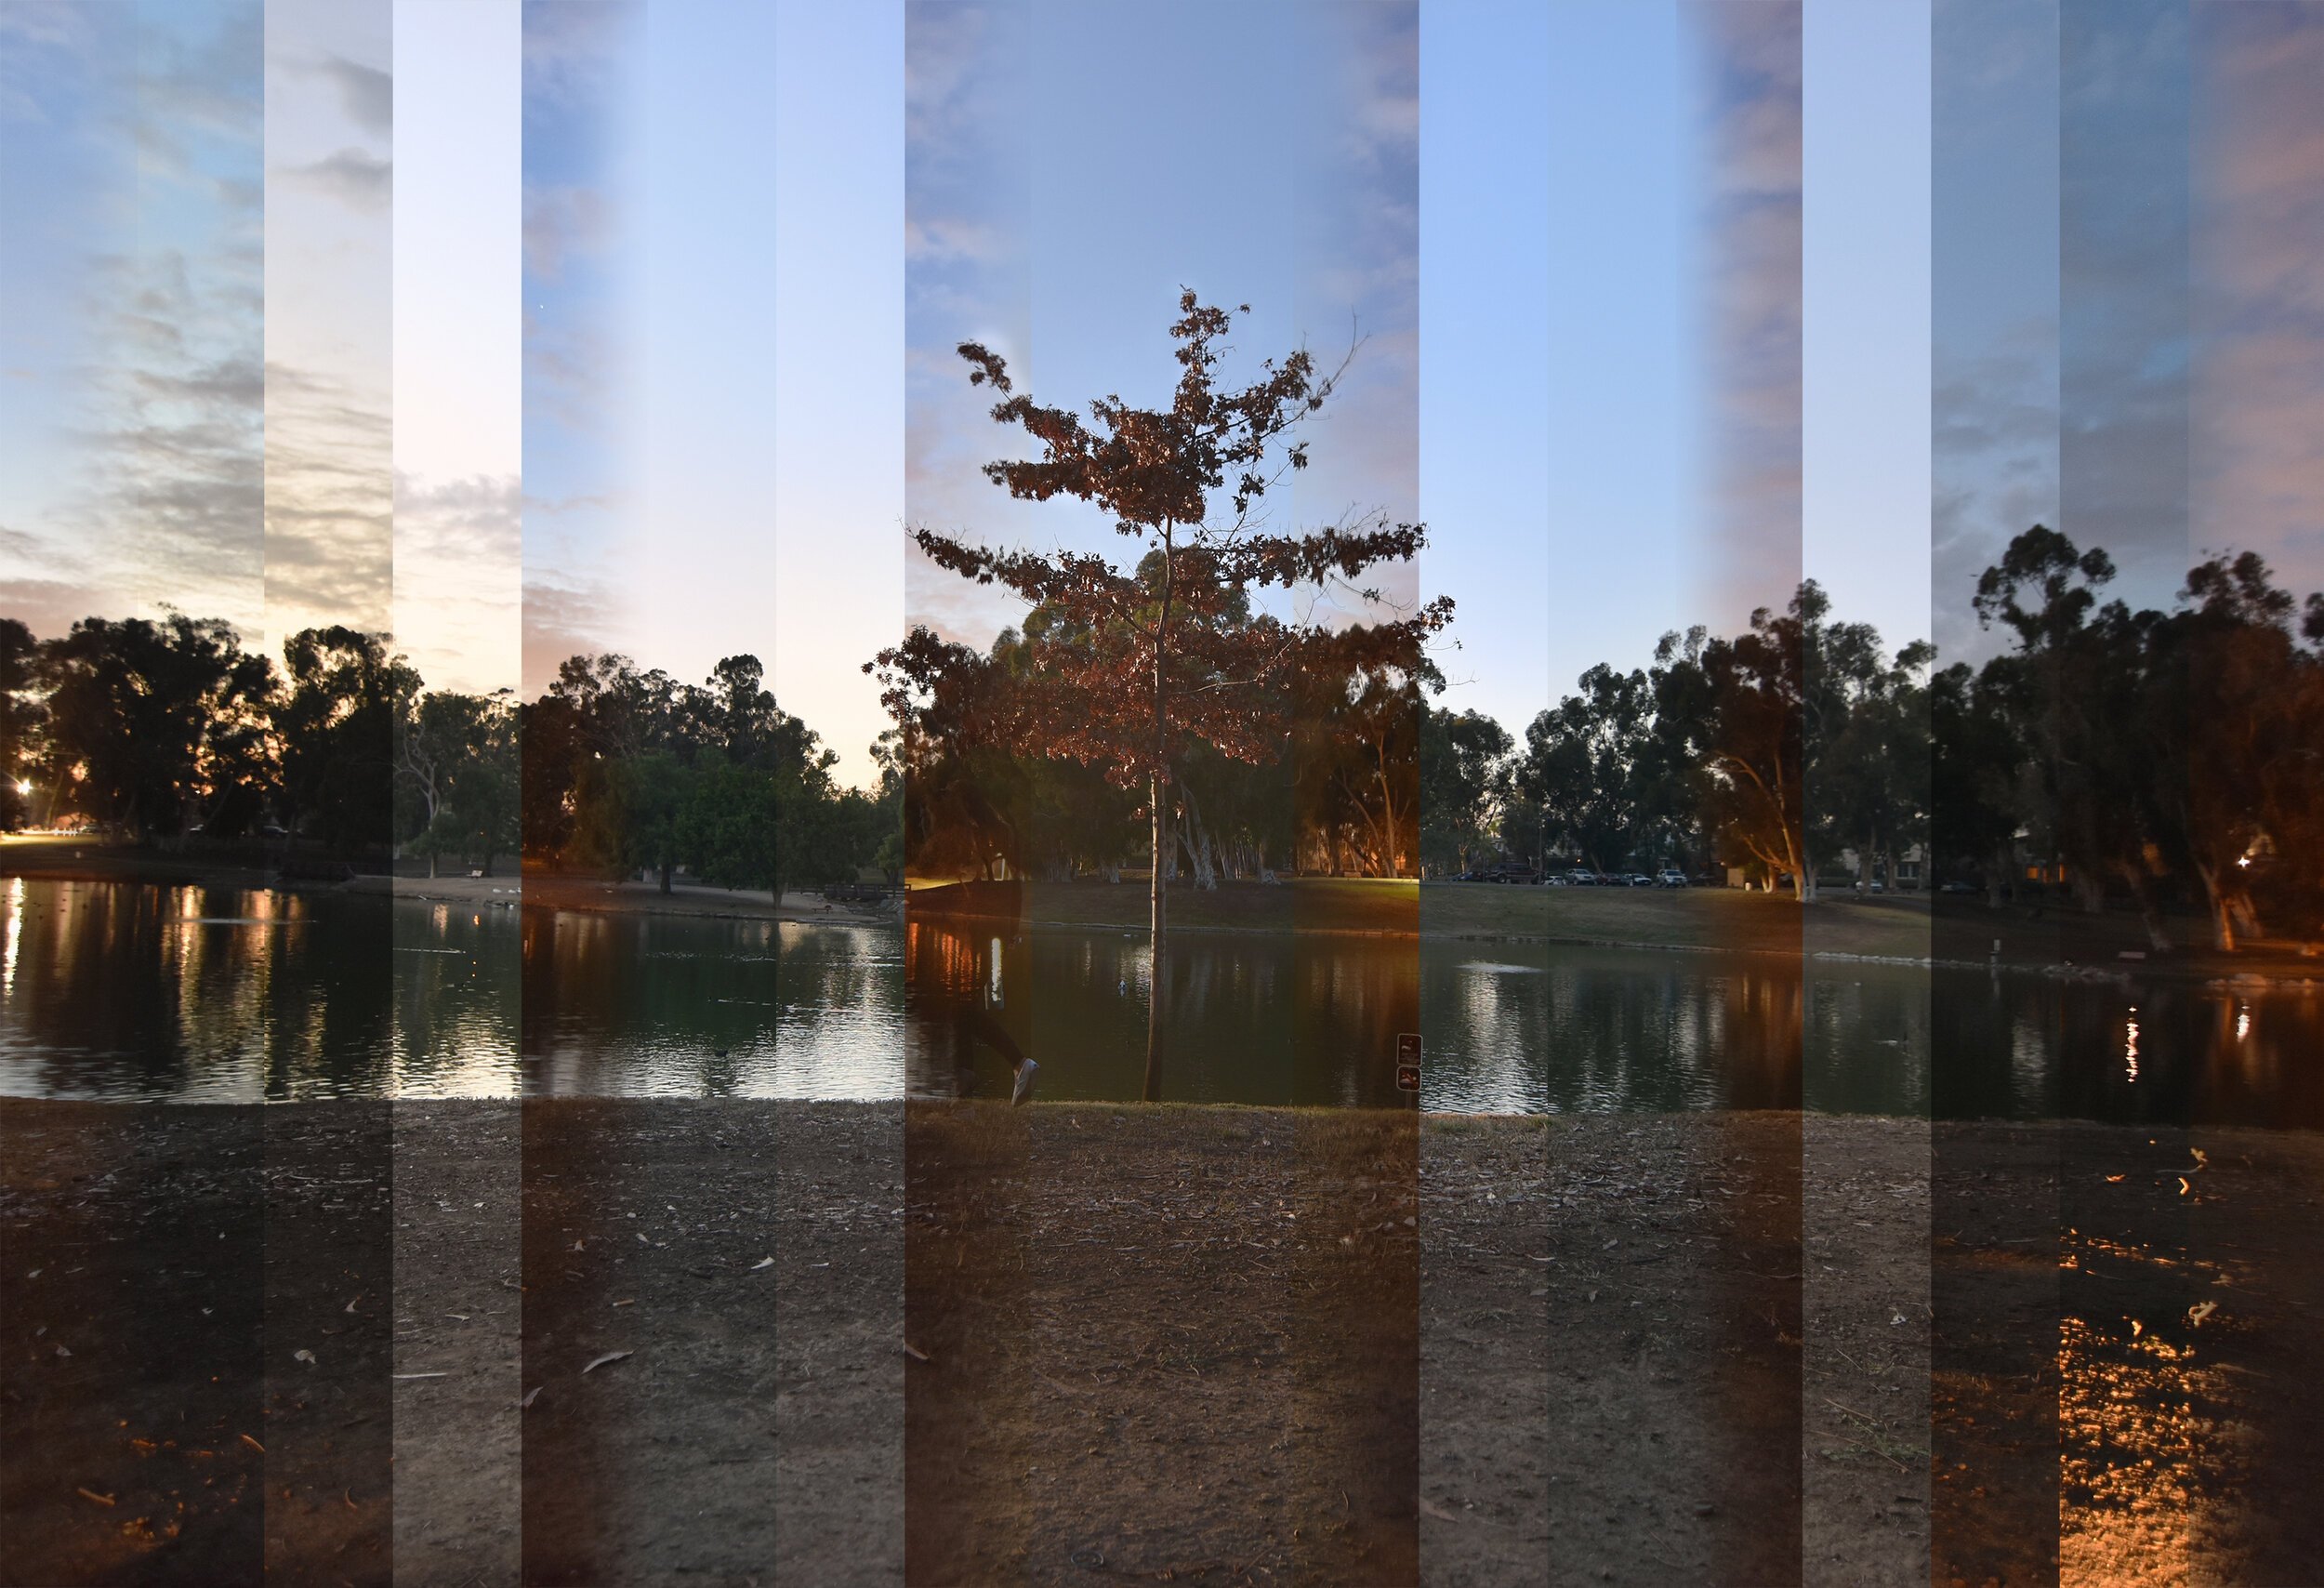

I wanted to continue my exploration of timelapses in this thesis. There’s something about timelapses that display the need for control in our lives. Manipulating time to our own will. I liked breaking this established photographic form in ways no one has done before. However, there was something that felt gimmicky about my previous timelapse work. They were aesthetically pleasing, sure, but they don’t seem to offer much outside of that (like an Instagram post). I now had the tools and method honed down, I just had to figure out what to build with them.
portraits
First portrait timelapse collage
Removing the original background for a flat color
Individual layers separated
The transition to portraiture was natural to me. It’s a form of photography I’ve grown to love. People tell stories in ways landscapes can’t. My painting background and access to a drawing tablet made it easy to paint the timelapse photographs over portraits in Photoshop.
All images shown so far in the bts were all done by hand. Instead of automating the process, I painstakingly drew borders and created individual frames in Photoshop. For the past three years I’ve kept a strong policy on keeping my code and art separate. I know there’s an endless possibility that code brings into the art - I’ve seen plenty of artists prove that. But I guess for me, it felt like cheating, at least for the purposes I wanted to use it for. I believed that there was something "right”, pure about doing painstaking things. It introduces imperfections which I think are beautiful. And I still believe in that, but now I don’t think automation doesn’t necessarily detract from a piece either. They’re different, apples and oranges, one’s not worse than the other. Once I injected code to my work just a few months before the show, I realized how many permutations and experiments I can carry out in minutes, driving me to make more work. “Why didn’t I do this earlier?”
In the end, I decided on using computer generated images for half of the portraits, and hand-painted ones for the other half.


If you want to learn about the technical aspect of the code, click here: https://github.com/junehosoft/self_portrait_timelapse
separating the layers physically
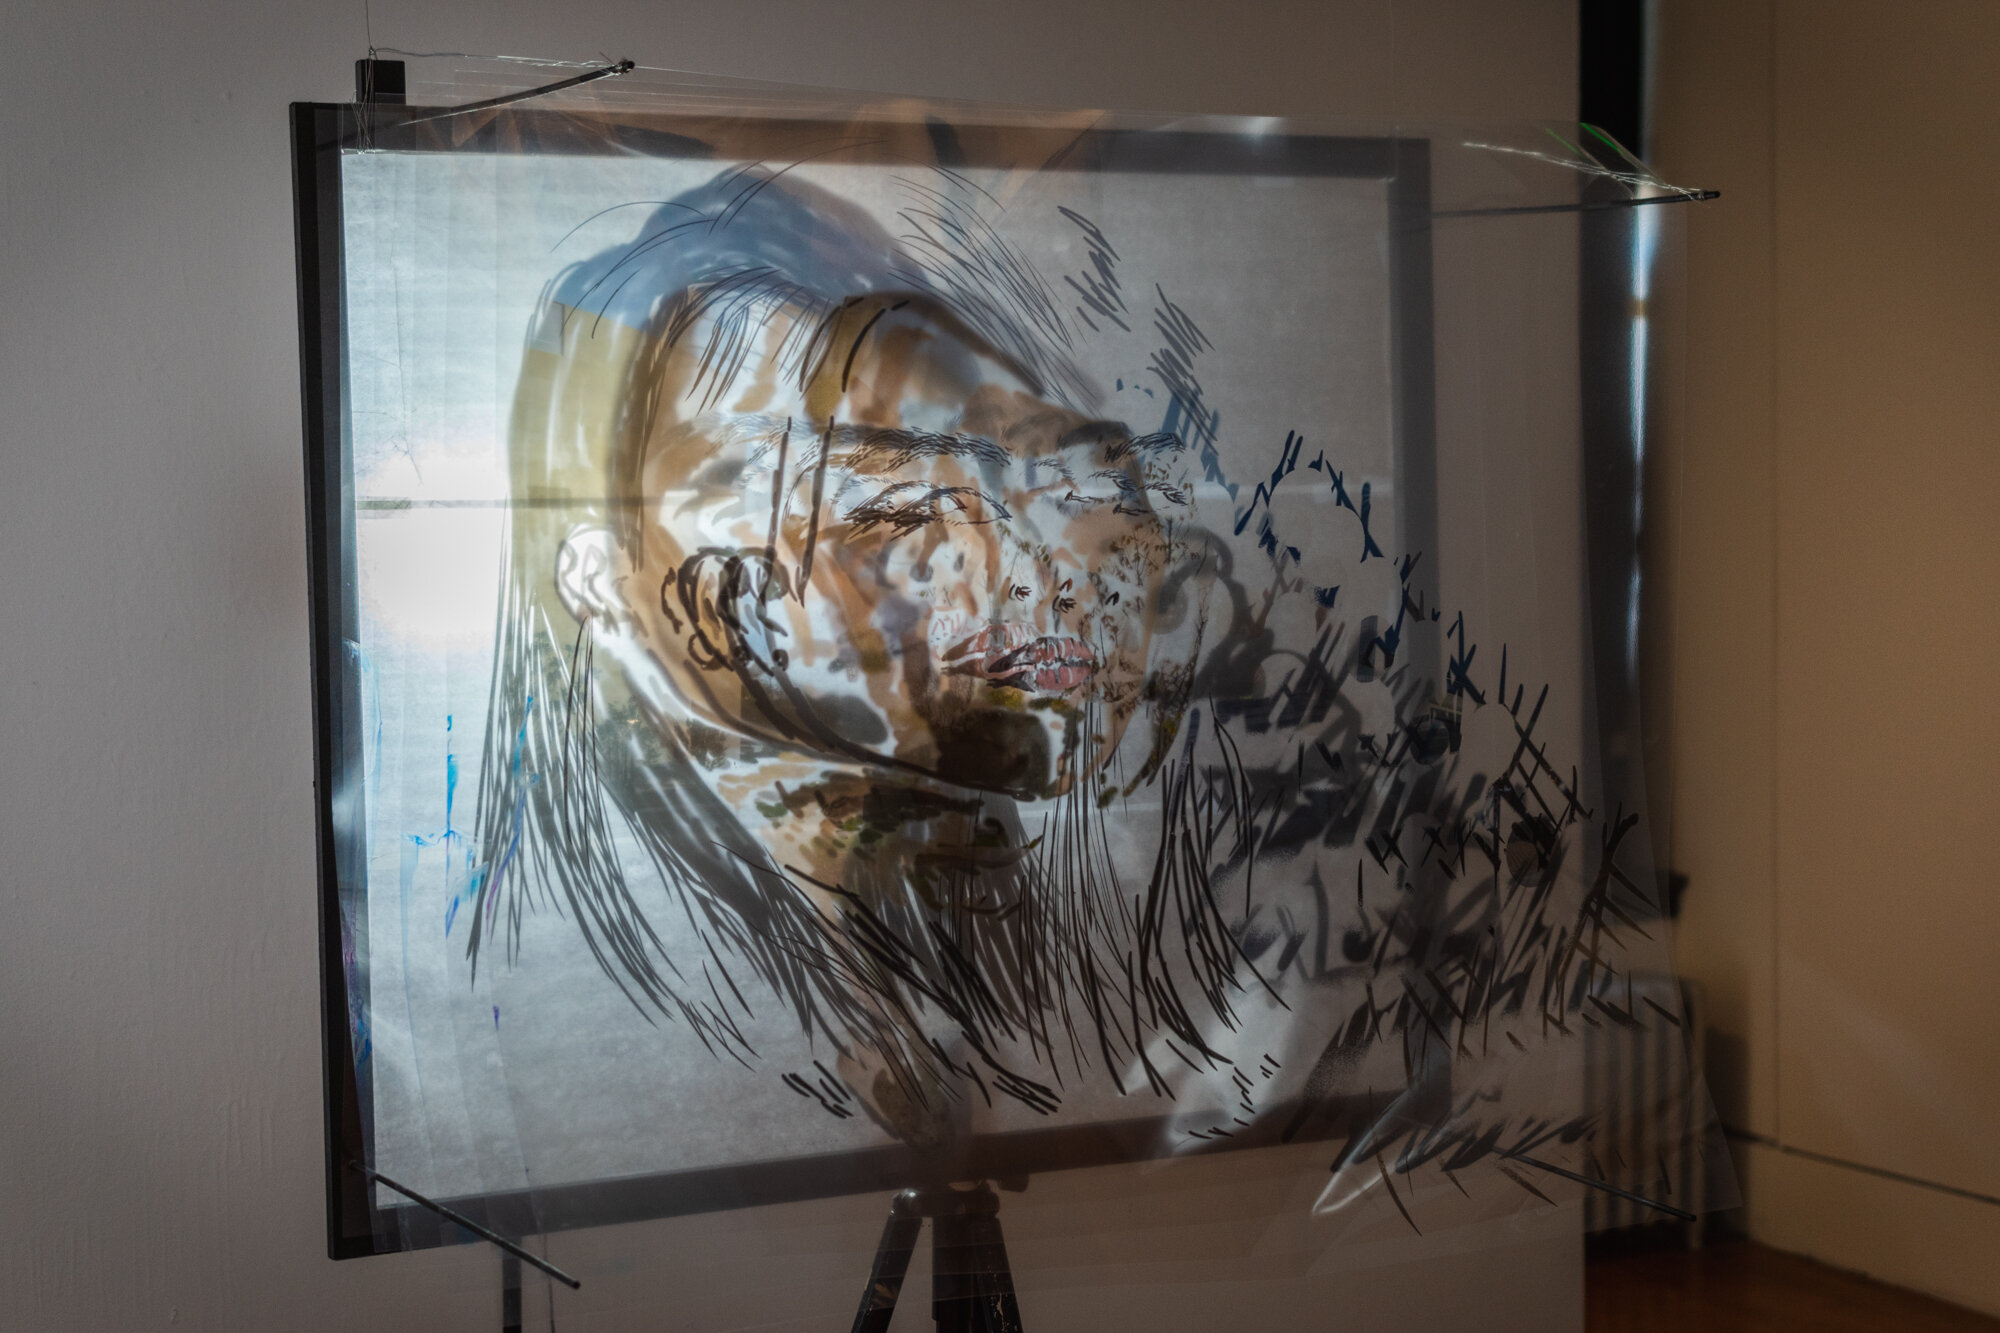
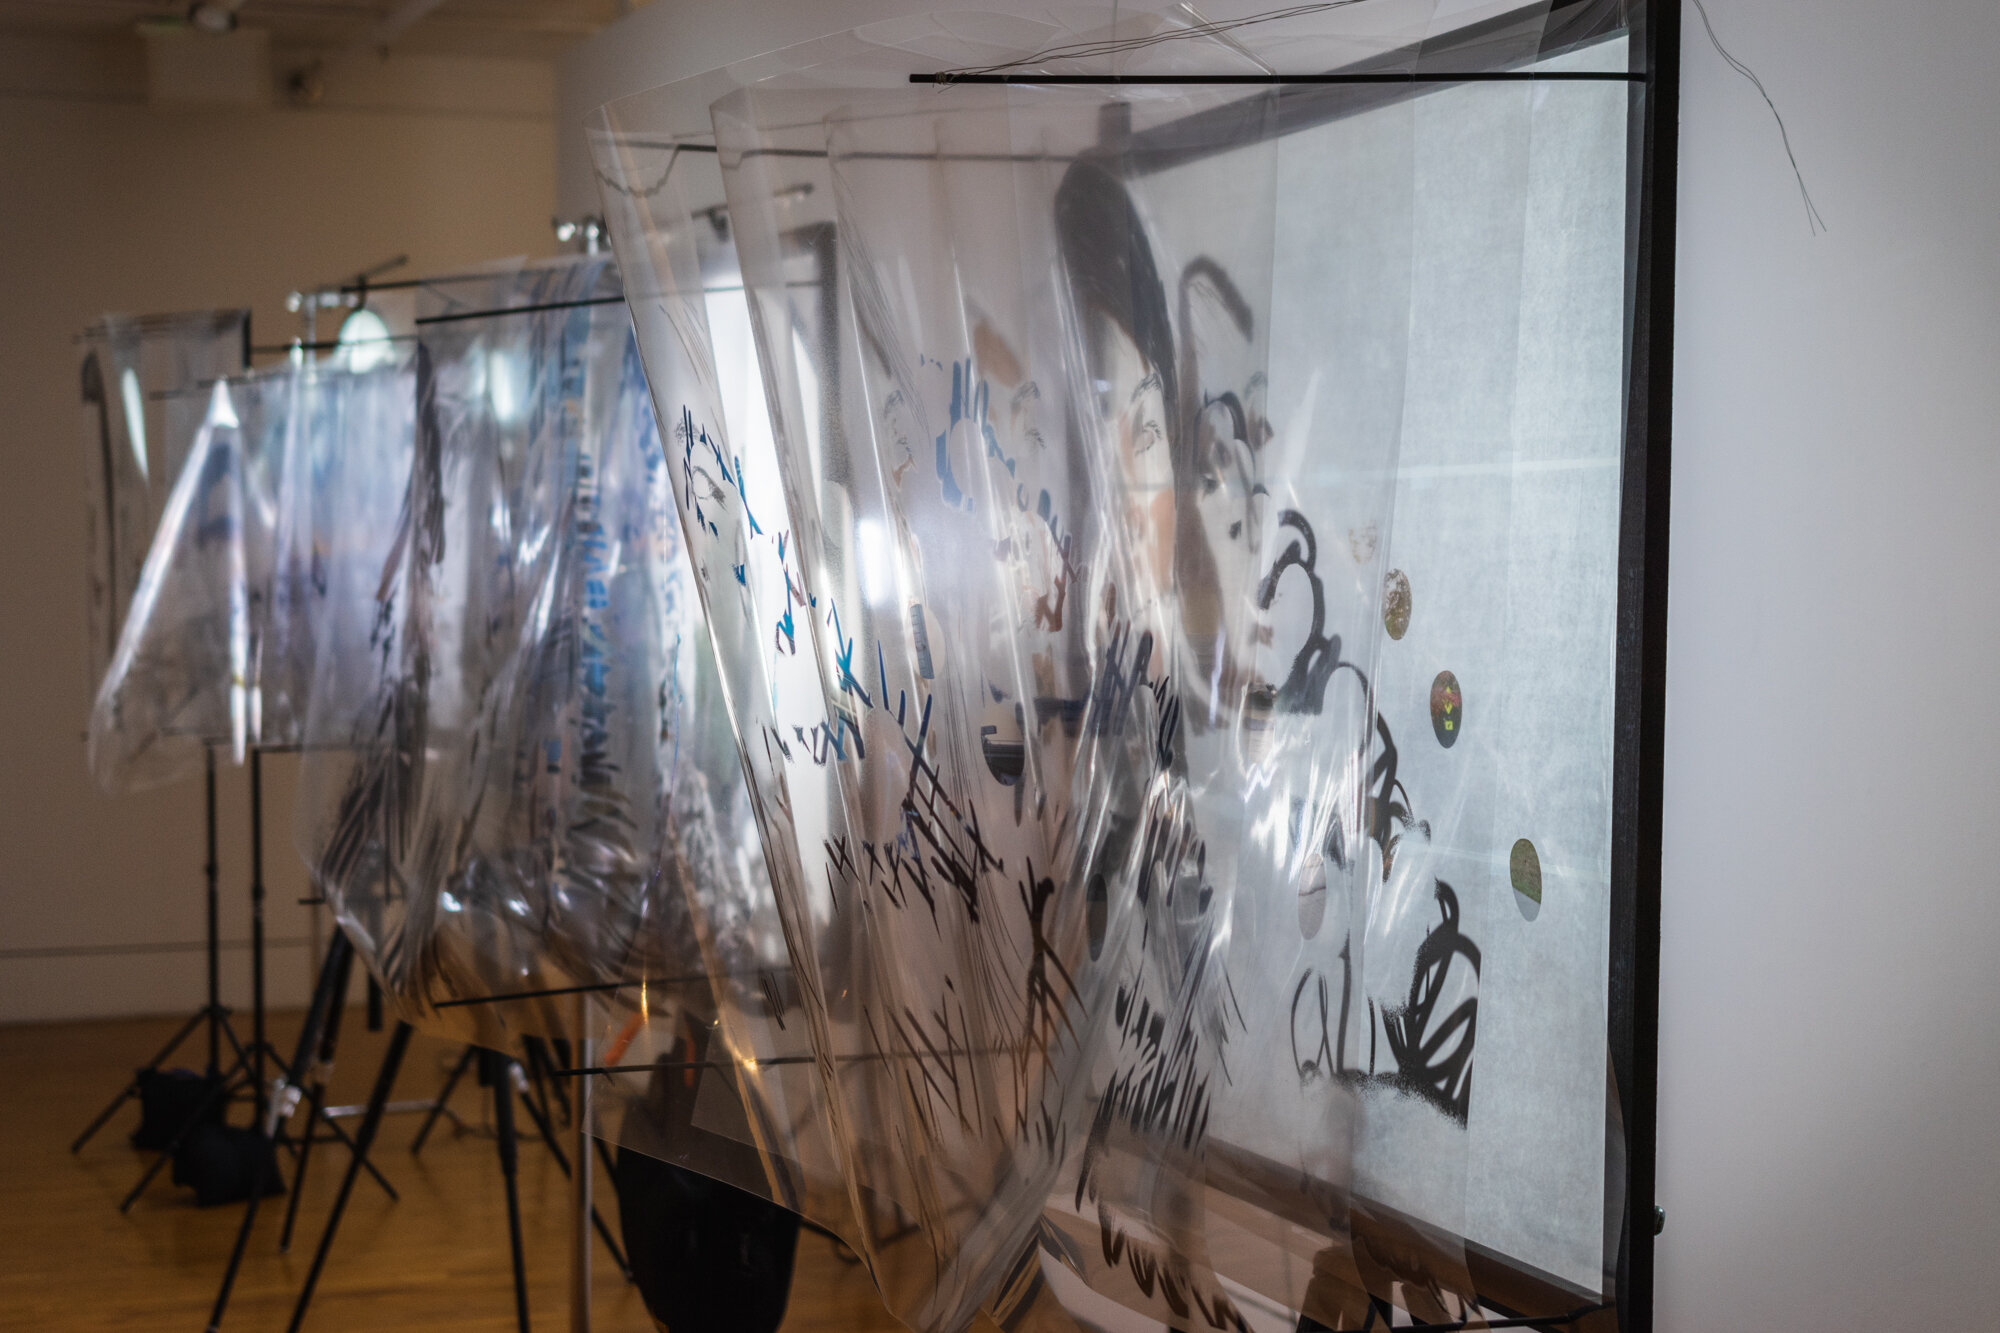
This painting of photographs on a digital flat surface wasn’t enough for me. It still felt like a gimmick. It halts once the viewer realizes there’s a person in the photo. Once I realized that I can print photos on a transparent material, I wanted to take the digital layers in Photoshop and separate them in the real world. This would add a new spatial aspect to timelapses.
I built the frames in a similar way I would make a canvas stretcher. The only modification I made was to drill holes and glue dowels that the prints would hang off of. I meticulously calculated the angle of holes I had to drill and spent so much time drilling them as precisely as possible. In hindsight, due to the flexibility of my prints and wood in general, I really didn’t need to do this.
Punching holes into my prints was a painstaking process. I had to carefully measure out where the holes needed to be placed and had to make sure all prints were aligned properly. What I didn’t anticipate was the sheer weight of the prints. The miniature I tested on before didn’t have this problem. The thin dowels the prints were hanging off of would bend due to the weight of the prints. Later I would resolve this by either using more dowels or using wires to keep the dowels straight.
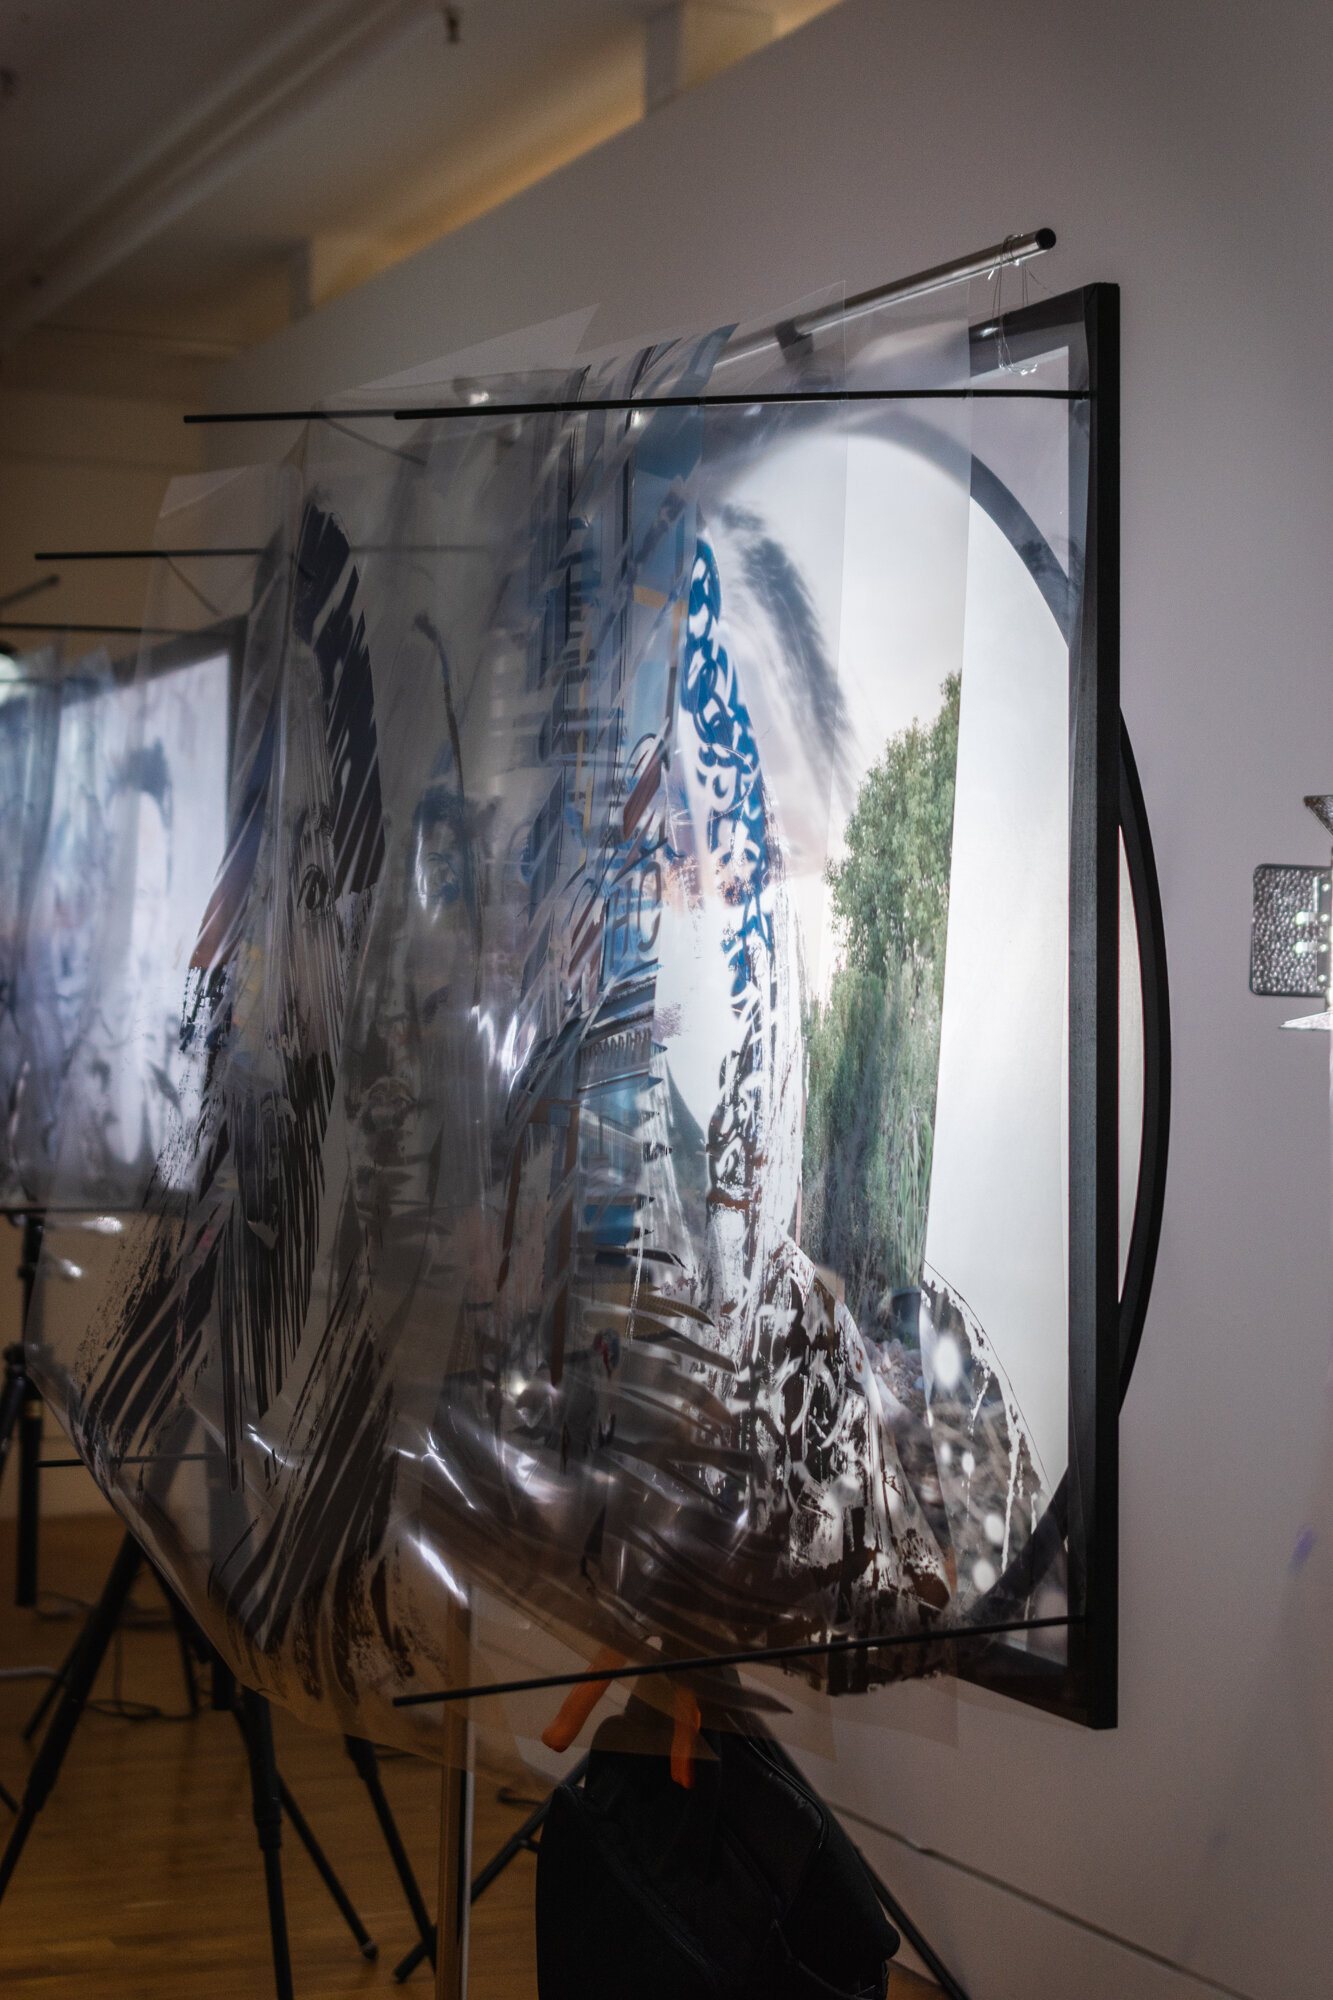
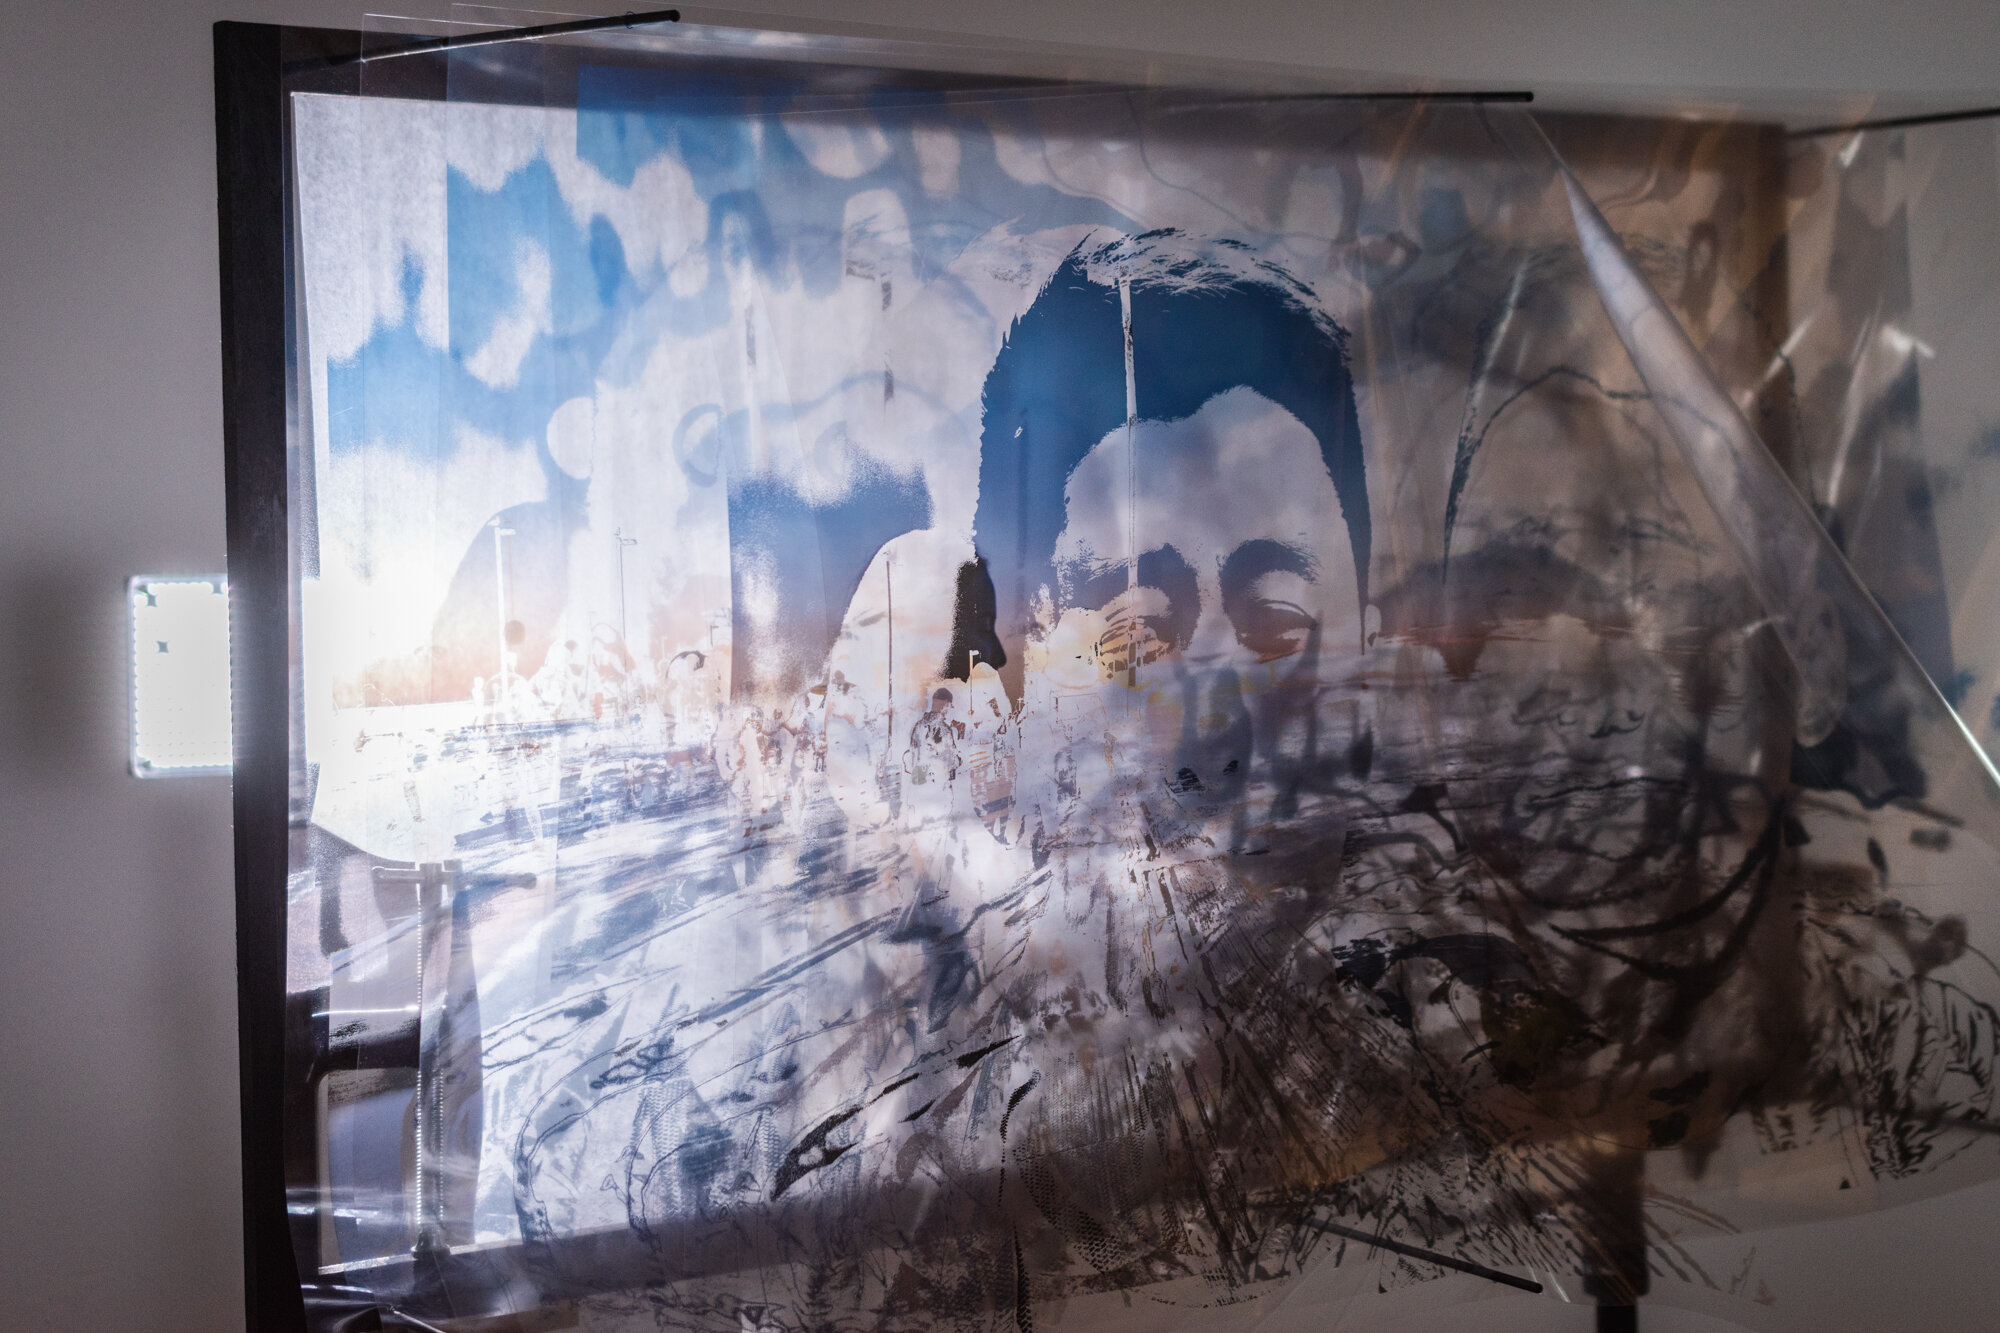
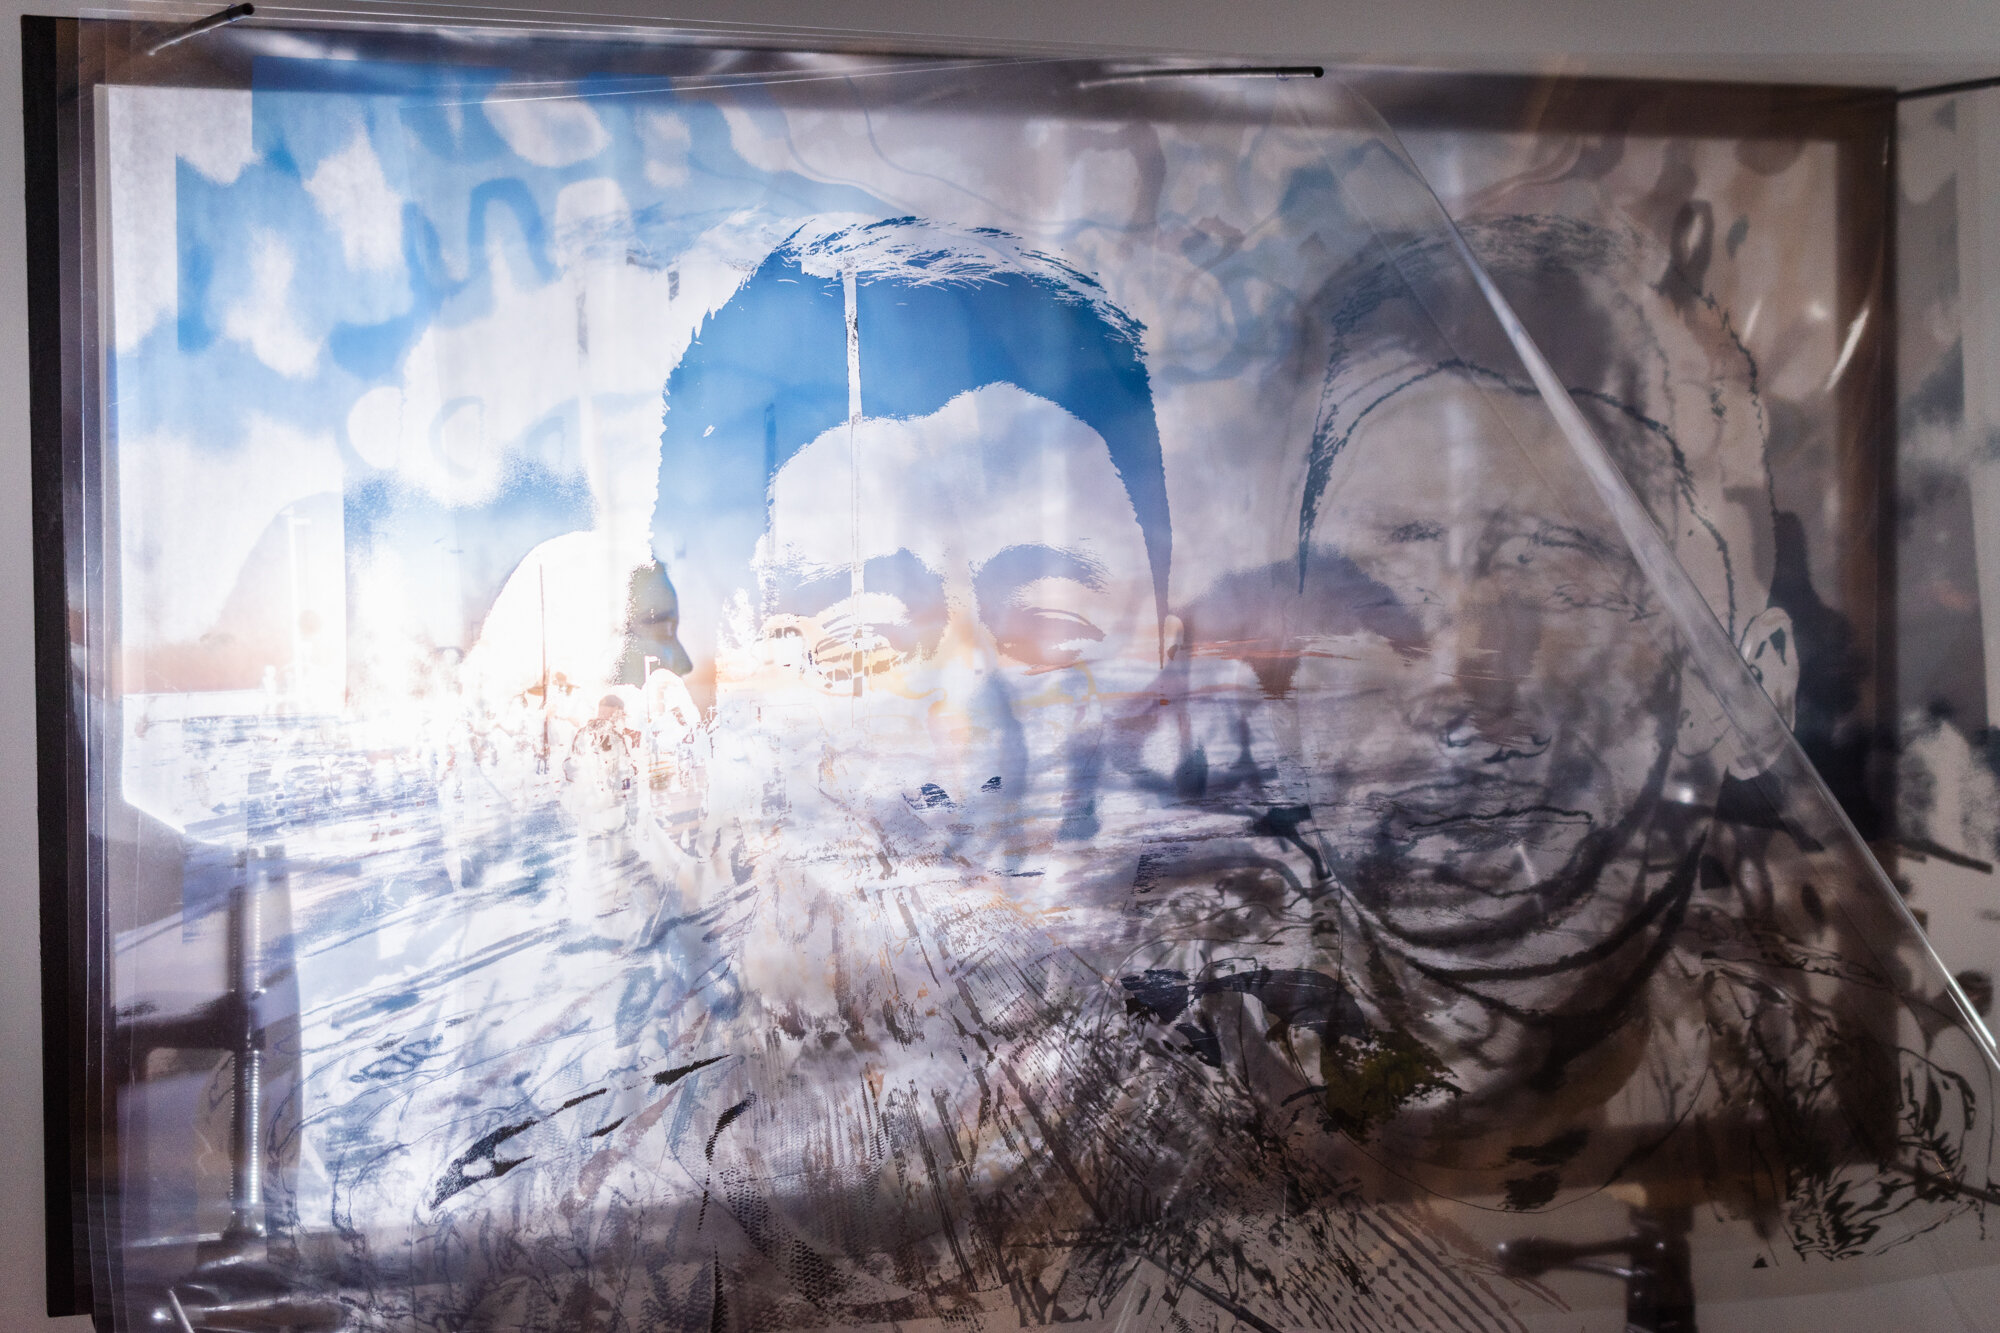
I knew that because of the material I was working with, warping, bending, and other imperfections were inevitable. And I embraced them. I think they added to the effect that the prints would never line up to recreate a perfect image. I enjoyed the thought of people trying to line the images up only to fail. The fragility of the piece meant there was constant movement of the piece, which brought back the temporal aspect I thought was missing.

installation
The original layout of the show was very different. I planned to have all of the pieces of the show in the central room of Lucas Gallery. It was only when I started placing works down that I realized that there would be no breathing room, no room to really observe each work.
With the prints all assembled on their frames, there was the daunting challenge of putting them up and lighting them. The original plan was to hang them up all the same way, but I wanted to explore the idea of using photographic tools in ways I shouldn’t be, which led me to making these janky contraptions. For Ben, I drilled some wood to screw onto tripods, which then I could use as a platform to clamp the frame to the tripod. For Jessica, I clamped the frames to two light stands, putting sandbags so they won’t tip over (which did happen and broke the frame once already gasp). For Sanna, I hung the frame from a C-stand and used a bag full of lighting equipment as a counterbalance. For Audrey, I hung the frame from a ceiling using galvanized wire, and kept the frame from tilting by placing a tripod behind the frame. LED light panels were placed behind the images to light them. To diffuse the light, I either used an actual diffuser or taped some parchment paper to the back of the frames. Overall, I like the DIY aesthetic this method of installation had.


Promotional Poster
Gnarly messed up prints
acknowledgements
I’d like to thank my friends for being my willing test subjects. I’d like to thank Nick Sharpe, Orlando Murgado, and Brandon Ndife for spending so much time helping me with the physical installation of the show. I’d like to thank VIS for giving me the space to create and display my work. I’d like to thank my peers in VIS for bouncing off ideas. Finally, I’d like to thank Joe Scanlan and Timothy Szetela for guiding me the past year. This show could not have happened without any of these people.